Singularity/Chapter 2
The Following commanders contributed to this guide:
- Lv.167: HellScythe42 (Administrator)
- Lv.193: Ceia (Guest)
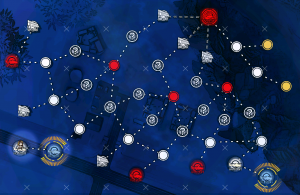
Below is the Node information for this chapter
| Node Count | 18 |
|---|---|
| Total Routes | 4 |
| Branching Nodes | 3 |
The following missions are branching nodes:
- Splinter Point (20:00) Branches into Route A and C.
- Queen's Gambit III (00:25) Branches into the final node of Route A and begins Route B.
- Promotion III (00:35) Branches into the final node of Route C and begins Route D.
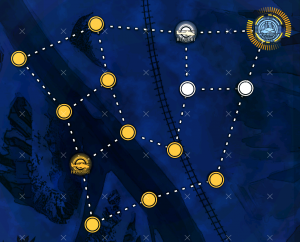
E2-1 "Splinter Point (20:00)"[edit]
| Battle Type | Night Battle |
|---|---|
| Recommended CE | 10000+ |
| Map Objectives | Base objectives:
S-Rank objectives:
|
| Clear Rewards | x1000 |
| Drop Types | T-Dolls (Set 2) |
| Limited Drops | None |
| Buffed T-dolls |
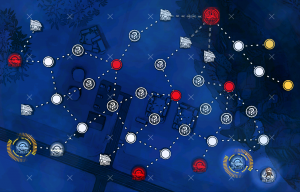
Welcome to Chapter 2, all the maps in this Chapter is based at night, please prepare your echelons accordingly.
- One echelon and one dummy echelon is needed here to secure enough movement points to finish this map on the second turn by rushing the Helipad.
- Cerynitis, or KCCO's Nemeum, have no charge up time for their cannon, do kite accordingly.
Note: This node is a branching path.
E2-A1 "Queen's Gambit I (21:20)"[edit]
| Battle Type | Night Battle |
|---|---|
| Recommended CE | 11000+ |
| Map Objectives | Base objectives:
S-Rank objectives:
|
| Clear Rewards | x30 |
| Drop Types | T-Dolls (Set 1) |
| Limited Drops | None |
| Buffed T-dolls | None
|
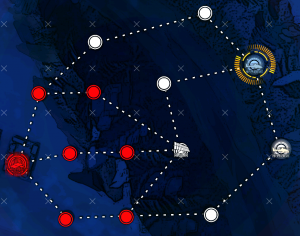
A straight forward map, with a twist, a Typhon awaits you at the enemy HQ.
- One echelon is enough for this mission.
- There are Cerynitis in a fixed patrol route around the enemy HQ, you may wait for them to pass before moving into the enemy HQ.
- There is 1 Typhon waiting for you in the enemy HQ, it only fires in a straight line, move your dolls out of its firing angle to secure an easy victory.
E2-A2 "Queen's Gambit II (22:50)"[edit]
| Battle Type | Night Battle |
|---|---|
| Recommended CE | 12000+ |
| Map Objectives | Base objectives:
S-Rank objectives:
|
| Clear Rewards | x200 |
| Drop Types | T-Dolls (Set 2) |
| Limited Drops | None |
| Buffed T-dolls | None
|
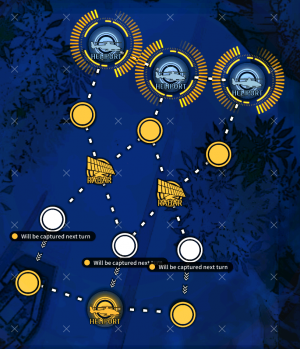
Another straight forward map, the map is pretty linear.
- This map is also the recommended map to farm crates on: it takes 1 turn to clear it with 10 crates per map clear.
- One echelon is enough for this mission, you don't need to utilize all 3 heliports.
- Move straight to the enemy heliport to capture and clear the map.
E2-A3 "Queen's Gambit III (00:25)"[edit]
| Battle Type | Night Battle |
|---|---|
| Recommended CE | 13000+ |
| Map Objectives | Base objectives:
S-Rank objectives:
|
| Clear Rewards | x200 |
| Drop Types | T-Dolls (Set 2) |
| Limited Drops | CN Server:
EN Server: |
| Buffed T-dolls | None
|
Map 3 of Route A, which is a branching route between Route A Map 4 and Route B. This features a supply line mission, which requires a specific way to clear it.
- Only 1 echelon is allowed to be deployed in this map.
- Due to the above rule, you are needed to capture node by node on the way to the supply point.
- Certain enemies do not move here, don't worry about running out of supplies.
Drop Locations: The following units can potentially drop the limited dolls for this map
Note: This node is a branching path.
E2-A4 "Queen's Gambit IV (00:30)"[edit]
| Battle Type | Night Battle |
|---|---|
| Recommended CE | 15000+ |
| Map Objectives | Base objectives:
S-Rank objectives:
|
| Clear Rewards | x150 |
| Drop Types | T-Dolls (Set 2) |
| Limited Drops | All Servers:
CN Server: EN Server:
|
| Buffed T-dolls | None
|
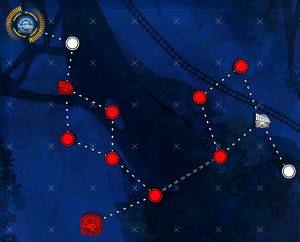
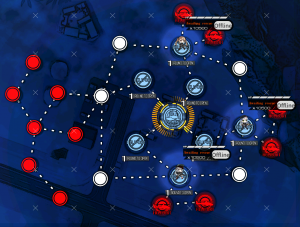
The last map of Route A, which is another supply line mission. Enemies here are all armored, please adapt accordingly.
- Only 2 echelons are allowed to be deployed in this map, and you want both of them.
- The red Heliport close to your Command Post can spawn enemies, cap it quickly to prevent enemies from going through your backdoor.
- Enemies will come from 3 directions, the KCCO Heliport in the North, from the Red Radar east of your supply point, and from the Yellow Radar in the south.
Drop Locations: The following units can potentially drop the limited dolls for this map
E2-B1 "Castling I (22:30)"[edit]
| Battle Type | Night Battle |
|---|---|
| Recommended CE | 13500+ |
| Map Objectives | Base objectives:
S-Rank objectives:
|
| Clear Rewards | x10 |
| Drop Types | T-Dolls (Set 1) |
| Limited Drops | CN Server:
EN Server:
|
| Buffed T-dolls |
First map of Route B, it is pretty straight forward.
- You may either use 1 or 2 echelons in this map, the 1 echelon method requires a specific routing.
- There are Jaeger in the north-eastern paths, and Scout on the south-eastern paths, pick your poison.
- Keep in mind that all enemies here are un-armored, build your echelons accordingly and you should be fine.
Drop Locations: The following units can potentially drop the limited dolls for this map
E2-B2 "Castling II (00:05)"[edit]
| Battle Type | Night Battle |
|---|---|
| Recommended CE | 14000+ |
| Map Objectives | Base objectives:
S-Rank objectives:
|
| Clear Rewards | x200 |
| Drop Types | T-Dolls (Set 1) |
| Limited Drops | All Servers: |
| Buffed T-dolls |
The second map of Route B, you'll see this map a couple more times in Singularity, with different settings.
- 1 echelon is enough to complete this mission.
- When your echelon touches the western Radar, it will activate an NPC echelon on the east side, use it to lure Gager out of the way.
- You may watch the NPC echelon die to Gager or retreat them when they lured her to the east side. Gager is unable to move back due to the one directional path.
- After Gager is lured away, move your echelon to the enemy HQ to secure the victory.
Drop Locations: The following units can potentially drop the limited dolls for this map
E2-B3 "Castling III (02:14)"[edit]
| Battle Type | Night Battle |
|---|---|
| Recommended CE | 15000+ |
| Map Objectives | Base objectives:
S-Rank objectives:
|
| Clear Rewards | x150 |
| Drop Types | T-Dolls (Set 1) |
| Limited Drops | CN Server:
EN Server:
|
| Buffed T-dolls |
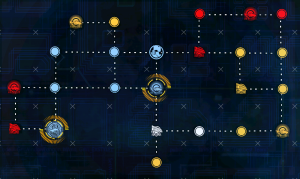
A standard Search & Destroy mission, but 2 of the enemy locations are random.
- 2 to 3 echelons are needed to cover enough ground before the turn limit runs out.
- Capture more Heliports to gain more movement points to cover more ground.
- Capture Radars to gain vision to see where the remaining enemies are.
- You can guess where the enemies are by looking which nodes are red from enemy captures, or when enemy captures a node.
Drop Locations: The following units can potentially drop the limited dolls for this map
Note: This node is a branching path.
E2-B4 "Castling IV (03:15)"[edit]
| Battle Type | Night Battle |
|---|---|
| Recommended CE | 16000+ |
| Map Objectives | Base objectives:
S-Rank objectives:
|
| Clear Rewards | MG HK21HK21HK21 (Original) x5 (Campaign Reward) |
| Drop Types | T-Dolls (Set 1) |
| Limited Drops | All Servers:
CN Server: EN Server: |
| Buffed T-dolls |
The last map of route B, this map can look intimidating at first, but there's a gimmick to this map.
- There is a 3 echelon limit in this map.
- You may use the support echelon of Task Force 404 to clear out the Goliath+ in the way as they're strong enough to do so.
- After clearing said Goliath+ out, you may use your echelon on the east side to move to the Radar on the path you just cleared out.
- The radar on the top-right side allows you to control a small group of Cyclops
- Use that group of Cyclops to secure the enemy HQ (by clicking on it and select "Capture HQ"), after luring Gager out of the way with your own echelon.
Drop Locations: The following units can potentially drop the limited dolls for this map
- 42558 CE Gager
Note: This node is a DEAD END.
E2-C1 "Promotion I (20:10)"[edit]
| Battle Type | Night Battle |
|---|---|
| Recommended CE | 11500+ |
| Map Objectives | Base objectives:
S-Rank objectives:
|
| Clear Rewards | x200 |
| Drop Types | Equipment |
| Limited Drops | None |
| Buffed T-dolls |
Map 1 of Route C, there is a hidden achievement in this map, can you figure it out?
- 2 echelons is recommended here due to the turn timer.
- Some enemies do not move, please keep that in mind when you're running the map.
E2-C2 "Promotion II (21:50)"[edit]
| Battle Type | Night Battle |
|---|---|
| Recommended CE | 13000+ |
| Map Objectives | Base objectives:
S-Rank objectives:
|
| Clear Rewards | x10 |
| Drop Types | Equipment |
| Limited Drops | None |
| Buffed T-dolls |
Map 2 of Route C, this map have Goliath+ blocking 2 of 3 routes to the enemy HQ.
- This map can be done with 1 combat echelon and 1 dummy echelon.
- After defending your Heliport, you may take the backdoor (North side) towards the enemy HQ.
E2-C3 "Promotion III (00:30)"[edit]
| Battle Type | Night Battle |
|---|---|
| Recommended CE | 14000+ |
| Map Objectives | Base objectives:
S-Rank objectives:
|
| Clear Rewards | x200 |
| Drop Types | Equipment |
| Limited Drops | None |
| Buffed T-dolls |
Map 3 of Route C, this map is pretty simple, since you can rescue all hostages on turn 1. However there is a hidden achievement here, can you figure it out?
- As mentioned, use 1 echelon to rescue all hostages on turn 1.
- Remember to use switch with the hostages as needed.
- This is one of the maps recommended to farm crates on, since you can finish the daily farming in less than 10 minutes.
Note: This node is a branching path.
E2-C4 "Promotion IV (03:15)"[edit]
| Battle Type | Night Battle |
|---|---|
| Recommended CE | 16000+ |
| Map Objectives | Base objectives:
S-Rank objectives:
|
| Clear Rewards | Furniture: Chess Board (Original) x100 (Campaign Reward) |
| Drop Types | Equipment |
| Limited Drops | EOT XPS3 |
| Buffed T-dolls |
Final map of Route C, similar to Route B's final map, you may cheese this map with a small group of Cyclops
- There is a 3 echelon limit on this map.
- You will need to use an echelon as bait to lure out the Goliath+ out of position for your main echelon to sneak in.
- Use the top right side radar to gain control of a small group of Cyclops , lure out Gager with the echelon on the radar.
- Keep your allied Cyclops on standby until Gager is out of the way.
- Sneak in the Cyclops after Gager is out of the way by switching its stance to "Capture HQ".
Note: This node is a DEAD END.
E2-D1 "Minor Pieces Draw I (22:10)"[edit]
| Battle Type | Night Battle |
|---|---|
| Recommended CE | 14000+ |
| Map Objectives | Base objectives:
S-Rank objectives:
|
| Clear Rewards | x100 |
| Drop Types | Equipment |
| Limited Drops | None |
| Buffed T-dolls |
Welcome to Route D, this route is going to be challenging to a lot of Commanders, good luck.
- This map requires 1 combat and 1 dummy echelon.
- Deploy your combat echelon on the bottom right and the combat echelon on the top left.
- Use support echelon of Task Force DEFY to clear out the way for you towards the supply point.
- Meanwhile, use your combat echelon to lure out Gager so NPC DEFY can do the work safely.
- Once Gager is out of the way (She cannot go back due to the 1 directional path), have Team DEFY secure the supply line.
E2-D2 "Minor Pieces Draw II (00:00)"[edit]
| Battle Type | Night Battle |
|---|---|
| Recommended CE | 15000+ |
| Map Objectives | Base objectives:
S-Rank objectives:
|
| Clear Rewards | x150 |
| Drop Types | Equipment |
| Limited Drops | None |
| Buffed T-dolls | None
|
A dangerous supply line mission with landmines everywhere on the map, almost every random event node on the map is an ambush so you need to be adequately prepared to engage any type of group. But not to worry, Goliath+ units wont ruin your night.
- There is a 3 echelon limit in this map, using 1 combat and 2 dummy echelons is possible, but deploying more combat echelons will help out more.
- Deploy all 3 echelons and capture the helipad next to you.
- The Tank will move towards whichever direction where more echelons are/the closest echelon, you may reset the map until the Tank doesn't move south on turn 2.
- Place an echelon on the opposite side of the radar relative to the tank.
- Move the bottom echelon towards the helipad on the bottom right to cap it to get additional movement points.
- Cap the supply node after to secure that portion of the map. Continue luring the tank away with 1 echelon while the other start forming a supply line on one of the corners of the map.
- Keep the tank occupied with 1 echelon and finish capping 2 corners of the map.
- If required, you may put an echelon right beside the tank to force it to move towards the direction you desire.
- This map tests your game mechanics to the extreme, RNG is not involved here.
E2-D3 "Minor Pieces Draw III (00:30)"[edit]
| Battle Type | Night Battle |
|---|---|
| Recommended CE | 16000+ |
| Map Objectives | Base objectives:
S-Rank objectives:
|
| Clear Rewards | x100 (Original) x5 (Campaign) |
| Drop Types | Equipment |
| Limited Drops | EOT XPS3 |
| Buffed T-dolls | None
|
Unlike the previous map, this map is a walk in the park. Let's review.
- This map can be cleared with 1 combat echelon and 1 dummy echelon.
- Make use of swapping then rescuing hostages to the fullest effect here, you may rescue the first hostage with this method easily.
- Move north east to engage the Jaeger that is staring down at the 4800 CE hostage menacingly, then swap and rescue her as well.
- Go north to surround cap the heliport and deploy your dummy echelon there to facilitate easy swap-evacuation.
- Rescue the rest of the hostages by swapping, rescuing, and evacuating them.
Drop Locations: The following units can potentially drop the limited equipment for this map
E2-D4 "Minor Pieces Draw III (01:50)" "[edit]
| Battle Type | Night Battle |
|---|---|
| Recommended CE | 18000+ |
| Map Objectives | Base objectives:
S-Rank objectives:
|
| Clear Rewards | ID Card: Coercion (Original) x200 |
| Drop Types | Equipment |
| Limited Drops | EOT XPS3 |
| Buffed T-dolls | None
|
The last map of the chapter, and one of the roadblocks faced by underequipped players.
- 2 combat echelons are recommended for this map. 1 to engage Agent, the other to stay at home to defend.
- Go north of your HQ and make your way using the north route to Agent, she is waiting in the enemy HQ.
- Use strong ARs such as the AR team, DEFY team, AR G11G11G11, Night ARs like AR 9A-919A-919A-91and AR OTs-14OTs-14OTs-14 to combat her.
- Use SMGs that have evasion based skills such as SMG SuomiSuomiSuomi, SMG MP7MP7MP7, SMG C-MSC-MSC-MS, SMG DorothyDorothyDorothy, SMG RO635RO635RO635 if you have them.
- At 25% HP, Agent will put up a shield, you are required to take down the shield before she unleashes a devastating AoE attack that takes all dolls down to critical damage.
Drop Locations: The following units can potentially drop the limited equipment for this map
- 71395 CE Agent
E2-H "Survivor"[edit]
| Battle Type | Night Battle |
|---|---|
| Recommended CE | 20000+ |
| Map Objectives | Base objectives:
S-Rank objectives:
|
| Clear Rewards | SMG Honey BadgerHoney BadgerHoney Badger (Original) x200 (Campaign) |
| Drop Types | T-Dolls (Set 2) |
| Limited Drops | All Servers:
CN Server: EN Server:
|
| Buffed T-dolls | None
|
The hidden map of Chapter 2, the requirements to unlock this map is listed below.
- You can deploy as many echelons as possible, though 3 of them is all you need.
- The Typhon units in this map follow a fixed patrol path, and will not steer off the patrol path to engage you. Keep the patrol paths in mind while clearing this map.
- There are certain spots in the map where you can stop safely.
- Try to cap the helipad on the bottom left to resupply and get more movement points.
- You are able to sprint from the top left to the top right in 1 turn.
- Cap the heliport on the top right as soon as you reach it, so you can deploy a dummy echelon for the next strategy.
- You can bait Agent to kill the Typhon in the way with a dummy echelon, you need a perfect positioning for on the dummy echelon for it.
- After Agent eliminates the Typhon , you can eliminate Agent with your main echelon.
- You may try to take down Agent as many times as possible, make sure you have a dummy echelon on the heliport on the top right to facilitate that.
- Agent in this map is as strong as the one faced in Hornets Nest. Proceed with caution and do not hesitate.
- Once Agent is taken out, wait for the Typhon to pass on the bottom right and wait for a 2 turn window to secure the supply line and clear the map.
Drop Locations: The following units can potentially drop the limited dolls for this map
Note: This node is hidden by default and has a requirement to unlock it. You're tasked to do the following in order to unlock this map:


