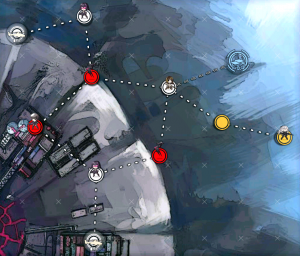
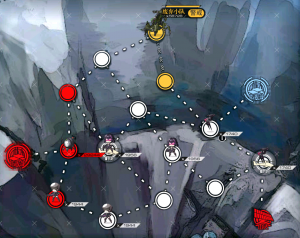
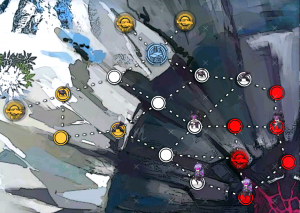
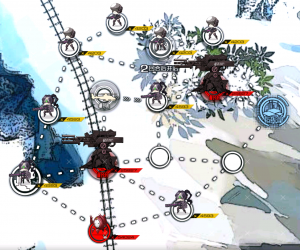
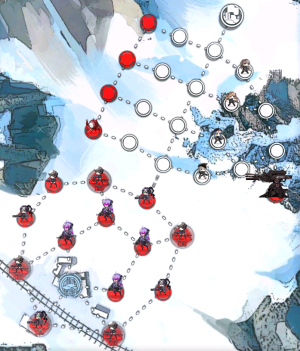
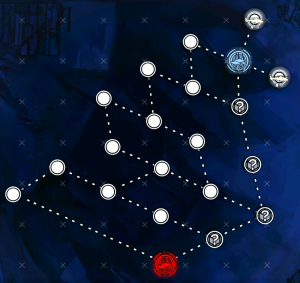
Singularity/Chapter 1
Every story has a beginning, and this event is no different.
Now, let us begin.
The Following commanders contributed to this guide:
- Lv.167: HellScythe42 (Administrator)
Below is the Node information for this chapter
| Node Count | 16 |
|---|---|
| Total Routes | 3 |
| Branching Nodes | 2 |
The following missions are branching nodes:
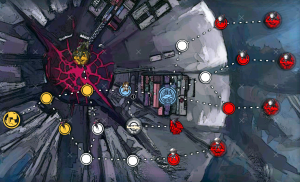
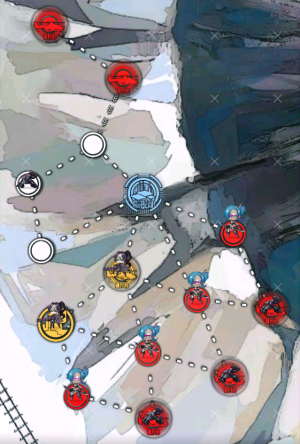
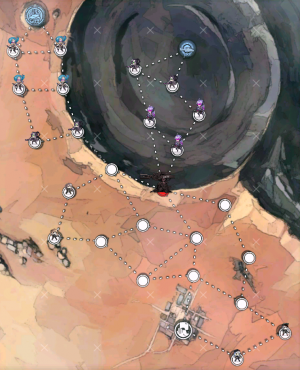
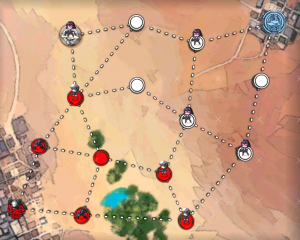
- Splinter Point (16:40) Branches into Route A and B.
- Compression Initiates III (18:20) Branches into the final node of Route B and begins Route C.
E1-1 "Starting Point (16:00)"[edit]
| Battle Type | Day Battle |
|---|---|
| Recommended CE | 1500+ |
| Map Objectives | Base objectives:
S-Rank objectives:
|
| Clear Rewards | x500 |
| Drop Types | T-Dolls (Set 1) |
| Limited Drops | None |
| Buffed T-dolls | Task Force DEFY:
|
Very straightforward, no guide is really necessary for this map, just stick to your objectives and you'll be fine.
- One echelon is all you need for this and the map can be cleared in 2 turns. Just move your echelon to the node in front of the enemy HQ and you'll clear the map via encirclement.
- Enemies are stationary, so dont worry about them trying to secure your HQ.
E1-2 "Splinter Point (16:40)"[edit]
| Battle Type | Day Battle |
|---|---|
| Recommended CE | 2500+ |
| Map Objectives | Base objectives:
S-Rank objectives:
|
| Clear Rewards | x20 |
| Drop Types | T-Dolls (Set 2) |
| Limited Drops | None |
| Buffed T-dolls | Task Force DEFY:
|
A Search and Rescue op, much like the first map, this shouldn't pose to much trouble.
- Once you exit your HQ, your path to it is blocked, you'll be required to extract the hostage via an nearby LZ.
- A friendly support echelon consisting of AR AK-12AK-12AK-12 is nearby, you will need to use her to defeat nearby SF that might end up encircling your HQ.
Note: This node is a branching path, Proceeding to the left will lead to Route A (Stroke Dead-Center) whereas the right will lead to Route B (Compression Initiates) and eventually Route C (Re-Ignition). You will not be able to access Route C unless you've completed both Route A and B.
E1-A1 "Stroke Dead-Center I (16:55)"[edit]
| Battle Type | Day Battle |
|---|---|
| Recommended CE | 4000+ |
| Map Objectives | Base objectives:
S-Rank objectives:
|
| Clear Rewards | x100 |
| Drop Types | T-Dolls (Set 1) |
| Limited Drops | CN Server:
EN Server: |
| Buffed T-dolls |
The first map in Route A, and you might be intimidated at first glance, but dont panic there is a trick to this map.
- Your Primary Objective is to secure the enemy HQ, relatively simple however there is a Hydra present on the map whose also trying to secure the enemy HQ, you dont want this.
- To make this map easier, you may wish to "hack" the Hydra unit via capturing the Radar present on the map. This'll cause the Hydra unit to turn into a friendly Support echelon and you'll be able to give orders to it, You can do 2 things with this knowledge, you can use the Hydra to defeat some enemies on the way, or you could tell it to stay put and stay out of your way of your echelons while you focus on the objective.
- The enemy Goliath present in front of the enemy HQ has an alert radius of 2 tiles, use this knowledge as a means to lure it out of the way if you dont wish to engage it. You can still engage it if you're confident with your echelons strength, but use your own judgement for this. Note should you destroy this Golyat, the Hydra unit will turn back neutral and will start hunting you.
- A Single echelon is all thats needed here and the map can be cleared in 3 turns. Start by capturing the LZ below our HQ, then on the next turn capture the enemy LZ and then on the next turn you'll be able to cap the enemy HQ.
Drop Locations: The following units can potentially drop the limited doll for this map
E1-A2 "Stroke Dead-Center II (17:42)"[edit]
| Battle Type | Day Battle |
|---|---|
| Recommended CE | 5000+ |
| Map Objectives | Base objectives:
S-Rank objectives:
|
| Clear Rewards | x50 |
| Drop Types | T-Dolls (Set 2) |
| Limited Drops | All Servers:
CN Server: EN Server:
|
| Buffed T-dolls |
Its Search and destroy, find and destroy all enemy units, simple.
- 1 ~ 2 Echelons is more then enough to clear this map, bring more if you wish to hasten the process. Though if running a single echelon, you'll be required to use a very specific path.
- Take caution of enemy Jaguar units.
Drop Locations: The following units can potentially drop the limited dolls for this map
E1-A3 "Stroke Dead-Center III (18:20)"[edit]
| Battle Type | Day Battle |
|---|---|
| Recommended CE | 6500+ |
| Map Objectives | Base objectives:
S-Rank objectives:
|
| Clear Rewards | x100 |
| Drop Types | T-Dolls (Set 1) |
| Limited Drops | All Servers:
CN Server: EN Server:
|
| Buffed T-dolls |
A Simple Supply line mission this time, however our supply lines are blocked by a pair of Jupiter Cannon's and a Goliath+ so this might take a while.
- 3 Echelons should be more then enough to clear this map. The enemies are stationary on the first turn, so make the first turn to spawn 2 of your echelons and then your 3rd on the next turn.
- The Goliath+ which is placed on the lowermost path, is Stationary! So ignore it like the annoying unit it is. Dont engage it either unless you have a death wish.
- You dont necessarily need to destroy both the Jupiter Cannon's to complete the mission. You can just ignore the Jupiters entirely and focus on securing the supply line and maintaining it for 2 turns.
- While its certainly possible to destroy the Jupiters without needing to encircle them, its NOT RECOMMENDED! the damages and repair costs would be far too great. Play it safe and encircle them if you wish to destroy them and get them out of your way.
Drop Locations: The following units can potentially drop the limited dolls for this map
- 25827 CE Jupiter Cannon
- 4593 CE Jaeger
E1-A4 "Stroke Dead-Center IV (19:30)"[edit]
| Battle Type | Day Battle |
|---|---|
| Recommended CE | 8000+ |
| Map Objectives | Base objectives:
S-Rank objectives:
|
| Clear Rewards | Player ID: "Reunion" (Original) x20 (Campaign) |
| Drop Types | T-Dolls (Set 2) |
| Limited Drops | All Servers:
CN Server: EN Server: |
| Buffed T-dolls |
The final node in Route A, so lets not waste time, this map is rather time consuming and you'll need to have some patience to win it.
- You are limited to only a single echelon, preferably you'll wanna use an ARSMG echelon as the boss of this map doesn't favour RFHG echelons and battles differently then you'd expect.
- The LZ on the left side of the boss will spawn enemies every passing turn, so you should pay attention to the enemies that come from there so that they dont encircle our HQ.
- The rest of Task Force DEFY is present on this map on the other side, you'll need to give orders to these girls and navigate them so that they encircle the Jupiter Cannon in the middle. This'll be very time consuming as you'll need to end your turns in order for them to move, so make the most of your action points from your end of the map. Dont worry about them falling they can handle themselves.
- When you start the round, you may want to set either one of the members of DEFY to standby so that when you end your first turn as you'll secure all the LZ's on their side. This'll give you the most action points to capitalise on. You may also want to set them to Standby when they've moved themselves next to the Jupiter Cannon so that they dont get themselves killed by it.
- Executioner EX doesn't fight like she would usually, this version of Executioner has her fight from a distance and not advance, as she takes damage and gets around to 75%, 50% and 25% she'll activate her skill which damages all units occupying tiles 1, 4, 5, 6 and 7 repeatedly, To avoid taking the brunt of this skill, you may wish to move your girls to occupy tiles 2, 3, 8 and 9 while retreating your last member.
- To commanders who've obtained a Parachute Fairy from HEC and have already skill trained it to SL10, you can airdrop to one of the enemy LZ's next to the boss and 1 turn the map. If your echelon can handle the penalty from the Fairies skill.
Drop Locations: The following units can potentially drop the limited dolls for this map
- 10821 CE Executioner EX
- 55004 CE Jupiter Cannon
Note: This node is a DEAD END. In order to proceed to another route, you'll be required to backtrack to the beginning of this chapter and navigate your way back to the branching nodes.
E1-B1 "Compression Initiates I (16:46)"[edit]
| Battle Type | Day Battle |
|---|---|
| Recommended CE | 4000+ |
| Map Objectives | Base objectives:
S-Rank objectives:
|
| Clear Rewards | x100 |
| Drop Types | T-Dolls (Set 1) |
| Limited Drops | None |
| Buffed T-dolls | Task Force DEFY:
|
First node of Route B brings us a supply line mission with a gimick to it.
- Our heroine AR M4A1M4A1M4A1 is here with us, but not in fighting shape, she will not last a single battle, so may wanna use her to swap your echelons positions and keep her out of harms way.
- Many Goliath's are off to the right side of our HQ and will gradually advance to it, you'll need to watch out for them.
- An enemy Hydra is present on the map, however we can hack it, below our HQ is a Radar, you'll want to swap your echelons positions with M4 and step on that Radar immediately, this'll cause the Hydra to swap to our side, and we'll be able to capitalise on this, once its on your side, you'll wanna set it to search and destroy for 1 turn. The following turn, set it to stationary and play a swapping game with your echelons, M4 and the Hydra so that the Hydra is sitting safely on our HQ, this'll keep the Golyats away while you focus on the main objective of this map.
- On Turn 2, you'll wanna spawn another echelon on that LZ you captured and swap your positions with M4 so that M4 is sitting on that LZ, and the Hydra is sitting on our HQ. The rest of the map should be easy enough to deal with.
E1-B2 "Compression Initiates II (17:50)"[edit]
| Battle Type | Day Battle |
|---|---|
| Recommended CE | 5000+ |
| Map Objectives | Base objectives:
S-Rank objectives:
|
| Clear Rewards | x100 |
| Drop Types | T-Dolls (Set 2) |
| Limited Drops | None |
| Buffed T-dolls | Task Force DEFY:
|
Node 2 of Route B is a Search and Destroy map, deal with all the enemies on the map and you'll win, thats all, shouldn't pose to much trouble.
- There are 2 empty LZ's present on the map, you may wish to secure them asap so that you can get the most action points. 2 ~ 3 Echelons should be all you need here, preferably ARSMG as you'll need to deal with a Jupiter Cannon to clear the map.
- On turn 1, the enemies are stationary. Use this to position your girls accordingly, or to capture the LZ's.
- The Jupiter Cannon is heavily guarded by Dragoon's and encircling it will take a few turns. Echelons with high burst are preferable in dealing with Dragoons.
E1-B3 "Compression Initiates III (18:20)"[edit]
| Battle Type | Day Battle |
|---|---|
| Recommended CE | 6500+ |
| Map Objectives | Base objectives:
S-Rank objectives:
|
| Clear Rewards | x200 |
| Drop Types | T-Dolls (Set 1) |
| Limited Drops | CN Server:
EN Server:
|
| Buffed T-dolls | Task Force DEFY:
|
Node 3 of Route B, brings about another supply line mission, though this one in particular is rather simple.
- 3 Echelons is all you need, after placing both your echelons in turn 1 on your 2nd turn, spawn your third and establish the supply line and just hold it to victory.
- Be warry of enemy Jaguar's as they're escorted by Dragoon's and are rather tanky, if you're unable to kill them quickly the Jaguars might end up launching their mortars at your girls and damaging them very badly.
Drop Locations: The following units can potentially drop the limited dolls for this map
- 5188 CE Jaguar
Note: This node is a branching path, Proceeding to the left will lead to the final node of Route B (Compression Initiates IV) whereas the right will lead to Route C (Re-Ignition). You will not be able to access Route C unless you've completed both Route A and B.
E1-B4 "Compression Initiates IV (19:30)"[edit]
| Battle Type | Day Battle |
|---|---|
| Recommended CE | 8000+ |
| Map Objectives | Base objectives:
S-Rank objectives:
|
| Clear Rewards | Furniture: "OGAS TV" (Original) x10 (Campaign) |
| Drop Types | T-Dolls (Set 2) |
| Limited Drops | All Servers:
CN Server: EN Server:
|
| Buffed T-dolls |
The final node of Route B, if you proceeded through Route A already, the map is very similar and the strategy will be roughly the same, except this time, we're on the opposite end of this map and our supporting doll is AR AN-94AN-94AN-94 instead.
- Since we're on the right side of the map, we have an echelon limit of 3, and as such, bring 4 echelons... wait...
- Since we're spawning on the right side of the map, the right enemy LZ next to the boss will spawn enemies each turn to attack us, make sure to pay attention to enemy spawns.
- As our supporting echelon is AR AN-94AN-94AN-94, she'll need to secure the node next to the Jupiter Cannon so that our girls can encircle it, alternatively as we have more echelons at our disposal, we can do it our self.
- To commanders who've obtained a Parachute Fairy from HEC and have already skill trained it to SL10, you can airdrop to one of the enemy LZ's next to the boss and 1 turn the map. If your echelon can handle the penalty from the Fairies skill.
Drop Locations: The following units can potentially drop the limited dolls for this map
- 10821 CE Executioner EX
- 55004 CE Jupiter Cannon
Note: This node is a DEAD END. In order to proceed to another route, you'll be required to backtrack to the beginning of this chapter and navigate your way back to the branching nodes.
E1-C1 "Re-Ignition I (18:30)"[edit]
| Battle Type | Day Battle |
|---|---|
| Recommended CE | 6000+ |
| Map Objectives | Base objectives:
S-Rank objectives:
|
| Clear Rewards | x10 |
| Drop Types | T-Dolls (Set 2) |
| Limited Drops | CN Server:
EN Server: |
| Buffed T-dolls |
First node of Route C and the final route of this map, has us doing a Supply Line mission with help of Task Force 404.
- 1 ~ 2 Echelons is more then enough for this map.
- Our position on the map is blocked off, we'll have to give orders to the members of 404 to encircle the Jupiter Cannon as well as establish the supply line for us. The mission is solely focused on them, so make sure to give correct orders for each turn so that they move as you expect them to.
- Make sure to resupply your echelons and make repairs if necessary.
- Our HQ is on the left side of the map, so when establishing the supply line, connect the paths to there, not the LZ on the right.
- All the enemy units on the right side of the map have a chance to drop the limited drop dolls of this map including the Jupiter Cannon. Should go without saying... bring yourself a Rescue Fairy if you're farming for drops.
Drop Locations: The following units can potentially drop the limited dolls for this map
- 4356 CE Jaeger
- 4857 CE Dragoon
- 68684 CE Jupiter Cannon
E1-C2 "Re-Ignition II (19:00)"[edit]
| Battle Type | Day Battle |
|---|---|
| Recommended CE | 7000+ |
| Map Objectives | Base objectives:
S-Rank objectives:
|
| Clear Rewards | x100 |
| Drop Types | T-Dolls (Set 1) |
| Limited Drops | All Servers:
CN Server: EN Server:
|
| Buffed T-dolls | None
|
A Node securing mission, nope, you're not capturing a HQ this time, you're after the Radar on the map.
- 1 ~ 2 Echelons should be enough for this map, its not too difficult and shouldn't be to much of a problem, you'll be able to clear it in 3 turns with certain moves.
- Use a high burst echelon to deal with the Goliath.
- Like other maps, simply landing on the Radar and ending your turn on it, will clear the map. You dont have to do something complicated and Encircle it.
Drop Locations: The following units can potentially drop the limited dolls for this map
E1-C3 "Re-Ignition III (19:10)"[edit]
| Battle Type | Day Battle |
|---|---|
| Recommended CE | 8000+ |
| Map Objectives | Base objectives:
S-Rank objectives:
|
| Clear Rewards | x50 (Original) x5 (Campaign) |
| Drop Types | T-Dolls (Set 2) |
| Limited Drops | All Servers:
CN Server: EN Server: |
| Buffed T-dolls | None
|
If players have not yet encountered or properly played through Chapter 10, this will be the first time you'll be combating KCCO units, and they're not to be underestimated with their overwhelming armour and high damaging units.
- There are 2 ways you can clear this map, 1 is by encircling the enemy HQ at the end, or by using a bomb defusal echelon, which consists of a Force Shield using doll and 2 smoke grenades all occupying tiles 1, 4 and 7 in the back.
- As the enemies we're going up against, possess incredibly high amounts of armour, RF are a must in dealing with them.
- Enemy Cyclops's posses an AP grenade skill which can devesate your girls, so be warry when dealing with both versions of the Cyclops's, their AR versions which you'll encounter a lot, and their SG versions.
- If using the bomb defusing method, it should be noted, that if you destroy a Goliath+, the patrolling KCCO units around that Golyat will also die.
- If you have an echelon that has incredibly high burst DPS, you can outright kill the Golyats present on the map, as they only have 1 of them present in battle, you wont have to worry about escorts in the battle.
- The alternate way to clearing this map is to play it safe and be mindful of your echelons supply and encircle the enemy HQ at the end.
- The KCCO units follow a patrol path around the Golyat's, however they do possess an alert radius of 1 tile, so they might divert off their path to attack nearby units, take caution when placing your girls near them.
Drop Locations: The following units can potentially drop the limited dolls for this map
- 6369 CE Cerynitis
- 11667 CE Aegis (KCCO)
E1-C4 "Re-Ignition IV (19:30)"[edit]
| Battle Type | Day Battle |
|---|---|
| Recommended CE | 6000+ |
| Map Objectives | Base objectives:
S-Rank objectives:
|
| Clear Rewards | AR CZ2000CZ2000CZ2000 (Original) x5 (Campaign) |
| Drop Types | T-Dolls (Set 2) |
| Limited Drops | All Servers:
CN Server: EN Server:
|
| Buffed T-dolls |
The final node of Route C and for this chapter as a whole, With the help of Task Force 404, you'll need to establish a supply line in order to complete this map.
- Task Force 404 is at the top of the map and they'll be required to establish the supply line while you handle the area below, however you need to be very careful with the orders you give them. On the opposite side of 404 is a patrolling Goliath+, He wont be harming anybody but will be acting as more of an indicator to change 404's orders. When the Goliath is closest to one of 404's members (2 Tiles away) set that respective member to "Search and Destroy" so that when you end your turn, they'll move 1 tile closer to the goliath and extract themselves afterwards. Set everyone else to standby in the meantime, otherwise they'll move closer to the Jupiter Cannon instead, completely botching the mission. SO PAY ATTENTION and dont end your turn prematurely.
- Our side on the other hand... Is heavily swarmed with SF units and every formation present is pretty strong, you'll want high burst and high DPS echelons, maybe even an MGSG echelon if you have one made already. While 404 is busy trying to establish the supply line, you'll wanna slowly make your way to the one-way path and connect the supply line. As for echelons, you'll wanna bring at least 3 ~ 4, more if you wanna hasten the process.
- For commanders who wish to farm a most swift SMG T-doll SMG MP7MP7MP7, this map is the most optimal map to choose in farming her. The 4 Dragoons and single Jaeger group around the HQ all have a chance to drop MP7.
Drop Locations: The following units can potentially drop the limited dolls for this map
E1-H "Hidden Messenger"[edit]
| Battle Type | Night Battle |
|---|---|
| Recommended CE | 8000+ |
| Map Objectives | Base objectives:
S-Rank objectives:
|
| Clear Rewards | x100 |
| Drop Types | T-Dolls (Set 2) |
| Limited Drops | None |
| Buffed T-dolls | None
|
A most hidden night battle map... away from plain sight, this map encourages a different strategy as this is a sneaking operation.
- A Hidden Achievement is present on this map, which is to clear it without engaging into a single battle, think you're up to it?
- You're limited to a single echelon for this map, and enemy presence is very heavy, there is most certainly, more then 5 enemy units present on the map, you will not be able to clear the map if you went guns blazing, play it safe and sneak around. Use an echelon that grants vision or utilise an Illumination Fairy.
- There is a path of 4 random event nodes present on the map leading to the HQ... these nodes have a 50% chance of being an ambush... with everyones favourite Red Goliath+ and its Manticore Escorts... You want that achievement? try your luck walking through this minefield. I cant guarantee your safety, and try not to lose your cool ja? For maximum efficiency, you may wanna bring a fodder HG, as they're the cheapest unit and you wont be needing to resupply them, you can just run repeatedly until you succeed and then never touch this map again.
Note: This node is hidden by default and has a requirement to unlock it. You're tasked to do the following in order to unlock this map:
- Defeat Executioner EX at least 5 times in either "Stroke Dead-Center IV" or "Compression Initiates IV".


