Polarized Light/Chapter 1

Every story has a beginning, and this event is no different.
Now, let us begin
Below is the node information for this chapter
| Node Count | 18 |
|---|---|
| Battle Nodes | 8 (2 EX) |
| Story Nodes | 10 |
Below is a table containing all the story nodes, their rewards, and their locations on the event map.
E1-1 "Propagation II"[edit]
| Battle Type | Day Battle |
|---|---|
| Recommended CE | 1000 |
| Map Objectives | Base objectives:
Achieve the following:
S-Rank objectives:
|
| Clear Rewards | x100 |
| Drop Types | T-Dolls (Set 1) |
| Limited Drops | None |
| Buffed T-dolls |
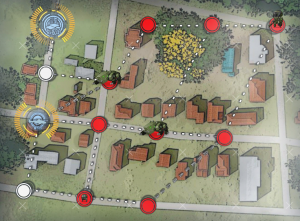
Very straightforward, no guide is really necessary for this map, just stick to your objectives and you'll be fine.
- You have an echelon limit of 2 and only 2 turns to take care of 4 units.
- There is only 1 path leading to your HQ with an Orthros standing close to it. Deal with this enemy first. Preferbly with the echelon spawned from our HQ.
- This mission introduces a new stationary enemy unit in one of the formations called the Acheron, be wary of it as it can provide HP shields to the rest of the enemies.
- Enemies have minor armour, be sure to utilize AP rounds or Armour bypassing skills such as Grenades and Charged shots. In the event you lack such, use T-Dolls that buff their own Damage.
Upon clearing this mission, your path will branch out into 2 directions. Heading north will lead to a dead end, but must be completed in order to progress.
E1-2 "Critical Angle II"[edit]
| Battle Type | Day Battle |
|---|---|
| Recommended CE | 2500 |
| Map Objectives | Base objectives:
Achieve the following:
S-Rank objectives:
|
| Clear Rewards | x200 |
| Drop Types | T-Dolls (Set 2) |
| Limited Drops | None |
| Buffed T-dolls |
If you picked the upper path from the branching node, this map will be the first battle node of the path and is somewhat deceptive initially due to its map clear requirements, but there is a gimick involved.
- Doesn't matter which path you take, there is going to be at most 4 enemies in the way, which'll result in your objectives changing from "Kill no more then 3" to "Destroy all enemy units".
- There are 3 enemy units which are indicated differently compared to the rest, once you've figured out the gimick of the map, these 3 units will die allowing you to fulfill the objective as intended.
- You're limited to 3 echelons max, so 3 echelons are required to clear this map.
- Hey now, theres 3 random event nodes... why though? will something happen if you step on all 3? The top path has 2 enemies leading to one... maybe that'll be a good first pick?
- The enemies are STATIONARY! So dont expect them to move or attack you.
E1-3 "Reflector II"[edit]
| Battle Type | Day Battle |
|---|---|
| Recommended CE | 2600 |
| Map Objectives | Base objectives:
Achieve the following:
S-Rank objectives:
|
| Clear Rewards | x200 |
| Drop Types | T-Dolls (Set 2) |
| Limited Drops | All Servers:
CN Server: |
| Buffed T-dolls |
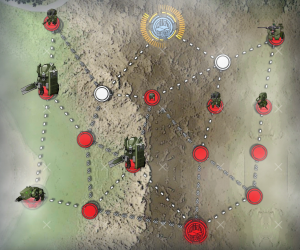
If you picked the lower path from the branching node, this map will be the first battle node of the path. This map is riddled with one-way paths and introduces a new enemy high HP unit known as a Kratos.
- You're limited to 2 Echelons. One should defend your HQ while you move the other to complete the map. As action points will be limited due to only using 2 echelons, make the most of every move you do.
- The enemies are stationary, so no need to worry about them advancing into your girls.
- Enemy Kratos units are in the way and are incredibly durable, although they do not do much damage, underprepared echelons may be surprised by their sheer amount of HP. They're also a sole 1x unit in all battle instances, so Explosives are not reccommended against them.
- In order to reach the HQ, you'll need to use the one-way path to the left of our HQ, there are 4 enemies on the way as well so you'll be able to clear the S-Rank objective in the process if you which to farm this map for limited drops.
Drop Locations: The following units can potentially drop the limited dolls for this map
- 1356 CE Aegis (KCCO)
- 1256 CE Kratos
E1-4 "Reflector III"[edit]
| Battle Type | Day Battle |
|---|---|
| Recommended CE | 2800 |
| Map Objectives | Base objectives:
Achieve the following:
S-Rank objectives:
|
| Clear Rewards | x200 |
| Drop Types | T-Dolls (Set 1) |
| Limited Drops | All Servers:
CN Server: |
| Buffed T-dolls |
A simple search an destroy map that poses very little difficulty.
- You're restricted to 2 Echelons max for this map, so make sure you're prepared and make the most of every move.
- There is an enemy Minotauros on the far right side of the map which should be noted. This high threat unit is stationary and is not required to battle in order to complete the map and will not be despawned from the maps gimick.
- Upon stepping on the indicated LZ, all the KCCO units which are tagged differently, will despawn themselves, rendering you unable to complete the objective... technically. Once you've ended your turn, enemy Hydra units will spawn from all the unoccupied LZ's and will begin advancing towards your units. These Hydras are not particularly dangerous and can be killed with sufficient preperation.
- For combating the swift Orthros units, MG's and AR's are recommended, for Aegis (KCCO) and Hydra units, considering using high DPS RFHG echelons.
Drop Locations: The following units can potentially drop the limited dolls for this map
E1-5 "Total Internal Reflection II"[edit]
| Battle Type | Day Battle |
|---|---|
| Recommended CE | 3000 |
| Map Objectives | Base objectives:
Achieve the following:
S-Rank objectives:
|
| Clear Rewards | x10 |
| Drop Types | T-Dolls (Set 2) |
| Limited Drops | All Servers:
CN Server: |
| Buffed T-dolls |
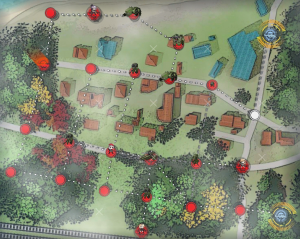
A search and rescue operation with several high theat units on the field, caution is a must for this and careful movements
- You have 8 turns to complete your objectives in this map, plan carefully.
- Many of the KCCO units in this map have patrol patterns leading to AR 9A-919A-919A-91, she'll only be able to survive 3 encounters, take note of this.
- There are 3 high threat Aegis (KCCO) units present on the map, although they might look scary... the formations consist entirely of Aegis units. They can be effectively dealt with using MGSG echelons or RFHG echelons with sufficient DPS and AP.
- There is an enemy Typhon present on the map, dont be alarmed by it, as it is only a sole Typhon escorted by 2 Orthros units. Once you've dealt with the 2 Orthros, kite your dolls into lanes which aren't occupied by the Typhon's LOS, retreat a doll if necessary.
- The lower LZ is at the risk of encirlcement, move an echelon to capture the node in front of it ASAP.
- You're limited to 3 echelons max on this map, plan accordingly.
- Although there are 4 hostages present on the map, you're only required to extract 2 of them. If needed consider using the hostages as units you can swap with in order to reach your secondary objective.
Drop Locations: The following units can potentially drop the limited dolls for this map
- 1500 CE Orthros
- 1734 CE Pathfinder
- 1928 CE Typhon
E1-6 "Reversibility II"[edit]
| Battle Type | Day Battle |
|---|---|
| Recommended CE | 4000 |
| Map Objectives | Base objectives:
S-Rank objectives:
|
| Clear Rewards | x200 |
| Drop Types | T-Dolls (Set 1) |
| Limited Drops | All Servers:
CN Server:
|
| Buffed T-dolls |
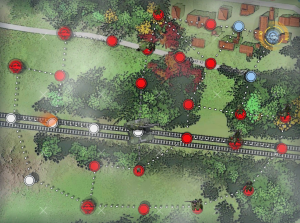
The objective is simple, haul ass to that neutral node on the left side of the map.
- Parachute Fairy says hi. If you posses a Parachute fairy with an SL10 skill, you'll be able to 1 turn this map by airdropping onto the unoccupied LZ's on the left side of the map. This is an effective way to secure your daily 40 crates, however as you'll only be securing an A rank and not S-rank, you'll need to do this 5 times to get your full 40 crates.
- Our Vela coilgun is stationed nearby with a support range of 5 tiles, meaning it'll be able to support our allies throughout the whole map. Except from our initial LZ and the node with the 1810 CE Cerynitis at the bottom of the map.
- There are 2 Very high threat Hydra units present on the map. Dont even both with them, you're not winning against them. They follow a patrol path and will attack any ally unit stationed next to them on the end of a turn.
- You're limited to 2 echelons max for this map, plan accordingly.
Drop Locations: The following units can potentially drop the limited dolls for this map
- 2132 CE Centauros
- 2797 CE Pathfinder
E1-1Ex "Critical Angle EX-I"[edit]
| Battle Type | Day Battle |
|---|---|
| Recommended CE | 30000 |
| Map Objectives | Base objectives:
S-Rank objectives:
|
| Clear Rewards | x200 |
| Drop Types | T-Dolls (Set 1) |
| Limited Drops | All Servers:
CN Server: |
| Buffed T-dolls |
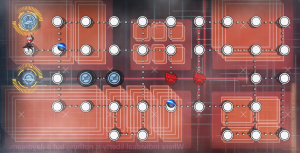
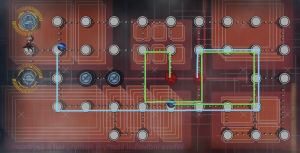
And now... for something different... a puzzle game? Welp, time to put those brains to work.
- Your objective is to place the EMP onto the radar node at the bottom of the map. The process is fairly simple, standing on the nodes nearby the EMP will give you promt to push it towards the opposite direction of your echelon.
- There are 3 very powerful enemy formations present in the map, there is no avoiding them so make sure your echelon is powerful enough to survive 3 encounters.
- You're limited to 2 echelons max, plan accordingly. Though only 1 echelon is more then enough.
- There are locked LZs set aside on the right of the map, these are actually a massive stack of locked LZs as when you start the round, you'll start with 15 ~ 16 Action points total. Make the most of these to accomplish your objectives.
- Upon pushing the EMP for the first time, the node in front of our LZ and HQ will become locked off, only a single echelon can be allowed through this map.
- The initial Dragoon EX is an effective enemy to battle in order to farm the limited drops for this map as well as Platinum Medals
 , as this is an EX map, each successful battle against this unit will drop 2x of them. With the LZ standing directly on the otherside of it, you can have a fodder echelon on standby to 1 turn farm for drops.
 - If you posses an echelon capable of clearing the map, it'll serve as an effective way to farm daily crates, granting 10 boxes on S-Ranks and can be cleared in 1 turn.
- Biggest enemy in these kinds of puzzles is corners and walls, whatever you do, never push the EMP into a corner, you'll need to restart if you do.
Drop Locations: The following units can potentially drop the limited dolls for this map
- 45066 CE Dragoon EX
E1-2Ex "Critical Angle EX-II"[edit]
| Battle Type | Day Battle |
|---|---|
| Recommended CE | 34000 |
| Map Objectives | Base objectives:
Achieve the following:
S-Rank objectives:
|
| Clear Rewards | x2 |
| Drop Types | T-Dolls (Set 2) |
| Limited Drops | All Servers:
CN Server:
|
| Buffed T-dolls |
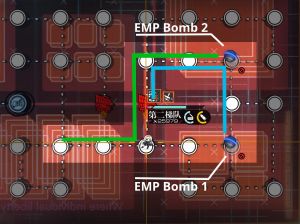
The 2nd Ex map of Chapter 1, like E1-1Ex, this map is a puzzle map which you're required to push the EMPs onto the indicated radar nodes, there is 2 on the map and its significantly bigger then the previous. Time to use them brains of yours folks.
- You're limited to 2 echelons max, plan accordingly. Though only 1 echelon is more then enough.
- There are locked LZs set aside on the right of the map, these are actually a massive stack of locked LZs as when you start the round, you'll start with 29 ~ 30 Action points total. Make the most of these to accomplish your objectives and waste absolutely no action points.
- Upon pushing the EMP for the first time, the node in front of our LZ and HQ will become locked off, only a single echelon can be allowed through this map.
- The initial Dragoon EX is an effective enemy to battle in order to farm the limited drops for this map as well as Platinum Medals
 , as this is an EX map, each successful battle against this unit will drop 2x of them. With the LZ standing directly on the otherside of it, you can have a fodder echelon on standby to 1 turn farm for drops.
 - Biggest enemy in these kinds of puzzles is corners and walls, whatever you do, never push the EMP into a corner, you'll need to restart if you do.
- There are 4 distinct pockets on the map which you can use to push the EMPs into 1 of 4 direction, take node of these when navigating the map.
- Note that when you push an EMP onto the Radars, it doesn't lock it into place, you can still push the EMP off it. Take note of this when trying to achieve your objectives.
Drop Locations: The following units can potentially drop the limited dolls for this map
- 40777 CE Dragoon EX


