GFL2 Weapon Accessories: Difference between revisions
Added all [X] on all Assault Rifles: QD Suppressor, Holo Sight, Internal Red Dot, Variable Red Dot, Angled Foregrip, Tactical Foregrip, QD Tactical Flashlight |
No edit summary |
||
| (22 intermediate revisions by 2 users not shown) | |||
| Line 3: | Line 3: | ||
Weapon Attachments in Exilium are used to further boost the stats of weapons, bringing bonuses to Attack, Health, Defense, Crit Rate, Crit DMG, Attack Boost, Health Boost or Defense Boost. The boosts are randomly generated when receiving the Attachment. They become available at Commander Level 23 and are obtained by running Targeted Study in Supply Missions, in the [[GFL2_Main_Screen#Combat Simulations|Boss Fight]] shop, or by dismantling enough Attachments in the [[GFL2 Main Screen#Storeroom|Storeroom]] to earn a Precise Grade Attachment. Attachments are equipped in the Refitting Room. All owned Weapon Attachments can be viewed in the Storage Room. | Weapon Attachments in Exilium are used to further boost the stats of weapons, bringing bonuses to Attack, Health, Defense, Crit Rate, Crit DMG, Attack Boost, Health Boost or Defense Boost. The boosts are randomly generated when receiving the Attachment. They become available at Commander Level 23 and are obtained by running Targeted Study in Supply Missions, in the [[GFL2_Main_Screen#Combat Simulations|Boss Fight]] shop, or by dismantling enough Attachments in the [[GFL2 Main Screen#Storeroom|Storeroom]] to earn a Precise Grade Attachment. Attachments are equipped in the Refitting Room. All owned Weapon Attachments can be viewed in the Storage Room. | ||
Attachments come in four grades: Civilian | Attachments come in four grades of rarity: {{Color|GF2Green|Civilian}}, {{Color|GF2Blue|Industrial}}, {{Color|GF2Purple|Military}}, and {{Color|GF2Yellow|Precision}}. {{Color|GF2Green|Civilian}} and {{Color|GF2Blue|Industrial}} Attachments are distinguished visually by their rusted appearance, while {{Color|GF2Purple|Military}} and {{Color|GF2Yellow|Precision}} Attachments have a clean appearance. They also come in Upgraded, Assembled and Specialized variants: [[File:GFL2 Weapon Accessories Upgraded.png|25px]] Upgraded only provide basic stat increases; [[File:GFL2 Weapon Accessories Assembled.png|25px]] Assembled will activate a set skill when three Attachments with the same Set Effect are equipped; and [[File:GFL2 Weapon Accessories Specialized.png|25px]] Specialized increase both basic stats and extra stats. | ||
Attachments come in 9 general categories, further segmented by weapon types. For example, an AR Sight dropped from the AR+SG Targeted Study cannot be equipped on an MG. | |||
{| class=gf-table | {| class=gf-table | ||
| Line 13: | Line 15: | ||
!Bipod | !Bipod | ||
!Latch | !Latch | ||
! | !Link | ||
!Edge | !Edge | ||
!Adjuster | !Adjuster | ||
| Line 95: | Line 97: | ||
|} | |} | ||
Attachments of Military Grade and Precision Grade can be be calibrated, in order to gain new randomized stat boosts. This can be done by consuming other Attachments of the same Targeted Study category (AR & SG, SMG & MG, RF & BLD, or HG), plus an amount of {{Icon|Sardis Gold}} Sardis Gold. | ==Calibration== | ||
Attachments of Military Grade and Precision Grade can be be calibrated, in order to gain new randomized stat boosts. This can be done by consuming other Attachments of the same Targeted Study category (AR & SG, SMG & MG, RF & BLD, or HG), plus an amount of {{Icon|Sardis Gold}} Sardis Gold. The amount of Sardis Gold required depends on the rarity of the Attachment that you are calibrating. | |||
* Calibrating a Military grade attachment consumes 1500 points of material fodder and 3000 Sardis Gold | |||
* Calibrating a Precision grade attachment consumes 5000 points of material fodder and 20000 Sardis Gold | |||
Each attachment that you consume for calibration provides points of material fodder dependent on its rarity: | |||
* Civilian attachments provide 200 points | |||
* Industrial attachments provide 400 points | |||
* Military attachments provide 600 points | |||
* Precision attachments provide 1000 points | |||
The first calibration will always produce a large increase to the stat boosts. Subsequent calibrations may produce higher or lower stat boosts, leaving you with the decision to accept the new stat boosts or retain the exists boost values. | The first calibration will always produce a large increase to the initial stat boosts. Subsequent calibrations may produce higher or lower stat boosts, leaving you with the decision to accept the new stat boosts or retain the exists boost values. It is more effective to calibrate attachments with higher initial stat boosts. | ||
Starting at Commander Level 45, {{Icon|Precision Boost Chip||gfl2}} Precision Boost Chips can be used as Boost Material to receive further enhancements to a random attribute. | |||
==Set Effects List== | ==Set Effects List== | ||
Attachments from a specific set effect can be selected to drop from Targeted Study. | Attachments from a specific set effect can be selected to drop from Targeted Study. | ||
* Ultimate Pursuit - Increases the damage, healing, and shield effects of Ultimate skills by 5%. Gains 1 stack after each use of an Ultimate skill, up to a maximum of 4 stacks | * Ultimate Pursuit - Increases the damage, healing, and shield effects of Ultimate skills by {{Color|GF2Orange|5%}}. Gains {{Color|GF2Orange|1 stack}} after each use of an Ultimate skill, up to a maximum of {{Color|GF2Orange|4 stacks}}. | ||
* Double Strategy - When enemy target is not near Cover, increases targeted damage by 10%. When enemy target is near Cover, increases AoE damage by 10% | * Double Strategy - When enemy target is not near Cover, increases targeted damage by {{Color|GF2Orange|10%}}. When enemy target is near Cover, increases AoE damage by {{Color|GF2Orange|10%}}. | ||
* Phase Strike - Deals 15% increased damage to targets with Phase Element debuffs | * Phase Strike - Deals {{Color|GF2Orange|15%}} increased damage to targets with Phase Element debuffs. | ||
* Phase Resonance - If the active skill exploits a phase weakness, gains Phase Boost I for 1 turn before the attack. If it exploits two phase weaknesses, increases damage dealt by 10% | * Phase Resonance - If the active skill exploits a phase weakness, gains {{Color|GF2Blue|Phase Boost I}} for {{Color|GF2Orange|1 turn}} before the attack. If it exploits two phase weaknesses, increases damage dealt by {{Color|GF2Orange|10%}}. | ||
* Emergency Repair - If the allied unit's HP is fully healed by an active skill, restores 2 points of their stability index. Triggers up to once per turn | * Emergency Repair - If the allied unit's HP is fully healed by an active skill, restores {{Color|GF2Orange|2 points}} of their stability index. Triggers up to {{Color|GF2Orange|once}} per turn. | ||
* | * Allay Support - When using defense skills, additionally applied {{Color|GF2Blue|Area Defense II}} to allied units for {{Color|GF2Orange|2 turns}}. | ||
* Ballistic Boost - When dealing Physical damage, the damage is increased by 20% | * Ballistic Boost - When dealing Physical damage, the damage is increased by {{Color|GF2Orange|20%}}. | ||
* | * Fire Boost - When dealing {{GFL2WeakIcon|burn}}{{Color|GF2Orange|Burn}} damage, the damage is increased by {{Color|GF2Orange|20%}}. | ||
* Ice Boost - When dealing Freeze damage, the damage is increased by 20% | * Ice Boost - When dealing {{GFL2WeakIcon|freeze}}{{Color|GF2LightBlue|Freeze}} damage, the damage is increased by {{Color|GF2Orange|20%}}. | ||
* Acid Boost - When dealing Corrosion damage, the damage is increased by 20% | * Acid Boost - When dealing {{GFL2WeakIcon|corrosion}}{{Color|GF2Purple|Corrosion}} damage, the damage is increased by {{Color|GF2Orange|20%}}. | ||
* Electric Boost - When dealing Electric damage, the damage is increased by 20% | * Electric Boost - When dealing {{GFL2WeakIcon|electric}}{{Color|GF2Yellow|Electric}} damage, the damage is increased by {{Color|GF2Orange|20%}}. | ||
* Riptide Boost - When dealing Hydro damage, the damage is increased by 20% | * Riptide Boost - When dealing {{GFL2WeakIcon|hydro}}{{Color|GF2Blue|Hydro}} damage, the damage is increased by {{Color|GF2Orange|20%}}. | ||
==List of Attachments== | ==List of Attachments== | ||
===Muzzle=== | ===Muzzle=== | ||
{| class=gf-table | |||
!Weapon Type | |||
!Attachment Name | |||
!Civilian | |||
!Industrial | |||
!Military/Precision | |||
|- | |||
|[AR] [SMG] | |||
|Basic Flash Hider | |||
|[[File:GFL2 Attachment Basic Flash Hider 1.png|100px]] | |||
|[[File:GFL2 Attachment Basic Flash Hider 2.png|100px]] | |||
|[[File:GFL2 Attachment Basic Flash Hider 3.png|100px]] | |||
|- | |||
|[AR] | |||
|Basic Muzzle Brake | |||
|[[File:GFL2 Attachment Basic Muzzle Brake 1.png|100px]] | |||
|[[File:GFL2 Attachment Basic Muzzle Brake 2.png|100px]] | |||
|[[File:GFL2 Attachment Basic Muzzle Brake 3.png|100px]] | |||
|- | |||
|[AR] [SMG] | |||
|Basic Suppressor | |||
|[[File:GFL2 Attachment Basic Suppressor 1.png|100px]] | |||
|[[File:GFL2 Attachment Basic Suppressor 2.png|100px]] | |||
|[[File:GFL2 Attachment Basic Suppressor 3.png|100px]] | |||
|- | |||
|[AR] [SMG] | |||
|Compact Suppressor | |||
|[[File:GFL2 Attachment Compact Suppressor 1.png|100px]] | |||
|[[File:GFL2 Attachment Compact Suppressor 2.png|100px]] | |||
|[[File:GFL2 Attachment Compact Suppressor 3.png|100px]] | |||
|- | |||
|[AR] [SMG] | |||
|Door Breacher Mk.I | |||
|[[File:GFL2 Attachment Door Breacher Mk.I 1.png|100px]] | |||
|[[File:GFL2 Attachment Door Breacher Mk.I 2.png|100px]] | |||
|[[File:GFL2 Attachment Door Breacher Mk.I 3.png|100px]] | |||
|- | |||
|[SG] [RF] [MG] | |||
|Door Breacher Mk.II | |||
|[[File:GFL2 Attachment Door Breacher Mk.II 1.png|100px]] | |||
|[[File:GFL2 Attachment Door Breacher Mk.II 2.png|100px]] | |||
|[[File:GFL2 Attachment Door Breacher Mk.II 3.png|100px]] | |||
|- | |||
|[SG] | |||
|Duckbill Choke | |||
|[[File:GFL2 Attachment Duckbill Choke 1.png|100px]] | |||
|[[File:GFL2 Attachment Duckbill Choke 2.png|100px]] | |||
|[[File:GFL2 Attachment Duckbill Choke 3.png|100px]] | |||
|- | |||
|[SG] | |||
|Extended Muzzle | |||
|[[File:GFL2 Attachment Extended Muzzle 1.png|100px]] | |||
|[[File:GFL2 Attachment Extended Muzzle 2.png|100px]] | |||
|[[File:GFL2 Attachment Extended Muzzle 3.png|100px]] | |||
|- | |||
|[RF] [MG] | |||
|Heavy Flash Hider | |||
|[[File:GFL2 Attachment Heavy Flash Hider 1.png|100px]] | |||
|[[File:GFL2 Attachment Heavy Flash Hider 2.png|100px]] | |||
|[[File:GFL2 Attachment Heavy Flash Hider 3.png|100px]] | |||
|- | |||
|[RF] [MG] | |||
|Heavy Muzzle Brake | |||
|[[File:GFL2 Attachment Heavy Muzzle Brake 1.png|100px]] | |||
|[[File:GFL2 Attachment Heavy Muzzle Brake 2.png|100px]] | |||
|[[File:GFL2 Attachment Heavy Muzzle Brake 3.png|100px]] | |||
|- | |||
|[RF] [MG] | |||
|Heavy Suppressor | |||
|[[File:GFL2 Attachment Heavy Suppressor 1.png|100px]] | |||
|[[File:GFL2 Attachment Heavy Suppressor 2.png|100px]] | |||
|[[File:GFL2 Attachment Heavy Suppressor 3.png|100px]] | |||
|- | |||
|[RF] | |||
|Lightweight Muzzle Brake | |||
|[[File:GFL2 Attachment Lightweight Muzzle Brake 1.png|100px]] | |||
|[[File:GFL2 Attachment Lightweight Muzzle Brake 2.png|100px]] | |||
|[[File:GFL2 Attachment Lightweight Muzzle Brake 3.png|100px]] | |||
|- | |||
|[HG] | |||
|Muzzle Compensator | |||
|[[File:GFL2 Attachment Muzzle Compensator 1.png|100px]] | |||
|[[File:GFL2 Attachment Muzzle Compensator 2.png|100px]] | |||
|[[File:GFL2 Attachment Muzzle Compensator 3.png|100px]] | |||
|- | |||
|[RF] [MG] | |||
|QD Flash Hider | |||
|[[File:GFL2 Attachment QD Flash Hider 1.png|100px]] | |||
|[[File:GFL2 Attachment QD Flash Hider 2.png|100px]] | |||
|[[File:GFL2 Attachment QD Flash Hider 3.png|100px]] | |||
|- | |||
|[RF] [MG] | |||
|QD Muzzle Brake | |||
|[[File:GFL2 Attachment QD Muzzle Brake 1.png|100px]] | |||
|[[File:GFL2 Attachment QD Muzzle Brake 2.png|100px]] | |||
|[[File:GFL2 Attachment QD Muzzle Brake 3.png|100px]] | |||
|- | |||
|[AR] [SMG] | |||
|QD Suppressor | |||
|[[File:GFL2 Attachment QD Suppressor 1.png|100px]] | |||
|[[File:GFL2 Attachment QD Suppressor 2.png|100px]] | |||
|[[File:GFL2 Attachment QD Suppressor 3.png|100px]] | |||
|- | |||
|[HG] | |||
|Rail Mounted Suppressor | |||
|[[File:GFL2 Attachment Rail Mounted Suppressor 1.png|100px]] | |||
|[[File:GFL2 Attachment Rail Mounted Suppressor 2.png|100px]] | |||
|[[File:GFL2 Attachment Rail Mounted Suppressor 3.png|100px]] | |||
|- | |||
|[HG] | |||
|Short-Range Suppressor | |||
|[[File:GFL2 Attachment Short-Range Suppressor 1.png|100px]] | |||
|[[File:GFL2 Attachment Short-Range Suppressor 2.png|100px]] | |||
|[[File:GFL2 Attachment Short-Range Suppressor 3.png|100px]] | |||
|- | |||
|[SG] [RF] [MG] | |||
|Specialized Flash Hider Mk.I | |||
|[[File:GFL2 Attachment Specialized Flash Hider Mk.I 1.png|100px]] | |||
|[[File:GFL2 Attachment Specialized Flash Hider Mk.I 2.png|100px]] | |||
|[[File:GFL2 Attachment Specialized Flash Hider Mk.I 3.png|100px]] | |||
|- | |||
|[HG] | |||
|Specialized Flash Hider Mk.II | |||
|[[File:GFL2 Attachment Specialized Flash Hider Mk.II 1.png|100px]] | |||
|[[File:GFL2 Attachment Specialized Flash Hider Mk.II 2.png|100px]] | |||
|[[File:GFL2 Attachment Specialized Flash Hider Mk.II 3.png|100px]] | |||
|- | |||
|[SG] [RF] | |||
|Specialized Muzzle Brake Mk.II | |||
|[[File:GFL2 Attachment Specialized Muzzle Brake Mk.I 1.png|100px]] | |||
|[[File:GFL2 Attachment Specialized Muzzle Brake Mk.I 2.png|100px]] | |||
|[[File:GFL2 Attachment Specialized Muzzle Brake Mk.I 3.png|100px]] | |||
|- | |||
|[HG] | |||
|Specialized Muzzle Brake Mk.II | |||
|[[File:GFL2 Attachment Specialized Muzzle Brake Mk.II 1.png|100px]] | |||
|[[File:GFL2 Attachment Specialized Muzzle Brake Mk.II 2.png|100px]] | |||
|[[File:GFL2 Attachment Specialized Muzzle Brake Mk.II 3.png|100px]] | |||
|- | |||
|[SG] [HG] | |||
|Specialized Suppressor | |||
|[[File:GFL2 Attachment Specialized Suppressor 1.png|100px]] | |||
|[[File:GFL2 Attachment Specialized Suppressor 2.png|100px]] | |||
|[[File:GFL2 Attachment Specialized Suppressor 3.png|100px]] | |||
|} | |||
===Underbarrel=== | ===Underbarrel=== | ||
{| class=gf-table | |||
!Weapon Type | |||
!Attachment Name | |||
!Civilian | |||
!Industrial | |||
!Military/Precision | |||
|- | |||
|[AR] [SMG] [RF] | |||
|Compact Tactical Flashlight | |||
|[[File:GFL2 Attachment Compact Tactical Flashlight 1.png|100px]] | |||
|[[File:GFL2 Attachment Compact Tactical Flashlight 2.png|100px]] | |||
|[[File:GFL2 Attachment Compact Tactical Flashlight 3.png|100px]] | |||
|- | |||
|[AR] [SMG] [RF] | |||
|Flashlight | |||
|[[File:GFL2 Attachment Flashlight 1.png|100px]] | |||
|[[File:GFL2 Attachment Flashlight 2.png|100px]] | |||
|[[File:GFL2 Attachment Flashlight 3.png|100px]] | |||
|- | |||
|[AR] [SMG] [MG] | |||
|Laser | |||
|[[File:GFL2 Attachment Laser 1.png|100px]] | |||
|[[File:GFL2 Attachment Laser 2.png|100px]] | |||
|[[File:GFL2 Attachment Laser 3.png|100px]] | |||
|- | |||
|[AR] [SMG] [RF] | |||
|QD Tactical Flashlight | |||
|[[File:GFL2 Attachment QD Tactical Flashlight 1.png|100px]] | |||
|[[File:GFL2 Attachment QD Tactical Flashlight 2.png|100px]] | |||
|[[File:GFL2 Attachment QD Tactical Flashlight 3.png|100px]] | |||
|- | |||
|[AR] [SMG] | |||
|Red Dot Device | |||
|[[File:GFL2 Attachment Red Dot Device 1.png|100px]] | |||
|[[File:GFL2 Attachment Red Dot Device 2.png|100px]] | |||
|[[File:GFL2 Attachment Red Dot Device 3.png|100px]] | |||
|- | |||
|[AR] [RF] [MG] | |||
|Tactical Range Finder | |||
|[[File:GFL2 Attachment Tactical Range Finder 1.png|100px]] | |||
|[[File:GFL2 Attachment Tactical Range Finder 2.png|100px]] | |||
|[[File:GFL2 Attachment Tactical Range Finder 3.png|100px]] | |||
|} | |||
===Sight=== | ===Sight=== | ||
{| class=gf-table | |||
!Weapon Type | |||
!Attachment Name | |||
!Civilian | |||
!Industrial | |||
!Military/Precision | |||
|- | |||
|[RF] | |||
|Close Range QM Scope | |||
|[[File:GFL2 Attachment Close Range QM Scope 1.png|100px]] | |||
|[[File:GFL2 Attachment Close Range QM Scope 2.png|100px]] | |||
|[[File:GFL2 Attachment Close Range QM Scope 3.png|100px]] | |||
|- | |||
|[SG] [HG] | |||
|Flip-up Red Dot Sight | |||
|[[File:GFL2 Attachment Flip-up Red Dot Sight 1.png|100px]] | |||
|[[File:GFL2 Attachment Flip-up Red Dot Sight 2.png|100px]] | |||
|[[File:GFL2 Attachment Flip-up Red Dot Sight 3.png|100px]] | |||
|- | |||
|[AR] [SMG] [MG] | |||
|High Magnification Scope Mk.I | |||
|[[File:GFL2 Attachment High Magnification Scope Mk.I 1.png|100px]] | |||
|[[File:GFL2 Attachment High Magnification Scope Mk.I 2.png|100px]] | |||
|[[File:GFL2 Attachment High Magnification Scope Mk.I 3.png|100px]] | |||
|- | |||
|[RF] | |||
|High Magnification Scope Mk.II | |||
|[[File:GFL2 Attachment High Magnification Scope Mk.II 1.png|100px]] | |||
|[[File:GFL2 Attachment High Magnification Scope Mk.II 2.png|100px]] | |||
|[[File:GFL2 Attachment High Magnification Scope Mk.II 3.png|100px]] | |||
|- | |||
|[RF] | |||
|High-Precision Scope | |||
|[[File:GFL2 Attachment High-Precision Scope 1.png|100px]] | |||
|[[File:GFL2 Attachment High-Precision Scope 2.png|100px]] | |||
|[[File:GFL2 Attachment High-Precision Scope 3.png|100px]] | |||
|- | |||
|[AR] [SMG] [MG] | |||
|Holo Sight Mk.I | |||
|[[File:GFL2 Attachment Holo Sight Mk.I 1.png|100px]] | |||
|[[File:GFL2 Attachment Holo Sight Mk.I 2.png|100px]] | |||
|[[File:GFL2 Attachment Holo Sight Mk.I 3.png|100px]] | |||
|- | |||
|[RF] | |||
|Holo Sight Mk.II | |||
|[[File:GFL2 Attachment Holo Sight Mk.II 1.png|100px]] | |||
|[[File:GFL2 Attachment Holo Sight Mk.II 2.png|100px]] | |||
|[[File:GFL2 Attachment Holo Sight Mk.II 3.png|100px]] | |||
|- | |||
|[AR] [SMG] [MG] | |||
|Internal Red Dot | |||
|[[File:GFL2 Attachment Internal Red Dot 1.png|100px]] | |||
|[[File:GFL2 Attachment Internal Red Dot 2.png|100px]] | |||
|[[File:GFL2 Attachment Internal Red Dot 3.png|100px]] | |||
|- | |||
|[SG] [HG] | |||
|Micro Red Dot Sight | |||
|[[File:GFL2 Attachment Micro Red Dot Sight 1.png|100px]] | |||
|[[File:GFL2 Attachment Micro Red Dot Sight 2.png|100px]] | |||
|[[File:GFL2 Attachment Micro Red Dot Sight 3.png|100px]] | |||
|- | |||
|[SG] [HG] | |||
|Mini Holo Sight | |||
|[[File:GFL2 Attachment Mini Holo Sight 1.png|100px]] | |||
|[[File:GFL2 Attachment Mini Holo Sight 2.png|100px]] | |||
|[[File:GFL2 Attachment Mini Holo Sight 3.png|100px]] | |||
|- | |||
|[SG] [HG] | |||
|Mini Red Dot Sight | |||
|[[File:GFL2 Attachment Mini Red Dot Sight 1.png|100px]] | |||
|[[File:GFL2 Attachment Mini Red Dot Sight 2.png|100px]] | |||
|[[File:GFL2 Attachment Mini Red Dot Sight 3.png|100px]] | |||
|- | |||
|[SG] [HG] | |||
|Mini Reflex Sight | |||
|[[File:GFL2 Attachment Mini Reflex Sight 1.png|100px]] | |||
|[[File:GFL2 Attachment Mini Reflex Sight 2.png|100px]] | |||
|[[File:GFL2 Attachment Mini Reflex Sight 3.png|100px]] | |||
|- | |||
|[RF] | |||
|Quick-Magnification Scope | |||
|[[File:GFL2 Attachment Quick-Magnification Scope 1.png|100px]] | |||
|[[File:GFL2 Attachment Quick-Magnification Scope 2.png|100px]] | |||
|[[File:GFL2 Attachment Quick-Magnification Scope 3.png|100px]] | |||
|- | |||
|[AR] [SMG] [MG] | |||
|Red Dot Sight | |||
|[[File:GFL2 Attachment Red Dot Sight 1.png|100px]] | |||
|[[File:GFL2 Attachment Red Dot Sight 2.png|100px]] | |||
|[[File:GFL2 Attachment Red Dot Sight 3.png|100px]] | |||
|- | |||
|[SG] | |||
|Round Red Dot Sight | |||
|[[File:GFL2 Attachment Round Red Dot Sight 1.png|100px]] | |||
|[[File:GFL2 Attachment Round Red Dot Sight 2.png|100px]] | |||
|[[File:GFL2 Attachment Round Red Dot Sight 3.png|100px]] | |||
|- | |||
|[RF] | |||
|Scope | |||
|[[File:GFL2 Attachment Scope 1.png|100px]] | |||
|[[File:GFL2 Attachment Scope 2.png|100px]] | |||
|[[File:GFL2 Attachment Scope 3.png|100px]] | |||
|- | |||
|[AR] [SMG] [MG] | |||
|Tube Red Dot | |||
|[[File:GFL2 Attachment Tube Red Dot 1.png|100px]] | |||
|[[File:GFL2 Attachment Tube Red Dot 2.png|100px]] | |||
|[[File:GFL2 Attachment Tube Red Dot 3.png|100px]] | |||
|- | |||
|[AR] [SMG] [MG] | |||
|Variable Red Dot | |||
|[[File:GFL2 Attachment Variable Red Dot 1.png|100px]] | |||
|[[File:GFL2 Attachment Variable Red Dot 2.png|100px]] | |||
|[[File:GFL2 Attachment Variable Red Dot 3.png|100px]] | |||
|} | |||
===Foregrip=== | ===Foregrip=== | ||
{| class=gf-table | |||
!Weapon Type | |||
!Attachment Name | |||
!Civilian | |||
!Industrial | |||
!Military/Precision | |||
|- | |||
|[AR] | |||
|Angled Foregrip | |||
|[[File:GFL2 Attachment Angled Foregrip 1.png|100px]] | |||
|[[File:GFL2 Attachment Angled Foregrip 2.png|100px]] | |||
|[[File:GFL2 Attachment Angled Foregrip 3.png|100px]] | |||
|- | |||
|[AR] [SMG] | |||
|Tactical Foregrip | |||
|[[File:GFL2 Attachment Tactical Foregrip 1.png|100px]] | |||
|[[File:GFL2 Attachment Tactical Foregrip 2.png|100px]] | |||
|[[File:GFL2 Attachment Tactical Foregrip 3.png|100px]] | |||
|- | |||
|[AR] | |||
|Tactical Handstop | |||
|[[File:GFL2 Attachment Tactical Handstop 1.png|100px]] | |||
|[[File:GFL2 Attachment Tactical Handstop 2.png|100px]] | |||
|[[File:GFL2 Attachment Tactical Handstop 3.png|100px]] | |||
|- | |||
|[AR] [SMG] | |||
|Vertical Foregrip | |||
|[[File:GFL2 Attachment Vertical Foregrip 1.png|100px]] | |||
|[[File:GFL2 Attachment Vertical Foregrip 2.png|100px]] | |||
|[[File:GFL2 Attachment Vertical Foregrip 3.png|100px]] | |||
|- | |||
|[AR] [SMG] | |||
|Vertical Foregrip Mk.I | |||
|[[File:GFL2 Attachment Vertical Foregrip Mk.I 1.png|100px]] | |||
|[[File:GFL2 Attachment Vertical Foregrip Mk.I 2.png|100px]] | |||
|[[File:GFL2 Attachment Vertical Foregrip Mk.I 3.png|100px]] | |||
|- | |||
|[AR] [SMG] | |||
|Vertical Foregrip Mk.II | |||
|[[File:GFL2 Attachment Vertical Foregrip Mk.II 1.png|100px]] | |||
|[[File:GFL2 Attachment Vertical Foregrip Mk.II 2.png|100px]] | |||
|[[File:GFL2 Attachment Vertical Foregrip Mk.II 3.png|100px]] | |||
|} | |||
===Bipod=== | ===Bipod=== | ||
{| class=gf-table | |||
!Weapon Type | |||
!Attachment Name | |||
!Civilian | |||
!Industrial | |||
!Military/Precision | |||
|- | |||
|[RF] | |||
|Adjustable Bipod | |||
|[[File:GFL2 Attachment Adjustable Bipod 1.png|100px]] | |||
|[[File:GFL2 Attachment Adjustable Bipod 2.png|100px]] | |||
|[[File:GFL2 Attachment Adjustable Bipod 3.png|100px]] | |||
|- | |||
|[RF] [MG] | |||
|Foldable Bipod | |||
|[[File:GFL2 Attachment Foldable Bipod 1.png|100px]] | |||
|[[File:GFL2 Attachment Foldable Bipod 2.png|100px]] | |||
|[[File:GFL2 Attachment Foldable Bipod 3.png|100px]] | |||
|- | |||
|[RF] [MG] | |||
|Heavy Bipod | |||
|[[File:GFL2 Attachment Heavy Bipod 1.png|100px]] | |||
|[[File:GFL2 Attachment Heavy Bipod 2.png|100px]] | |||
|[[File:GFL2 Attachment Heavy Bipod 3.png|100px]] | |||
|- | |||
|[MG] | |||
|Multi-Purpose Bipod | |||
|[[File:GFL2 Attachment Multi-Purpose Bipod 1.png|100px]] | |||
|[[File:GFL2 Attachment Multi-Purpose Bipod 2.png|100px]] | |||
|[[File:GFL2 Attachment Multi-Purpose Bipod 3.png|100px]] | |||
|- | |||
|[RF] | |||
|Retractable Bipod | |||
|[[File:GFL2 Attachment Retractable Bipod 1.png|100px]] | |||
|[[File:GFL2 Attachment Retractable Bipod 2.png|100px]] | |||
|[[File:GFL2 Attachment Retractable Bipod 3.png|100px]] | |||
|- | |||
|[RF] | |||
|Tactical QD Bipod | |||
|[[File:GFL2 Attachment Tactical QD Bipod 1.png|100px]] | |||
|[[File:GFL2 Attachment Tactical QD Bipod 2.png|100px]] | |||
|[[File:GFL2 Attachment Tactical QD Bipod 3.png|100px]] | |||
|} | |||
===Latch=== | ===Latch=== | ||
{| class=gf-table | |||
!Weapon Type | |||
!Attachment Name | |||
!Civilian | |||
!Industrial | |||
!Military/Precision | |||
|- | |||
|[SG] [BLD] [HG] | |||
|Dovetail Latch | |||
|[[File:GFL2 Attachment Dovetail Latch 1.png|100px]] | |||
|[[File:GFL2 Attachment Dovetail Latch 2.png|100px]] | |||
|[[File:GFL2 Attachment Dovetail Latch 3.png|100px]] | |||
|- | |||
|[SG] [BLD] [HG] | |||
|Half-Opened Stealth Latch | |||
|[[File:GFL2 Attachment Half-Opened Stealth Latch 1.png|100px]] | |||
|[[File:GFL2 Attachment Half-Opened Stealth Latch 2.png|100px]] | |||
|[[File:GFL2 Attachment Half-Opened Stealth Latch 3.png|100px]] | |||
|- | |||
|[SG] [BLD] [HG] | |||
|Single-Sided Latch | |||
|[[File:GFL2 Attachment Single-Sided Latch 1.png|100px]] | |||
|[[File:GFL2 Attachment Single-Sided Latch 2.png|100px]] | |||
|[[File:GFL2 Attachment Single-Sided Latch 3.png|100px]] | |||
|} | |||
* | |||
* | |||
* | |||
===Link=== | ===Link=== | ||
{| class=gf-table | |||
!Weapon Type | |||
!Attachment Name | |||
!Civilian | |||
!Industrial | |||
!Military/Precision | |||
|- | |||
|[SG] [BLD] [HG] | |||
|Alloy Ejector Rivet | |||
|[[File:GFL2 Attachment Alloy Ejector Rivet 1.png|100px]] | |||
|[[File:GFL2 Attachment Alloy Ejector Rivet 2.png|100px]] | |||
|[[File:GFL2 Attachment Alloy Ejector Rivet 3.png|100px]] | |||
|- | |||
|[SG] [BLD] [HG] | |||
|Carbon Fiber Ejector Rivet | |||
|[[File:GFL2 Attachment Carbon Fiber Ejector Rivet 1.png|100px]] | |||
|[[File:GFL2 Attachment Carbon Fiber Ejector Rivet 2.png|100px]] | |||
|[[File:GFL2 Attachment Carbon Fiber Ejector Rivet 3.png|100px]] | |||
|- | |||
|[SG] [BLD] [HG] | |||
|Steel Ejector Rivet | |||
|[[File:GFL2 Attachment Steel Ejector Rivet 1.png|100px]] | |||
|[[File:GFL2 Attachment Steel Ejector Rivet 2.png|100px]] | |||
|[[File:GFL2 Attachment Steel Ejector Rivet 3.png|100px]] | |||
|} | |||
* | |||
* | |||
* | |||
===Edge=== | ===Edge=== | ||
Edge attachments are exclusive to BLD weapons. | |||
{| class=gf-table | |||
!Weapon Type | |||
!Attachment Name | |||
!Civilian | |||
!Industrial | |||
!Military/Precision | |||
|- | |||
|[BLD] | |||
|Cold Rolled Edge | |||
|[[File:GFL2 Attachment Cold Rolled Edge 1.png|100px]] | |||
|[[File:GFL2 Attachment Cold Rolled Edge 2.png|100px]] | |||
|[[File:GFL2 Attachment Cold Rolled Edge 3.png|100px]] | |||
|- | |||
|[BLD] | |||
|Hot Forged Edge | |||
|[[File:GFL2 Attachment Hot Forged Edge 1.png|100px]] | |||
|[[File:GFL2 Attachment Hot Forged Edge 2.png|100px]] | |||
|[[File:GFL2 Attachment Hot Forged Edge 3.png|100px]] | |||
|- | |||
|[BLD] | |||
|Hypersonic Rotating Edge | |||
|[[File:GFL2 Attachment Hypersonic Rotating Edge 1.png|100px]] | |||
|[[File:GFL2 Attachment Hypersonic Rotating Edge 2.png|100px]] | |||
|[[File:GFL2 Attachment Hypersonic Rotating Edge 3.png|100px]] | |||
|- | |||
|[BLD] | |||
|Ngombe Edge | |||
|[[File:GFL2 Attachment Ngombe Edge 1.png|100px]] | |||
|[[File:GFL2 Attachment Ngombe Edge 2.png|100px]] | |||
|[[File:GFL2 Attachment Ngombe Edge 3.png|100px]] | |||
|- | |||
|[BLD] | |||
|Power Edge | |||
|[[File:GFL2 Attachment Power Edge 1.png|100px]] | |||
|[[File:GFL2 Attachment Power Edge 2.png|100px]] | |||
|[[File:GFL2 Attachment Power Edge 3.png|100px]] | |||
|- | |||
|[BLD] | |||
|Serrated Edge | |||
|[[File:GFL2 Attachment Serrated Edge 1.png|100px]] | |||
|[[File:GFL2 Attachment Serrated Edge 2.png|100px]] | |||
|[[File:GFL2 Attachment Serrated Edge 3.png|100px]] | |||
|} | |||
===Adjuster=== | ===Adjuster=== | ||
Adjuster attachments are exclusive to BLD weapons. | |||
{| class=gf-table | |||
!Weapon Type | |||
!Attachment Name | |||
!Civilian | |||
!Industrial | |||
!Military/Precision | |||
|- | |||
|[BLD] | |||
|Polymeride Armor | |||
|[[File:GFL2 Attachment Polymeride Armor 1.png|100px]] | |||
|[[File:GFL2 Attachment Polymeride Armor 2.png|100px]] | |||
|[[File:GFL2 Attachment Polymeride Armor 3.png|100px]] | |||
|- | |||
|[BLD] | |||
|Polymeride Balancer | |||
|[[File:GFL2 Attachment Polymeride Balancer 1.png|100px]] | |||
|[[File:GFL2 Attachment Polymeride Balancer 2.png|100px]] | |||
|[[File:GFL2 Attachment Polymeride Balancer 3.png|100px]] | |||
|- | |||
|[BLD] | |||
|Polymeride Paw | |||
|[[File:GFL2 Attachment Polymeride Paw 1.png|100px]] | |||
|[[File:GFL2 Attachment Polymeride Paw 2.png|100px]] | |||
|[[File:GFL2 Attachment Polymeride Paw 3.png|100px]] | |||
|} | |||
Latest revision as of 09:29, 1 January 2025
Weapon Attachments in Exilium are used to further boost the stats of weapons, bringing bonuses to Attack, Health, Defense, Crit Rate, Crit DMG, Attack Boost, Health Boost or Defense Boost. The boosts are randomly generated when receiving the Attachment. They become available at Commander Level 23 and are obtained by running Targeted Study in Supply Missions, in the Boss Fight shop, or by dismantling enough Attachments in the Storeroom to earn a Precise Grade Attachment. Attachments are equipped in the Refitting Room. All owned Weapon Attachments can be viewed in the Storage Room.
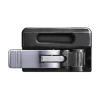
Attachments come in four grades of rarity: Civilian, Industrial, Military, and Precision. Civilian and Industrial Attachments are distinguished visually by their rusted appearance, while Military and Precision Attachments have a clean appearance. They also come in Upgraded, Assembled and Specialized variants: ![]() Upgraded only provide basic stat increases;
Upgraded only provide basic stat increases; ![]() Assembled will activate a set skill when three Attachments with the same Set Effect are equipped; and
Assembled will activate a set skill when three Attachments with the same Set Effect are equipped; and ![]() Specialized increase both basic stats and extra stats.
Specialized increase both basic stats and extra stats.
Attachments come in 9 general categories, further segmented by weapon types. For example, an AR Sight dropped from the AR+SG Targeted Study cannot be equipped on an MG.
| Weapon Type | Muzzle | Underbarrel | Sight | Foregrip | Bipod | Latch | Link | Edge | Adjuster |
|---|---|---|---|---|---|---|---|---|---|
| HG | ✓ | ✓ | ✓ | ✓ | |||||
| SMG | ✓ | ✓ | ✓ | ✓ | |||||
| AR | ✓ | ✓ | ✓ | ✓ | |||||
| RF | ✓ | ✓ | ✓ | ✓ | |||||
| MG | ✓ | ✓ | ✓ | ✓ | |||||
| SG | ✓ | ✓ | ✓ | ✓ | |||||
| BLD | ✓ | ✓ | ✓ | ✓ |
Calibration[edit]
Attachments of Military Grade and Precision Grade can be be calibrated, in order to gain new randomized stat boosts. This can be done by consuming other Attachments of the same Targeted Study category (AR & SG, SMG & MG, RF & BLD, or HG), plus an amount of ![]() Sardis Gold. The amount of Sardis Gold required depends on the rarity of the Attachment that you are calibrating.
Sardis Gold. The amount of Sardis Gold required depends on the rarity of the Attachment that you are calibrating.
- Calibrating a Military grade attachment consumes 1500 points of material fodder and 3000 Sardis Gold
- Calibrating a Precision grade attachment consumes 5000 points of material fodder and 20000 Sardis Gold
Each attachment that you consume for calibration provides points of material fodder dependent on its rarity:
- Civilian attachments provide 200 points
- Industrial attachments provide 400 points
- Military attachments provide 600 points
- Precision attachments provide 1000 points
The first calibration will always produce a large increase to the initial stat boosts. Subsequent calibrations may produce higher or lower stat boosts, leaving you with the decision to accept the new stat boosts or retain the exists boost values. It is more effective to calibrate attachments with higher initial stat boosts.
Starting at Commander Level 45, ![]() Precision Boost Chips can be used as Boost Material to receive further enhancements to a random attribute.
Precision Boost Chips can be used as Boost Material to receive further enhancements to a random attribute.
Set Effects List[edit]
Attachments from a specific set effect can be selected to drop from Targeted Study.
- Ultimate Pursuit - Increases the damage, healing, and shield effects of Ultimate skills by 5%. Gains 1 stack after each use of an Ultimate skill, up to a maximum of 4 stacks.
- Double Strategy - When enemy target is not near Cover, increases targeted damage by 10%. When enemy target is near Cover, increases AoE damage by 10%.
- Phase Strike - Deals 15% increased damage to targets with Phase Element debuffs.
- Phase Resonance - If the active skill exploits a phase weakness, gains Phase Boost I for 1 turn before the attack. If it exploits two phase weaknesses, increases damage dealt by 10%.
- Emergency Repair - If the allied unit's HP is fully healed by an active skill, restores 2 points of their stability index. Triggers up to once per turn.
- Allay Support - When using defense skills, additionally applied Area Defense II to allied units for 2 turns.
- Ballistic Boost - When dealing Physical damage, the damage is increased by 20%.
- Fire Boost - When dealing
 Burn damage, the damage is increased by 20%.
 - Ice Boost - When dealing
 Freeze damage, the damage is increased by 20%.
 - Acid Boost - When dealing
 Corrosion damage, the damage is increased by 20%.
 - Electric Boost - When dealing
 Electric damage, the damage is increased by 20%.
 - Riptide Boost - When dealing
 Hydro damage, the damage is increased by 20%.
List of Attachments[edit]
Muzzle[edit]
Underbarrel[edit]
Sight[edit]
| Weapon Type | Attachment Name | Civilian | Industrial | Military/Precision |
|---|---|---|---|---|
| [RF] | Close Range QM Scope | 
|

|

|
| [SG] [HG] | Flip-up Red Dot Sight | 
|

|

|
| [AR] [SMG] [MG] | High Magnification Scope Mk.I | 
|

|

|
| [RF] | High Magnification Scope Mk.II | 
|

|

|
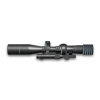
| [RF] | High-Precision Scope | 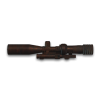
|

|
|
| [AR] [SMG] [MG] | Holo Sight Mk.I | 
|

|

|
| [RF] | Holo Sight Mk.II | 
|

|

|
| [AR] [SMG] [MG] | Internal Red Dot | 
|

|

|
| [SG] [HG] | Micro Red Dot Sight | 
|

|

|
| [SG] [HG] | Mini Holo Sight | File:GFL2 Attachment Mini Holo Sight 1.png | File:GFL2 Attachment Mini Holo Sight 2.png | File:GFL2 Attachment Mini Holo Sight 3.png |
| [SG] [HG] | Mini Red Dot Sight | 
|

|

|
| [SG] [HG] | Mini Reflex Sight | 
|

|

|
| [RF] | Quick-Magnification Scope | File:GFL2 Attachment Quick-Magnification Scope 1.png | File:GFL2 Attachment Quick-Magnification Scope 2.png | File:GFL2 Attachment Quick-Magnification Scope 3.png |
| [AR] [SMG] [MG] | Red Dot Sight | 
|

|

|
| [SG] | Round Red Dot Sight | 
|

|

|
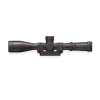
| [RF] | Scope | 
|
|

|
| [AR] [SMG] [MG] | Tube Red Dot | 
|

|

|
| [AR] [SMG] [MG] | Variable Red Dot | 
|

|

|
Foregrip[edit]
Bipod[edit]
Latch[edit]
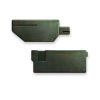
| Weapon Type | Attachment Name | Civilian | Industrial | Military/Precision |
|---|---|---|---|---|
| [SG] [BLD] [HG] | Dovetail Latch | 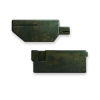
|
|
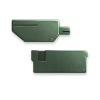
|
| [SG] [BLD] [HG] | Half-Opened Stealth Latch | 
|

|

|
| [SG] [BLD] [HG] | Single-Sided Latch | 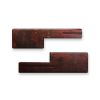
|
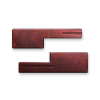
|

|
Link[edit]
| Weapon Type | Attachment Name | Civilian | Industrial | Military/Precision |
|---|---|---|---|---|
| [SG] [BLD] [HG] | Alloy Ejector Rivet | 
|

|

|
| [SG] [BLD] [HG] | Carbon Fiber Ejector Rivet | 
|

|

|
| [SG] [BLD] [HG] | Steel Ejector Rivet | 
|

|

|
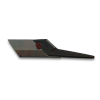
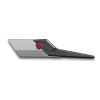
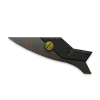
Edge[edit]
Edge attachments are exclusive to BLD weapons.
| Weapon Type | Attachment Name | Civilian | Industrial | Military/Precision |
|---|---|---|---|---|
| [BLD] | Cold Rolled Edge | 
|

|

|
| [BLD] | Hot Forged Edge | 
|

|

|
| [BLD] | Hypersonic Rotating Edge | 
|

|

|
| [BLD] | Ngombe Edge | 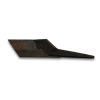
|
|
|
| [BLD] | Power Edge | 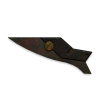
|
|
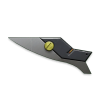
|
| [BLD] | Serrated Edge | 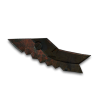
|
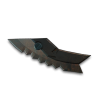
|

|
Adjuster[edit]
Adjuster attachments are exclusive to BLD weapons.
| Weapon Type | Attachment Name | Civilian | Industrial | Military/Precision |
|---|---|---|---|---|
| [BLD] | Polymeride Armor | 
|

|

|
| [BLD] | Polymeride Balancer | 
|

|
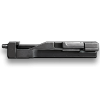
|
| [BLD] | Polymeride Paw | 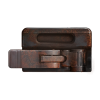
|

|
|


