IOP Wiki:How To/GFL2/Enemies
The main page for enemies from Girls' Frontline 2: Exilium uses Template:GFL2Enemy. Consult the template to see parameters details.
Core Page Example
Collating multiple enemies in one page
Because of the high amount of enemies in Exilium that share a similar name and appearance, all similar enemies are rolled up under one article using their generic name.
For example, the Thorn contains both the basic Thorn enemy, but also its HYD variant, its enhanced variant, its ranged attack variant, etc.
About titles
To distinguish the article of enemies with the same name in another game, “(GFL2)” is specified in the title. The solution to generalize game suffix for all pages was previously discussed and rejected as it made navigation less intuitive.
Leaving a warning banner at the top of the article
If there are a few spoilers in text form, apply Template:spoiler to the text in question. If the page you're creating contains a lot of text spoilers or spoiler images, you should add Template:Spoiler at the top of the page and don't bother censoring everything.
If you're creating the base of the article so it is referenced but doesn't include all the info in one go, add Template:Stub at the very start. If you intend to return to the article shortly, use Template:WIP.
If the article is already well-developed but you know it's still missing some things, use Template:Incomplete and define a reason parameter as a guide for the next editor.
Main article
Infobox
- Portrait: See #Files
- Full Name: Used to exclude the “(GFL2)” part of the title from other templates.
- Affiliation: read Template:GFL2Enemy to see the list of valid factions. This changes the enemy's listing in GFL2 Enemies.
- Voice actor: Optional. Should use Template:voice_actor_name, when used.
- Released on: Should use Template:server short, followed by name of the enemy in the server's language.
- Class (not displayed): Slightly changes the summary line.
Summary
Usually left by default, the summary parameter can be defined if there's something special to be noted in the intro.
Corresponding enemies
For enemies that appear in other games, use the PNC (for Project Neural Cloud) or GFL (for Girls' Frontline) parameters with the title of the corresponding article to display a quick link.
Variants
Inside this parameter, one or more instances of Template:GFL2EnemyVariants should be defined, depending on the number of variants.
For each variants, the following are defined:
- Name: used as section title.
- Enemies may have multiple names depending on the screen where it appears. Choose any of the names for the title, and list the others in the othername parameter so the article still shows up when alternative names are searched.
- Different variants may have the same name in-game. An extra description like "second form" can be added in this case.
- Description: Should be taken from the enemy preview before entering the battle screen.
- Appearances: Should be defined for elite enemies, bosses and other rare enemies.
- Portait: See #Files.
- Possible Weaknesses: Seen from the enemy profile on the bottom-left of the screen or next to the enemy's health bar. Up to 5 can be defined. Should be written down at the start of the battle, before any extra weaknesses can be applied. Some enemies may have extra or different weaknesses depending on the map, the list is not meant to be definitive. The possible values are those of Template:GFL2WeakIcon.
- Stability Index: Seen from the enemy profile on the bottom-left of the screen or next to the enemy's health bar. Value at the start of the map, before the enemy takes damage.
- Stability damage reduction and Critical values: These shouldn't be defined in most cases because these values tend to always be the same. Seen on the enemy profile on the bottom-left of the screen.
- Movement Points: How far the enemy can move, before any debuffs are applied. Seen on the enemy profile on the bottom-left of the screen.
- Skills: Seen on the enemy profile on the bottom-left of the screen, you should then select each skill to display their details. Up to six skills can be defined. The parameters names will repeat with just the number at the end of the parameter name changing.
- Skill name
- Attributes: Up to two attributes can be defined.
- Types: Those are listed under the skill name.
- Stability: Stability damage caused by the skill.
- Range: Distance in tiles the skill can be used at. Written under the tiles graph.
- Area of effect: Distance in tiles the skill will strike. Written under the tiles graph.
- Description: Copy the skill description. You can reproduce the text colors with Template:Color, the relevant color parameters are GF2Orange, GF2LightBlue, GF2Blue , GF2Yellow and GF2Purple.
- Battle Traits: Listed at the bottom of the enemy profile, click to display the effects. Up to five can be listed. Only note down the name, a link to GFL2 Battle Traits will be created automatically. If the Battle Trait doesn't exist in the list, it must be added there.
Strategies
Will contain an explanation of the enemy's important skills and suggest strategies and Dolls to use against it. Mostly for bosses.
Lore
Only used if the enemy has a role in the story or was mentioned in a lore piece. Needs to have references to the specific chapters where the info appears.
Gallery
The gallery parameter should contain full-body illustrations and any story or promotional artworks.
Trivia
Should be presented as a bullet point list. If the enemy is named differently in game files, it should be mentioned here to make finding files easier.
Files
Naming conventions
Some files must respect naming conventions when uploaded because they will be displayed automatically based on their name.
Where to find files
Aside from promo images and misc illustrations, all files must be extracted directly from the game. Do not reuse files found elsewhere to ensure they are unmodified and up to date.
Use any of the methods and tools documented by the community to extract the files. Or ask in our Discord.
Note: The name of the enemies in game files is not always the same as in-game. The technical name should be added to #Trivia for reference.
Portraits
- Naming Convention
<Articlename>_S.pngor<Variantname>_S.png<Articlename>_I.png
- S portraits are stored in the game with the title
Monster_Half_<Name>.- The portrait displayed in the variants will look for the file using the name of the variant. If for some reason the file doesn't have the same name as the variant, define a portrait parameter with the file name in the variant parameters.
- The portrait displayed in the infobox will look for the file using the name of the article. If the name of the article doesn't match any of the variants, define the file name in the imagename parameter in the general enemy information.
- I portraits are stored as
Monster_Head_<Name>. They are smaller portraits used in GFL2 Enemies.
-
Portrait example: Darture_S.png.
-
Small portrait example: Darture_I.png
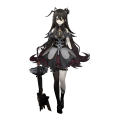
Full-body illustrations
- Naming Convention
<Name>_Whole.png
Whole-body main artwork is found in the game files with the name Monster_Whole_<Dollname>.
-
Example: Darture_Whole.png.
Other artworks
The gallery can also contain such artworks:
- Promotional images shared on official social media. Fan-arts that are reposted by official accounts shouldn't be included.
- Story artworks.


