Valhalla: Difference between revisions
HellScythe42 (talk | contribs) mNo edit summary |
HellScythe42 (talk | contribs) mNo edit summary |
||
| Line 652: | Line 652: | ||
|- | |- | ||
! colspan=10 | S-Rank Objective | ! colspan=10 | S-Rank Objective | ||
| Kill 6 enemies within | | Kill 6 enemies within 7 turns | ||
|- | |- | ||
! colspan=10 | Clear Reward | ! colspan=10 | Clear Reward | ||
Revision as of 10:49, 20 June 2019
2019 collaboration event with VA-11 Hall-A by Sukeban Games. Event starts after 13th of June maintenance.
Overview
Chapters
There are 17 maps total within Valhalla and 2 difficulties;
- E1-1 = Didgeridoo Manual
- E1-2 = Puberty
- E1-3 = Pioneer
- E1-4 = Sonic Boom
- E1-5 = Chicken Breast
- E1-6 = Glossophobia
- E1-7 = Truth or Dare
- E1-8 = Last Rain in the world
- E2-1 = Didgeridoo Manual (EX)
- E2-2 = Puberty (EX)
- E2-3 = Pioneer (EX)
- E2-4 = Sonic Boom (EX)
- E2-5 = Chicken Breast (EX)
- E2-6 = Glossophobia (EX)
- E2-7 = Truth or Dare (EX)
- E2-8 = Last Rain in the world (EX)
- E3-1 = Habanera
Overall difficulty
In terms of overall difficulty, from maps E1-1 all the way to E1-8 are relatively easy and requires a bit of strategy to complete, while the EX maps; E2-1 all the way to E2-8 are incredibly difficult and commanders are expected to have endgame Equipment and T-doll's prepared, otherwise you will not make it that far. Expect opposition from multiple factions.
Expected Echelons:
- Total Echelons Required = 3 ~ 6 ~ Max
- ARSMG = 2 ~ 4
- RFHG = 2 ~ 4
- MGSG = 2 ~ 4
- Average CE = 8000 ~ 30000+
- Average Levels:
- Normal Mode = 30 ~ 80
- EX Mode = 90+
- Night Battles = Present (8 Maps total)
New elements and mechanics

There are no new mechanics other then the bar mini-game which you are Required to do, in order to proceed with the event.
As for mechanics, some of them are returning mechanics which were seen in Isomer such as Control Panels, Gates and Golyat Towers.
During the collab, the Cafe in the Dorms will change into the Bar from VA-11 Hall-A, and be manned by the bartender Jill.
In event stages 1 to 8 of the collab, after each stage is cleared, a story event can be triggered at the bar. T-Dolls will visit the bar in the stories and Jill will need to prepare drinks for them based on their requests by selecting the various ingredients.
If the correct drink is mixed, intel points will be rewarded which can be used to unlock the next stage in the event.
This is where the mini-game begins, before you actually begin, you'll be given a promt out of 3 choices, these are simply music choices, so pick the one you feel comfortable with. After engaging the customer with a chat, they'll end up asking Jill for a drink, you'll then be taken to another menu which will be very similar to the UI you see in VA-11 Hall-A, These will be your options (Note your Cocktail Shaker, will only be able to hold 20 doses):
Tabs on the top left:
- Sort drinks by NAME
- Sort drinks by FLAVOR
- Sort drinks by TYPE
The right side shows your mixers:
- Adelhyde
- Bronson Ext
- Pwd Delta
- Flanergide
- Karmotrine
Top right of your Cocktail Shaker:
- Iced
- Aged
At the bottom of your shaker:
- Left is blend drink (only click this if there is green text at the end of the recipe)
- Right is mix drink (only click this if there is no coloured text at the end of the recipe)
- Circled arrow is resets mixers and starts over.
New collab Extra T-Dolls
- HG JillJillJill - Reward - Acquired after beating E1-8 "Last Rain in the world")
- SG DanaDanaDana - Reward - Acquired after beating E1-1 "Didgeridoo Manual")
- HG SeiSeiSei - Drops from E1-5 and E2-5)
- RF StellaStellaStella - Drops from E1-8 and E2-8)
- SMG DorothyDorothyDorothy - Can be purchased in the event shop for 150 shards, max 1 purchase)
- MG AlmaAlmaAlma - Can be purchased in the event shop for 150 shards, max 1 purchase)
New Exclusive Equipment
Along with this Collaboration Event, All the EXTRAEXTRAEXTRA T-dolls added in from this event all possess Exclusives which can be obtained as following:
- Adelhyde 1 - Obtained alongside Jill from clearing E1-8 "Last Rain in the World"
- Adelhyde 2 - Obtained alongside Jill from clearing E1-8 "Last Rain in the World"
- Bronson Ext - Obtained alongside Jill from clearing E1-8 "Last Rain in the World"
- Flanergide - Obtained alongside Jill from clearing E1-8 "Last Rain in the World"
- Pwd Delta - Obtained alongside Jill from clearing E1-8 "Last Rain in the World"
- Karmotrine 1 - Obtained alongside Jill from clearing E1-8 "Last Rain in the World"
- Karmotrine 2 - Obtained alongside Jill from clearing E1-8 "Last Rain in the World"
- Karmotrine 3 - Obtained alongside Jill from clearing E1-8 "Last Rain in the World"
- Mechanical Arm - Obtained from the Event Shop for 70 shards (Max 1 purchase)
- MIRD5-Class Ammo - Obtained from the Event Shop for 70 shards (Max 1 purchase)
- White Knight Armor - Obtained from the Event Shop for 70 shards (Max 1 purchase)
- Prosthetic Eye - Obtained from the Event Shop for 70 shards (Max 1 purchase)
- Artificial Hands - Obtained from the Event Shop for 70 shards (Max 1 purchase)
New collab Extra fairies
- Anna Graem (Can be purchased in the event shop for 80 shards, max 3 purchases)
Event Shop
Plot
The story can be read here:
- Didgeridoo Manual
- Puberty
- Pioneer
- Sonic Boom
- Chicken Breast
- Glossophobia
- Truth or Dare
- Last Rain in the World
- Habanera
- Bar Mini-game
Event Map
A Few notes to take into consideration before we begin:
- The following guides will pertain to the original version of the Event as they were present on the CN/TW/KR Servers.
- Future servers may have varied changes which will affect the strategies presented here in these guides.
- The presence of certain enemies and bosses may come off as spoilers.
- Maps Provided may not show all enemies.
Commander HS, will be accepting donations of food, preferably sweets, please guys... i'm dying over here
The Following Commanders contributed to these guides:
- HQLV: 161 - HellScythe42 (Administrator)
Didgeridoo Manual (E1-1)

| Battle Type | Day Battle | |||||||||
|---|---|---|---|---|---|---|---|---|---|---|
| Recommended CE | 1000+ | |||||||||
| Map Objective | Capture enemy HQ | |||||||||
| S-Rank Objective | Kill 5 enemies within 3 turns | |||||||||
| Clear Reward | T-doll: SG DanaDanaDana x1 | |||||||||
| Drop Types | Equipment | |||||||||
| Limited Drops | None | |||||||||
Every Event has its beginning, this one is no different, a very simple and straightforward map, you really shouldn't need any guidance for this once.
But i'll continue anyway.
Requirements:
- 2 ~ 3 Echelons
- Any Echelon works
- Overall T-doll's Levels should be 30+ and at 3x dummy links.
- T-dolls skills should be at level 4+
Turn 1:
- Spawn first echelon on HQ and move them 1 tile up
- Spawn 2nd echelon on HQ
- End Turn
Turn 2: (Move echelons into enemies according to their movements)
- Move first echelon 3 tiles closer to the enemy HQ (move 1 tile if you plan to spawn another echelon for more Action points)
- [Optional] - Move 2nd echelon 1 tile out and spawn 3rd echelon on HQ
- End Turn
The rest should be self explanitory. Dont be alarmed by Architect, the map ends upon securing the enemy HQ.
Didgeridoo Manual EX (E2-1)

| Battle Type | Day Battle | |||||||||
|---|---|---|---|---|---|---|---|---|---|---|
| Recommended CE | 26000 | |||||||||
| Map Objective | Capture enemy HQ | |||||||||
| S-Rank Objective | Kill 7 enemies within 3 turns | |||||||||
| Clear Reward | ||||||||||
| Drop Types | Equipment | |||||||||
| Limited Drops | None | |||||||||
Puberty (E1-2)
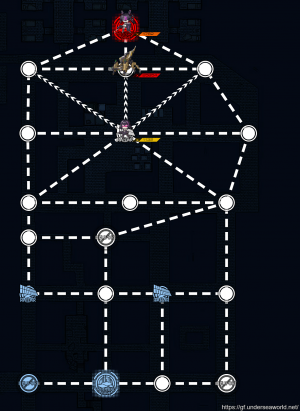
| Battle Type | Night Battle | |||||||||
|---|---|---|---|---|---|---|---|---|---|---|
| Recommended CE | 2000 | |||||||||
| Map Objective | Capture enemy HQ | |||||||||
| S-Rank Objective | Kill 3 enemies within 3 turns | |||||||||
| Clear Reward | ||||||||||
| Drop Types | Equipment | |||||||||
| Limited Drops | None | |||||||||
Puberty EX (E2-2)

| Battle Type | Night Battle | |||||||||
|---|---|---|---|---|---|---|---|---|---|---|
| Recommended CE | 28000 | |||||||||
| Map Objective | Capture enemy HQ | |||||||||
| S-Rank Objective | Kill 3 enemies within 3 turns | |||||||||
| Clear Reward | ||||||||||
| Drop Types | Equipment | |||||||||
| Limited Drops | None | |||||||||
Pioneer (E1-3)
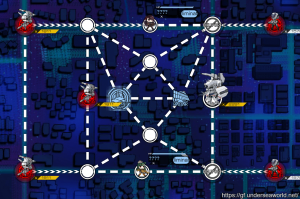
| Battle Type | Night Battle | |||||||||
|---|---|---|---|---|---|---|---|---|---|---|
| Recommended CE | 3500 | |||||||||
| Map Objective | Maintain Supply line for 2 turns | |||||||||
| S-Rank Objective | Maintain Supply line for 2 turns within 5 turns | |||||||||
| Clear Reward | ||||||||||
| Drop Types | T-dolls | |||||||||
| Limited Drops | HG ThunderThunderThunder | |||||||||
Pioneer EX (E2-3)

| Battle Type | Night Battle | |||||||||
|---|---|---|---|---|---|---|---|---|---|---|
| Recommended CE | 32000 | |||||||||
| Map Objective | Maintain Supply line for 2 turns | |||||||||
| S-Rank Objective | Maintain Supply line for 2 turns within 6 turns | |||||||||
| Clear Reward | ||||||||||
| Drop Types | T-dolls | |||||||||
| Limited Drops | HG ThunderThunderThunder | |||||||||
Sonic Boom (E1-4)
| Battle Type | Day Battle | |||||||||
|---|---|---|---|---|---|---|---|---|---|---|
| Recommended CE | 4500 | |||||||||
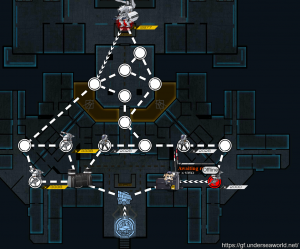
| Map Objective | Search and Rescue 1 Hostage | |||||||||
| S-Rank Objective | Extract 1 Hostage within 4 turns | |||||||||
| Clear Reward | Feline Pet: Fore x1 | |||||||||
| Drop Types | T-dolls | |||||||||
| Limited Drops | RF Mk 12Mk 12Mk 12 | |||||||||
Sonic Boom EX (E2-4)
| Battle Type | Day Battle | |||||||||
|---|---|---|---|---|---|---|---|---|---|---|
| Recommended CE | 34000 | |||||||||
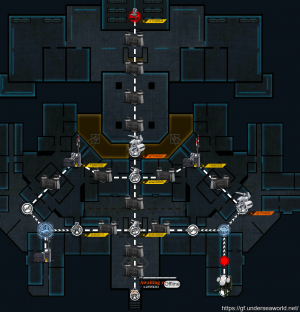
| Map Objective | Search and Rescue 1 Hostage | |||||||||
| S-Rank Objective | Extract 1 Hostage within 4 turns | |||||||||
| Clear Reward | ||||||||||
| Drop Types | T-dolls | |||||||||
| Limited Drops | RF Mk 12Mk 12Mk 12 | |||||||||
Chicken Breast (E1-5)

| Battle Type | Day Battle | |||||||||
|---|---|---|---|---|---|---|---|---|---|---|
| Recommended CE | 5500 | |||||||||
| Map Objective | Search and Rescue 2 Hostages | |||||||||
| S-Rank Objective | Extract 2 Hostages within 7 turns | |||||||||
| Clear Reward | ||||||||||
| Drop Types | T-dolls | |||||||||
| Limited Drops | HG SeiSeiSei | |||||||||
Chicken Breast EX (E2-5)
| Battle Type | Day Battle | |||||||||
|---|---|---|---|---|---|---|---|---|---|---|
| Recommended CE | 36000 | |||||||||
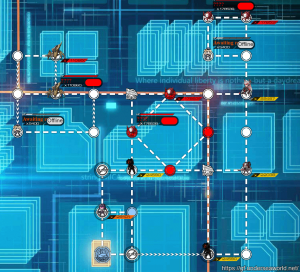
| Map Objective | Search and Rescue 2 Hostages | |||||||||
| S-Rank Objective | Extract 2 Hostages within 7 turns | |||||||||
| Clear Reward | ||||||||||
| Drop Types | T-dolls | |||||||||
| Limited Drops | HG SeiSeiSei | |||||||||
Glossophobia (E1-6)

| Battle Type | Night Battle | |||||||||
|---|---|---|---|---|---|---|---|---|---|---|
| Recommended CE | 7000 | |||||||||
| Map Objective | Capture enemy HQ | |||||||||
| S-Rank Objective | Kill 6 enemies within 3 turns | |||||||||
| Clear Reward | Combat Reports x100 | |||||||||
| Drop Types | T-dolls | |||||||||
| Limited Drops | MG Lewis GunLewis GunLewis Gun | |||||||||
Glossophobia EX (E2-6)

| Battle Type | Night Battle | |||||||||
|---|---|---|---|---|---|---|---|---|---|---|
| Recommended CE | 37000 | |||||||||
| Map Objective | Capture enemy HQ | |||||||||
| S-Rank Objective | Kill 6 enemies within 7 turns | |||||||||
| Clear Reward | ||||||||||
| Drop Types | T-dolls | |||||||||
| Limited Drops | MG Lewis GunLewis GunLewis Gun | |||||||||
Truth or Dare (E1-7)
| Battle Type | Day Battle | |||||||||
|---|---|---|---|---|---|---|---|---|---|---|
| Recommended CE | 10000 | |||||||||
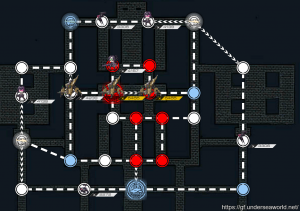
| Map Objective | Capture enemy HQ | |||||||||
| S-Rank Objective | Kill 5 enemies within 2 turns | |||||||||
| Clear Reward | Advanced Combat Reports x100 | |||||||||
| Drop Types | T-dolls | |||||||||
| Limited Drops | HG PythonPythonPython | |||||||||
Truth or Dare EX (E2-7)

| Battle Type | Day Battle | |||||||||
|---|---|---|---|---|---|---|---|---|---|---|
| Recommended CE | 38000 | |||||||||
| Map Objective | Capture enemy HQ | |||||||||
| S-Rank Objective | Kill 9 enemies within 5 turns | |||||||||
| Clear Reward | ||||||||||
| Drop Types | T-dolls | |||||||||
| Limited Drops | HG PythonPythonPython | |||||||||
Last Rain in the world (E1-8)

| Battle Type | Night Battle | |||||||||
|---|---|---|---|---|---|---|---|---|---|---|
| Recommended CE | 14000 | |||||||||
| Map Objective | Capture enemy HQ | |||||||||
| S-Rank Objective | Kill 9 enemies within 4 turns | |||||||||
| Clear Reward | HG JillJillJill x1 Adelhyde 1 x1 Adelhyde 2 x1 Bronson Ext x1 Flanergide s1 Pwd Delta x1 Karmotrine 1 x1 Karmotrine 2 x1 Karmotrine 3 x1 | |||||||||
| Drop Types | T-dolls | |||||||||
| Limited Drops | RF StellaStellaStella | |||||||||
VA-11... Hall.. A... Oh! did you notice the map layout spells the collab? interesting ja?
The final map of the collab, technically normal mode, but you get the idea.
This map is rather tricky... and care must be taken when traversing it, its a night battle map and the boss has evasion, so you better slap your PEQ's on your ARSMG echelons, because Nimogen does not play around, as she's a Micro heavy boss and you'll need to pay full attention to minimize damage done to your echelon against her. You can find a battle strategy about her on her page, so click it, BUT! i'd hold off, because its spoiler territory, i'll just give you a brief rundown shortly but first, lets go through how to get to her in this map so i hope you'd prepared 3 echelons and a spare HG for action points.
The method i'll be showing you is how to clear the map in 3 turns, this strategy can also be used in farming RF StellaStellaStella as well as White Knight Armour Shards for dailies, however its entirely dependant on a singular enemy... but we can still work things through, thats why i suggested to prep a spare HG in your 4th echelon.
Turn 1:
- Spawn ARSMG Echelons on South LZ and Western LZ, then spawn your 3rd echelon onto the 3rd LZ
- Move South echelon 1 tile up, 2 tiles left and 1 tile right (to Encircle the LZ below you)
- Move 3rd echelon 2 tiles down
- End Turn
Turn 2: (Pay close attention now)
- Move South echelon 5 tiles, this should get you to the lower case "a" in "VA-11 Hall-A", this will decide your next actions
- If the Dopplesoldner is blocking the way, Move echelon up 1 tile into the Rodelero. And then spawn your HG behind your 3rd echelon on the top right
- Move your 2nd ARSMG echelon on the west side down 1 tile, then End your turn
- If the Dopplesoldner isn't blocking the way, move your girls onto the Resupply node and move your 2nd ARSMG echelon down 1 tile and disregard spawning the spare HG.
- End Turn
Turn 3: (Listen Up!)
- Enci-- WAIT!, Resupply your first ARSMG echelon.
- Now Encircle the enemy HQ
- [Optional] - If you're under 8 kills, Move your first ARSMG echelon 1 tile to the left and 1 tile to the right and you'll have the requirements to S-Rank the map.
- End Turn. and then Nimogen engages either of your ARSMG echelon
First thing to NOT DO against Nimogen, is panic. there are 3 skills you need to worry about with Nimogen;
- Tide of the Apocalypse: Targets a random T-doll and traps them in their location, sending out damaging shockwaves in straight lines in either north, south, east or west directions from where the sealed T-doll is standing. This skill activates based on a percentage of her remaining HP. (Meaning she can seal 2 T-dolls at once, so be careful)
- Tide Mark: Sends forth a small tide across the ground marking any T-doll within its path, if Nimogen's skills damage any of these Marked T-dolls, they will receive double damage done to them.
- Doppelganger: Upon activating Tide of the Apocalypse, Nimogen summons a stationary dummy, while this dummy remains on the field, the sealed T-dolls will continue to send out periodical shockwaves from Nimogen's main skill, Destroy this Doppelganger ASAP
- Laser Strike: Slowly hops to the front of one of your T-dolls and fires a powerful laser damaging all in its path, if target is marked, they will receive double damage taken.
Now there is a way to lessen the damage taken from Nimogen's Tide... i'm not gonna continue writing down its name, its annoying, you'll know what i'm talking about.
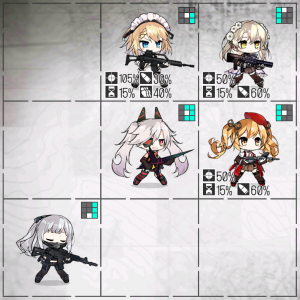
You'll primarily wanna kite your T-dolls straight into an X formation as the battle starts, always make sure your tanks are at the front especially when you're going to need to micro, at no point, should your DPS's end up being microed to the frontline. Kite your T-dolls into the following formations as shown in the screenshots on the side here. Setting up your girls like this in battle is important to keeping damage taken at a minimum level.
As you can see in any of those tile positions, the targeted T-doll, will not be harming their allies, another thing to note about Nimogen's Tide of the apocalypse, is that it DOESN'T DAMAGE THE SEALED UNIT! This is why you must remain calm when dealing with her. JUST DONT PANIC, YA HEAR!? PANIC DAMMIT!! but seriously... its not too bad.
Other then that, her laser beam is also something you should look out for, now you may not have enough time to micro you girls out of the skills way, but if one of your girls is currently sealed and you see her prepping her laser beam... err... tough it out... theres no real way to avoid it at that point.
That should be all to cover with this map, once you Encircle the HQ, and killed Nimogen in the process, you win the map, and hopefully get Jill and Stella in the process. Do your best commanders!
On a sidenote... should you already have Jill unlocked... try putting her into an echelon... and take that echelon to the [!] node in the map and kill whatever is on it... trust me on this one, once you've done that, you can exit the map.
Last Rain in the World EX (E2-8)

| Battle Type | Night Battle | |||||||||
|---|---|---|---|---|---|---|---|---|---|---|
| Recommended CE | 40000 | |||||||||
| Map Objective | Defeat the Boss | |||||||||
| S-Rank Objective | Kill 6 enemies within 7 turns | |||||||||
| Clear Reward | Collaboration Elite Medal x1 | |||||||||
| Drop Types | T-dolls | |||||||||
| Limited Drops | RF StellaStellaStella | |||||||||
Habanera (E3-1)
| Battle Type | Night Battle | |||||||||
|---|---|---|---|---|---|---|---|---|---|---|
| Recommended CE | 14000 | |||||||||
| Map Objective | Defeat the Boss | |||||||||
| S-Rank Objective | Kill 5 enemies within 2 turns | |||||||||
| Clear Reward | ||||||||||
| Drop Types | T-dolls | |||||||||
| Limited Drops | None | |||||||||
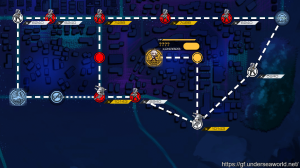
The secret hidden map, which you'll need help from Jill to unlock and a few runs through other maps, we'll keep this short and simple, the path is short and you can clear it in one turn.
Now there is one thing to acknowledge with Dana (Boss)... she has 1,000,000 HP, have fun. as well as other incredibly high stats, dont expect SG's to tank her hits, dont expect your SMG's to dodge forever, dont expect to kill her either, because that is not how you'll be doing this battle.
Spawn your main echelon to the right LZ and spawn a HG on the HQ, and then B-line your other echelon all the way to Dana.
During the boss fight, you'll see a counter appear in the middle, showing how many drinks Dana has gone through, it'll start at 0 and gradually rises through the battle, this process can be accelerated if you bring HG JillJillJill with the appropriate drink setup, in that you make Dana's favorite drink.
You'll preferably want an Evasion focused echelon with high HP SMG's, this is an endurance match, you just have to outlast Dana. Once she reaches her 10th drink, you win. easy ja?


