
This is an example to make costumeSwitcher doesn't break it
Template:StatTable/Sandbox: Difference between revisions
Jump to navigation
Jump to search
Pianoforte (talk | contribs) mNo edit summary |
Pianoforte (talk | contribs) huh |
||
| Line 3: | Line 3: | ||
<div style="display:flex;flex-direction:column;min-width:500px;flex-grow:1"> | <div style="display:flex;flex-direction:column;min-width:500px;flex-grow:1"> | ||
<div style="display:flex;background-color:rgba(0,0,0,0.5);margin:2px;flex-grow:1;flex-direction:column"> | <div style="display:flex;background-color:rgba(0,0,0,0.5);margin:2px;flex-grow:1;flex-direction:column"> | ||
{| style="color:white;width:100%;height:100%;top:0;bottom:0;left:0;right:0" | |||
|- | |||
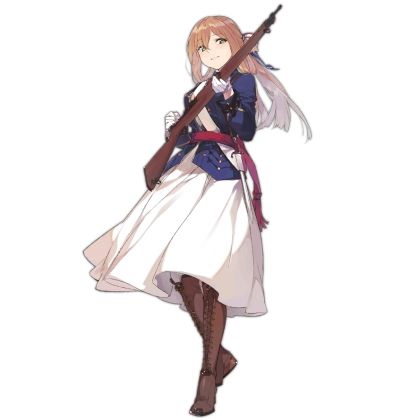
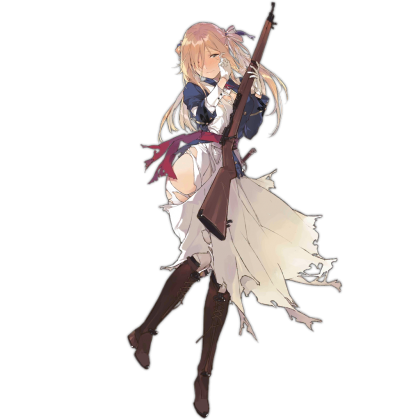
|colspan=2 style="background:rgba(0, 0, 0, 0.25);width:247px;height:193px" |[[File:{{#ifexist:File:{{BASEPAGENAME}}_chibi.png|{{BASEPAGENAME}}_chibi.png|backup_chibi.png}}|link=|center|class=tdoll_chibi]] | |||
|- | |||
|style="background:rgba(127, 127, 127, 0.4);width:25%" |[[File:Icon_dmg.png|25px|link=|left|Damage]] Damage | |||
|style="background:rgba(0, 0, 0, 0.5);padding-left:10px;padding-right:10px;width:25%" | | |||
{| cellspacing = 0 cellpadding = 0 style="width:100%;text-align:center" | |||
| style="width:35%"|{{{min_dmg_t|50}}} | |||
| style="vertical-align:center"| → | |||
| style="width:35%"|{{{max_dmg_t|150}}} | |||
|} | |||
|style="background:rgba(127, 127, 127, 0.4);width:25%" |[[File:Icon_eva.png|25px|link=|left|Evasion]] Evasion | |||
|style="background:rgba(0, 0, 0, 0.5);padding-left:10px;padding-right:10px;width:25%" | | |||
{| cellspacing = 0 cellpadding = 0 style="width:100%;text-align:center" | |||
| style="width:35%"|{{{min_eva_t|5}}} | |||
| style="vertical-align:center"| → | |||
| style="width:35%"|{{{max_eva_t|50}}} | |||
|} | |||
|- | |||
|style="background:rgba(127, 127, 127, 0.4)" |[[File:Icon_acc.png|25px|link=|left|Accuracy]] Accuracy | |||
|style="background:rgba(0, 0, 0, 0.5);padding-left:10px;padding-right:10px" | | |||
{| cellspacing = 0 cellpadding = 0 style="width:100%;text-align:center" | |||
| style="width:35%"|{{{min_acc_t|100}}} | |||
| style="vertical-align:center"| → | |||
| style="width:35%"|{{{max_acc_t|100}}} | |||
|} | |||
|style="background:rgba(127, 127, 127, 0.4)" |[[File:Icon_rof.png|25px|link=|left|Rate of Fire]] Rate of Fire | |||
|style="background:rgba(0, 0, 0, 0.5);padding-left:10px;padding-right:10px" | | |||
{| cellspacing = 0 cellpadding = 0 style="width:100%;text-align:center" | |||
| style="width:35%"|{{{min_rof_t|100}}} | |||
| style="vertical-align:center"| → | |||
| style="width:35%"|{{{max_rof_t|100}}} | |||
|} | |||
|- | |||
|style="background:rgba(127, 127, 127, 0.4)" |[[File:Icon_hp.png|25px|link=|left|Health]] Health | |||
|style="background:rgba(0, 0, 0, 0.5)" | | |||
{| cellspacing = 0 cellpadding = 0 style="width:100%;text-align:center" | |||
| style="width:35%"|<sup>{{{min_hp_t|90}}}</sup>/<sub>{{{min_hp_t|90}}}</sub> | |||
| style="vertical-align:center"| → | |||
| style="width:35%"|<sup>{{{max_hp_t|100}}}</sup>/<sub>{{{max_hp_t|100}}}</sub> | |||
|} | |||
|style="background:rgba(127, 127, 127, 0.4)" |[[File:Icon_mov.png|25px|link=|left|Movement Speed]] Move Speed | |||
|style="background:rgba(0, 0, 0, 0.5);padding-left:10px;padding-right:10px;text-align:center" |{{#if:{{{mov_t|}}}|{{{mov_t|}}}|{{#switch:{{{classification_t|}}}| AR = 10 | RF = 7 | SG = 50% | HG = 15 | MG = 4 | SMG = 12 | 666}}}} | |||
|- | |||
|style="background:rgba(127, 127, 127, 0.4)" |[[File:Icon_armor.png|25px|link=|left|Armor]] Armor | |||
|style="background:rgba(0, 0, 0, 0.5);padding-left:10px;padding-right:10px;text-align:center" | {{#if:{{{min_armor_t|}}}{{{max_armor_t|}}}| | |||
{{{!}} cellspacing = 0 cellpadding = 0 style="width:100%;text-align:center" | |||
{{!}} style="width:35%"{{!}}{{{min_armor_t|100}}} | |||
{{!}} style="vertical-align:center"{{!}} → | |||
{{!}} style="width:35%"{{!}}{{{max_armor_t|100}}} | |||
{{!}}} | |||
|0}} | |||
|style="background:rgba(127, 127, 127, 0.4)" |[[File:Icon_penetration.png|25px|link=|left|Armor Penetration]] Armor Pen. | |||
|style="background:rgba(0, 0, 0, 0.5);padding-left:10px;padding-right:10px;text-align:center" |{{{penetration_t|10}}} | |||
|- | |||
|style="background:rgba(127, 127, 127, 0.4)" |[[File:Icon_crit.png|25px|link=|left|Critical Hit Rate]] Crit. Rate | |||
|style="background:rgba(0, 0, 0, 0.5);padding-left:10px;padding-right:10px;text-align:center" |{{#if:{{{crit_t|}}}|{{{crit_t|}}}|{{#switch:{{{classification_t|}}}| AR = 20% | RF = 40% | SG = 40% | HG = 20% | MG = 5% | SMG = 5% | 666%}}}} | |||
|style="background:rgba(127, 127, 127, 0.4);{{#if:{{{clipsize_t|}}}||filter:brightness(20%)}}" |[[File:Icon_clipsize.png|25px|link=|left|Clip Size]] Clip Size | |||
|style="background:rgba(0, 0, 0, 0.5);padding-left:10px;padding-right:10px;text-align:center" |{{{clipsize_t|}}} | |||
|- | |||
|colspan=4 style="background:rgba(127, 127, 127, 0.4);text-align:center" | Crafting Time | |||
|- | |||
|colspan=4 style="background:rgba(0, 0, 0, 0.5);text-align:center" | {{{craft_t|?}}} | |||
|} | |||
{{#widget:costumeSwitcher | {{#widget:costumeSwitcher | ||
Revision as of 03:54, 17 December 2017
Stats
 | |||||||||
|
| ||||||||
|
| ||||||||
|
666 | ||||||||
| 0 | 10 | ||||||||
| 666% | |||||||||
| Crafting Time | |||||||||
| ? | |||||||||
Tiles
?
Skill
 |
name of skill here | |


This is an example to make costumeSwitcher doesn't break itx2