Difference between revisions of "Heavy Ordnance Corps"
(Initial setup) |
HellScythe42 (talk | contribs) m |
||
| (26 intermediate revisions by 8 users not shown) | |||
| Line 1: | Line 1: | ||
| + | {{Guide}} | ||
| + | {{Cleanup|reason= | ||
| + | *AP Value System | ||
| + | *HOC Targeting | ||
| + | |||
| + | *Resource cost of Chip Enhance? | ||
| + | }} | ||
| + | [[File:HOC_Tutorial_Unit_Dashboard.jpg|400px|right|thumb|Screenshot of HOC unit [[BGM-71]]]] | ||
| + | Heavy Ordnance Corps (HOC for short) is the name of the heavily equipped units in game. First released on {{server short|CN}} before [[Updates/2018/August|2018 summer]] event [[Continuum Turbulence]] they made a big change in gameplay. {{server short|EN}}/{{server short|JP}} followed roughly the same release order ([[Updates_(EN)/2020/January|January 2020]] before Continuum Turbulence). | ||
| + | |||
| + | __TOC__ | ||
| + | |||
== General == | == General == | ||
| − | + | HOC units are handled different than normal [[T-Doll|T-Dolls]]. There can only be one instance of each HOC unit, so they are rather unlocked than gained. To unlock a HOC unit, '''five [[#Known units|Central Data]]''' need to be prepared. Further Central Data will be needed to promote the HOC unit. An additional, method to obtain HOC Fragments of the newer released units is from [[Theater Mode]], a recurring event that hosts the newest HOC unit as an event & ranking reward. Once unlocked there is no way to lose them as there is no mechanic to release or scrap them. | |
| − | + | ||
| − | + | They do not have equipment, but can be strengthened with [[#Chips|Chips]]. | |
| − | + | ||
| + | HOC units appear as normal units on the battlefield. For a proper introduction on how to handle them, please see [[#In Practice|In battle]]. | ||
| + | The HOC feature introduces two new buildings to the [[Guide:3D Base|Headquarters]]: The [[#Intelligence Center|Intelligence Center]] and the [[#Garage|Garage]]. | ||
| + | |||
| + | === Facilities === | ||
| + | :{| class="gf-table mw-collapsible mw-collapsed" | ||
| + | ! Next Level | ||
| + | ! Time to Level Up | ||
| + | ! Batteries{{Icon|battery}}Required | ||
| + | |- | ||
| + | | Lv. 0 | ||
| + | | --:-- | ||
| + | | N/A | ||
| + | |- | ||
| + | | Lv. 1 | ||
| + | | 0:01 | ||
| + | | 5 | ||
| + | |- | ||
| + | | Lv. 2 | ||
| + | | 0:05 | ||
| + | | 50 | ||
| + | |- | ||
| + | | Lv. 3 | ||
| + | | 0:30 | ||
| + | | 100 | ||
| + | |- | ||
| + | | Lv. 4 | ||
| + | | 1:00 | ||
| + | | 150 | ||
| + | |- | ||
| + | | Lv. 5 | ||
| + | | 2:00 | ||
| + | | 200 | ||
| + | |- | ||
| + | | Lv. 6 | ||
| + | | 4:00 | ||
| + | | 250 | ||
| + | |- | ||
| + | | Lv. 7 | ||
| + | | 8:00 | ||
| + | | 350 | ||
| + | |- | ||
| + | | Lv. 8 | ||
| + | | 12:00 | ||
| + | | 450 | ||
| + | |- | ||
| + | | Lv. 9 | ||
| + | | 18:00 | ||
| + | | 600 | ||
| + | |- | ||
| + | | Lv. 10 | ||
| + | | 24:00 | ||
| + | | 800 | ||
| + | |- | ||
| + | |} | ||
| + | |||
| + | === Access === | ||
| + | [[File:HOC_Tutorial_Access.jpg|250px|right|thumb|Accessing the new rooms as seen in the in-game tutorial]] | ||
| + | All interactions with the new HOC feature are within the new buildings/rooms. They will be unlocked with beating [[Story#Episode_08_-_Spark|chapter 8 stage 5]]. | ||
| − | + | The newly available room can be accessed by either of the following ways: | |
| + | * Tapping the Intelligence Center in the Headquarters (HQ) menu (the overview of all rooms of the HQ). It's in the outer ring. | ||
| + | * Tapping the Intelligence Center in the quick-base-menu on the main screen. It will be one of the available quick-switch-options | ||
| + | * On the main screen on the left quick-overview. The [[WAVE|WAVE Tech.]] Logo will lead to the room. Also, it will show possible Samples to harvest. | ||
| − | == | + | {{clr}} |
| + | == Intelligence Center == | ||
| + | {{ThumbSlider|mode=stopslider|width=250|align=right|list= | ||
| + | <div class="jcarousel-item">[[File:HOC_Tutorial_Intelligence_Center.jpg|250px|right|thumb|Intelligence Center (Initial; no facilities unlocked)]]</div> | ||
| + | <div class="jcarousel-item">[[File:HOC_Tutorial_Intelligence_Center_Level_1.jpg|250px|right|thumb|Intelligence Center (all facilities on Level 1)]]</div> | ||
| + | }} | ||
| + | The Intelligence Center is the main place to gain Central Data and Chips for the HOC units. | ||
| + | {{clr}} | ||
| − | === | + | === Infrastructure Upgrade === |
| + | :{| class="gf-table mw-collapsible mw-collapsed" | ||
| + | ! Next Level | ||
| + | ! Data Hub {{Icon|hocdata}} / {{Icon|hocpuredata}} | ||
| + | ! Mission Center | ||
| + | ! Storage {{Icon|hocdata}} / {{Icon|hocpuredata}} | ||
| + | ! Analysis | ||
| + | |- | ||
| + | | Lv. 0 | ||
| + | | Gen 10 / 0, Hold 90 / 0 | ||
| + | | <span style="color:Orange">Level 1</span>, Rewards 1x | ||
| + | | 600 / 20 | ||
| + | | Slot 1, Time <span style="color:red">100%</span> | ||
| + | |- | ||
| + | | Lv. 1 | ||
| + | | Gen 14 / 2; Hold 126 / 18 | ||
| + | | 1.25x Reward | ||
| + | | 900 / 100 | ||
| + | | Slot 2, Time <span style="color:red">95%</span> | ||
| + | |- | ||
| + | | Lv. 2 | ||
| + | | Gen 18 / 4; Hold 162 / 36 | ||
| + | | 1.5x Reward | ||
| + | | 1200 / 200 | ||
| + | | Slot 3, Time <span style="color:orangered">90%</span> | ||
| + | |- | ||
| + | | Lv. 3 | ||
| + | | Gen 22 / 6; Hold 198 / 54 | ||
| + | | <span style="color:DarkOrange">Level 2</span> | ||
| + | | 1500 / 300 | ||
| + | | Slot 4, Time <span style="color:orangered">85%</span> | ||
| + | |- | ||
| + | | Lv. 4 | ||
| + | | Gen 26 / 8; Hold 234 / 72 | ||
| + | | 1.75x Reward | ||
| + | | 1800 / 400 | ||
| + | | Slot 5, Time <span style="color:orange">80%</span> | ||
| + | |- | ||
| + | | Lv. 5 | ||
| + | | Gen 30 / 10; Hold 270 / 90 | ||
| + | | 2x Reward | ||
| + | | 2100 / 500 | ||
| + | | Slot 6, Time <span style="color:gold">75%</span> | ||
| + | |- | ||
| + | | Lv. 6 | ||
| + | | Gen 34 / 12 ; Hold 306 / 108 | ||
| + | | 2.25x Reward | ||
| + | | 2400 / 600 | ||
| + | | Slot 7, Time <span style="color:yellow">70%</span> | ||
| + | |- | ||
| + | | Lv. 7 | ||
| + | | Gen 38 / 14; Hold 342 / 126 | ||
| + | | <span style="color:Coral">Level 3</span> | ||
| + | | 2700 / 700 | ||
| + | | Slot 8, Time <span style="color:limegreen">65%</span> | ||
| + | |- | ||
| + | | Lv. 8 | ||
| + | | Gen 42 / 16; Hold 378 / 144 | ||
| + | | 2.5x Reward | ||
| + | | 3000 / 800 | ||
| + | | Slot 9, Time <span style="color:limegreen">60%</span> | ||
| + | |- | ||
| + | | Lv. 9 | ||
| + | | Gen 46 / 18; Hold 414 / 162 | ||
| + | | 2.75x Reward | ||
| + | | 3300 / 900 | ||
| + | | Slot 10, Time <span style="color:lime">55%</span> | ||
| + | |- | ||
| + | | Lv. 10 | ||
| + | | Gen 50 / 20; Hold 450 / 180 | ||
| + | | 3x Reward | ||
| + | | 3600 / 1000 | ||
| + | | Time <span style="color:lime">25%</span> | ||
| + | |- | ||
| + | |} | ||
| + | === Data receiver === | ||
| − | === | + | [[File:HOC_Tutorial_Data_Sampling.jpg|250px|right|thumb|Tapping the bubble with the samples will result in harvesting them]] |
| + | Every 8 (eight) hours from 00:00 (+8GMT), {{Icon|hocdata}} Original Samples and {{Icon|hocpuredata}} Pure Samples can be harvested here. The samples will remain at the Data Receiver until one collects it and will continue to gather over time until it reaches a certain cap. This cap can be raised by upgrading this facility. | ||
| + | {{clr}} | ||
| + | === Intelligence quests === | ||
| − | + | [[File:HOC_Tutorial_Data_Quests.jpg|250px|right|thumb|The Intelligence Quests as seen in the in-game tutorial]] | |
| + | Provides quests rewarding Samples. The Intelligence Quests will offer new quests each day. Existing quest progress will be lost with the change of the day. Despite only specifying so once, '''None''' of the Quests may be completed through the Auto-Battle feature. | ||
| − | + | Quest rewards are {{Icon|hocdata}} Original Samples and {{Icon|hocpuredata}} Pure Samples. | |
| − | + | Depending on the upgrade level of the facility, up to 3 (three) quests are provided. | |
| − | |||
| − | |||
| − | + | ''Following table displays Missions and Rewards from a max level Intelligence Center.'' | |
| + | <div style='text-align: center;> | ||
| + | {| class="gf-table style="width: 85%; border-style: solid; border-width: 3px" | ||
| + | |- | ||
| + | ! <span style="color:Orange">Level 1</span> | ||
| + | ! <span style="color:DarkOrange">Level 2</span> | ||
| + | ! <span style="color:Coral">Level 3</span> | ||
| + | |- | ||
| + | | (30 {{Icon|hocdata}} 9 {{Icon|hocpuredata}}) | ||
| + | | (30 {{Icon|hocdata}} 12 {{Icon|hocpuredata}}) | ||
| + | | (30 {{Icon|hocdata}} 15 {{Icon|hocpuredata}}) | ||
| + | |- | ||
| + | | | ||
| + | | | ||
| + | | | ||
| + | |- | ||
| + | | • Clear any map once (Auto Battles do not count). | ||
| + | | • Clear a Normal map once. | ||
| + | | • Kill 1 Boss in a victorious battle. | ||
| + | |- | ||
| + | | • Destroy 5 enemy units in a victorious battle. | ||
| + | | • Clear an Emergency map once. | ||
| + | | • Clear Normal 6-6 once. | ||
| + | |- | ||
| + | | • Destroy 3 unarmored units in a victorious battle. | ||
| + | | • Clear a Night map once. | ||
| + | | • Clear Normal 7-6 once. | ||
| + | |- | ||
| + | | • Destroy 3 armored units in a victorious battle. | ||
| + | | • Clear Normal 4-6 twice. | ||
| + | | | ||
| + | |- | ||
| + | | | ||
| + | | • Clear Normal 5-6 twice. | ||
| + | | | ||
| + | |- | ||
| + | |} | ||
| + | </div> | ||
| − | == | + | <!--'''Intelligence Quests:''' |
| + | {| class="gf-table mw-collapsible mw-collapsed" style="text-align:center;" | ||
| + | |- | ||
| + | !Intel Mission (I, II, III) | ||
| + | !Quest (Description) | ||
| + | !Reward {{Icon|hocdata}} / {{Icon|hocpuredata}} | ||
| + | |- | ||
| + | |I | ||
| + | |Clear any map once (Auto Battles do not count). | ||
| + | |Original Sample x 30 / Pure Sample x 9 | ||
| + | |- | ||
| + | |I | ||
| + | |Destroy 5 enemy units in a victorious battle. | ||
| + | |Original Sample x 30 / Pure Sample x 9 | ||
| + | |- | ||
| + | |I | ||
| + | |Destroy 3 unarmored units in a victorious battle. | ||
| + | |Original Sample x 30 / Pure Sample x 9 | ||
| + | |- | ||
| + | |I | ||
| + | |Destroy 3 armored units in a victorious battle. | ||
| + | |Original Sample x 30 / Pure Sample x 9 | ||
| + | |- | ||
| + | | | ||
| + | | | ||
| + | | | ||
| + | |- | ||
| + | |II | ||
| + | |Clear a Normal map once. | ||
| + | |Original Sample x 30 / Pure Sample x 12 | ||
| + | |- | ||
| + | |II | ||
| + | |Clear an Emergency map once. | ||
| + | |Original Sample x 30 / Pure Sample x 12 | ||
| + | |- | ||
| + | |II | ||
| + | |Clear a Night map once. | ||
| + | |Original Sample x 30 / Pure Sample x 12 | ||
| + | |- | ||
| + | |II | ||
| + | |Clear Normal 4-6 twice. | ||
| + | |Original Sample x 30 / Pure Sample x 12 | ||
| + | |- | ||
| + | |II | ||
| + | |Clear Normal 5-6 twice. | ||
| + | |Original Sample x 30 / Pure Sample x 12 | ||
| + | |- | ||
| + | | | ||
| + | | | ||
| + | | | ||
| + | |- | ||
| + | |III | ||
| + | |Kill 1 Boss in a victorious battle. | ||
| + | |Original Sample x 30 / Pure Sample x 15 | ||
| + | |- | ||
| + | |III | ||
| + | |Clear Normal 6-6 once. | ||
| + | |Original Sample x 30 / Pure Sample x 15 | ||
| + | |- | ||
| + | |III | ||
| + | |Clear Normal 7-6 once. | ||
| + | |Original Sample x 30 / Pure Sample x 15 | ||
| + | |- | ||
| + | |} | ||
| − | + | Alternative Table...--> | |
| − | |||
| − | |||
| − | |||
| − | |||
| − | |||
| − | |||
| − | |||
| − | |||
| − | === | + | === Data storage === |
| − | + | Defines how many {{Icon|hocdata}} Original Samples and {{Icon|hocpuredata}} Pure Samples can be storaged. Upgrading this facility will increase the amount of Samples storable. | |
| − | |||
| − | |||
| − | |||
| − | |||
| − | |||
| − | === | + | === Computer === |
| − | + | {{ThumbSlider|mode=stopslider|width=250|align=right|list= | |
| + | <div class="jcarousel-item">[[File:HOC_Tutorial_Data_Processing.jpg|250px|right|thumb|The data processing can be accessed by tapping the computer or the yellow "Intelligence Analysis" button]]</div> | ||
| + | <div class="jcarousel-item">[[File:HOC_Tutorial_Data_Sample_Processing.jpg|250px|right|thumb|At analysis level 1, only two research tasks can be queued at once]]</div> | ||
| + | <div class="jcarousel-item">[[File:HOC_Tutorial_Sample_Results.jpg|250px|right|thumb|The results of a processing task as seen in the in-game tutorial]]</div> | ||
| + | <div class="jcarousel-item">[[File:HOC_Tutorial_Chips.jpg|250px|right|thumb|Chips can be said to be the equipment of HOC units]]</div> | ||
| + | }} | ||
| + | Processes {{Icon|hocdata}} Original Samples and {{Icon|hocpuredata}} Pure Samples into [[#Chips|Chips]] or Central Data. | ||
| − | + | The general rules of processing are as follows: | |
| + | * The level of the Computer determines the research tasks that can be started parallel and the time it will take (Starting at 8 hours and 1 Slot at level zero to being reduced to 2 hours and upgraded to 10 Slots at max level). | ||
| + | * A research task can be started either with 20 {{Icon|hocdata}} Original Samples or 20 {{Icon|hocpuredata}} Pure Samples. | ||
| + | ** {{Icon|hocpuredata}} Pure Samples have a higher chance to result in a Central Data unit. | ||
| + | ** Research task can be finished instantly with a {{Icon|quickanalysis}} Quick Analysis Contract similiar to repair or production. | ||
| + | * The result will be a [[#Chip|Chip]] or a Central Data instance of a HOC unit. | ||
| + | ** Central Data will be automatically assigned to the corresponding HOC unit. | ||
| + | ** If the HOC unit is already at its maximum, the Central Data will be automatically converted to a {{Icon|wavedatapatch}} WAVE Data Patch. | ||
| − | + | [[File:HOC_Tutorial_Unlock_Or_RankUp.jpg|250px|right|thumb|The symbol of the HOC unit has a plus sign as overlay]] | |
| + | When enough Central Data for a HOC unit's promotion or unlocking is collected, it can be applied by tapping the corresponding icon on the bottom. Depending on the currently activated tab at the bottom a switch to "all" might be necessary. | ||
| + | {{clr}} | ||
| − | == | + | == Garage == |
| − | + | [[File:HOC_Tutorial_Garage_Overview.jpg|250px|right|thumb|The garage as seen in the in-game-tutorial]] | |
| + | The Garage provides facilities necessary to manage HOC units and Chips. | ||
| + | {{clr}} | ||
| + | === Infrastructure Upgrade === | ||
| + | :{| class="gf-table mw-collapsible mw-collapsed" | ||
| + | ! Facility Level | ||
| + | ! Storage [[File:HOC Chip.png|35px]] | ||
| + | ! Maintenance Machinery | ||
| + | ! Training Range | ||
| + | ! Elevator | ||
| + | |- | ||
| + | | Lv. 0 | ||
| + | | 100 | ||
| + | | Repair Slot 1 | ||
| + | | Research Slot 1, {{Icon|advancedcombatreport}} <span style="Color:darkturquoise">(1/hour)</span> | ||
| + | | Travel Between Basement Floors (Base - B1 - B2 . . .) | ||
| + | |- | ||
| + | | Lv. 1 | ||
| + | | 210 | ||
| + | | Repair Slot 2 | ||
| + | | <span style="Color:darkturquoise"> {{Icon|advancedcombatreport}} (3/hour)</span> | ||
| + | | | ||
| + | |- | ||
| + | | Lv. 2 | ||
| + | | 320 | ||
| + | | Repair Slot 3 | ||
| + | | Research Slot 2 | ||
| + | | | ||
| + | |- | ||
| + | | Lv. 3 | ||
| + | | 430 | ||
| + | | Repair Slot 4 | ||
| + | | <span style="Color:darkturquoise"> {{Icon|advancedcombatreport}} (5/hour)</span> | ||
| + | | | ||
| + | |- | ||
| + | | Lv. 4 | ||
| + | | 540 | ||
| + | | | ||
| + | | <span style="Color:darkturquoise"> {{Icon|advancedcombatreport}} (7/hour)</span> | ||
| + | | | ||
| + | |- | ||
| + | | Lv. 5 | ||
| + | | 650 | ||
| + | | | ||
| + | | Research Slot 3 | ||
| + | | | ||
| + | |- | ||
| + | | Lv. 6 | ||
| + | | 760 | ||
| + | | | ||
| + | | <span style="Color:darkturquoise"> {{Icon|advancedcombatreport}} (9/hour)</span> | ||
| + | | | ||
| + | |- | ||
| + | | Lv. 7 | ||
| + | | 870 | ||
| + | | | ||
| + | | <span style="Color:darkturquoise"> {{Icon|advancedcombatreport}} (11/hour)</span> | ||
| + | | | ||
| + | |- | ||
| + | | Lv. 8 | ||
| + | | 980 | ||
| + | | | ||
| + | | Research Slot 4 | ||
| + | | | ||
| + | |- | ||
| + | | Lv. 9 | ||
| + | | 1090 | ||
| + | | | ||
| + | | <span style="Color:darkturquoise"> {{Icon|advancedcombatreport}} (13/hour)</span> | ||
| + | | | ||
| + | |- | ||
| + | | Lv. 10 | ||
| + | | 1200 | ||
| + | | | ||
| + | | <span style="Color:darkturquoise"> {{Icon|advancedcombatreport}} (15/hour)</span> | ||
| + | | | ||
| + | |- | ||
| + | |} | ||
| − | |||
| − | + | === Storage === | |
| − | ** | + | |
| − | ** Can first be | + | The Storage holds onto all Chips collected. Upgrading the Storage increases the amount of Chips storable. It has no further function. |
| − | ** | + | |
| − | * | + | The facility's level determines the amount of Chips which can be stored. |
| − | * HOC units support | + | |
| − | ** Multiple HOC units can support an echelon | + | === Maintenance Machinery === |
| − | * | + | |
| − | * | + | [[File:HOC_Tutorial_Maintenance_Machinery.jpg|250px|right|thumb|The facility's menu as seen in-game]] |
| − | * If attacked by an enemy the HOC unit will flee ( | + | The repair station for damaged HOC units. HOC units can be repaired by opening the facility's menu and choosing the HOC unit which shall be repaired. |
| + | |||
| + | When there are damaged HOC units, the T-Doll repair menu will show an additional button to start the repair of the HOC unit, too. | ||
| + | |||
| + | Each facility level adds another slot up to a max. level of three (=four slots). | ||
| + | |||
| + | |||
| + | |||
| + | |||
| + | '''Repair Cost''' | ||
| + | |||
| + | The cost of an HOC Repair appears to be the same regardless of whether minimal damage was taken or the HOC was put Out of Commission (ooc). | ||
| + | ''Repair Cost and Timers are only affected by an HOC's level and not by their rarity.'' | ||
| + | |||
| + | Similar to T-Dolls, repairing only comes at the cost of Manpower (MP), Parts (P) and Repair Time. | ||
| + | ''The cost to forego the repair timer is ALWAYS 10 quick repairs'' {{Icon|quickrepair}}. | ||
| + | |||
| + | <span style="color:turquoise">MP = Manpower, P = Parts, pl = per level</span> | ||
| + | |||
| + | Formulas: | ||
| + | |||
| + | : Repair Cost: 240 MP {{Icon|Manpower}} + 12 (pl) / 120 P {{Icon|Parts}} + 6 (pl) | ||
| + | : Repair Time: 20880 Seconds + 864 Seconds (pl) | ||
| + | |||
| + | |||
| + | <span style="color:yellow">Please Be Aware of Time Conversions!</span> | ||
| + | |||
| + | Example: | ||
| + | |||
| + | : Level 50 HOC | ||
| + | : 20880 seconds + (864 seconds*(Level 50)) = 64080 seconds | ||
| + | : 64080 seconds ÷ 3600 seconds = 17.8 hours | ||
| + | : 0.8 hours × 60 minutes = 48.0 minutes | ||
| + | : Repair Time = 17 hours, 48 minutes, and 0 seconds | ||
| + | |||
| + | |||
| + | === Training Range === | ||
| + | |||
| + | {{ThumbSlider|mode=stopslider|width=250|align=right|list= | ||
| + | <div class="jcarousel-item">[[File:HOC_Tutorial_Training_Range.jpg|250px|right|thumb|The Training Range facility as seen in the in-game tutorial]]</div> | ||
| + | <div class="jcarousel-item">[[File:HOC_Tutorial_Skill_Training.jpg|250px|right|thumb|Both experience and skill training are accessible over the HOC unit, too]]</div> | ||
| + | <div class="jcarousel-item">[[File:HOC_Tutorial_Exp_Training.jpg|250px|right|thumb|Screenshot of the experience training menu]]</div> | ||
| + | <div class="jcarousel-item">[[File:HOC_Tutorial_Exp_Training_Access.jpg|250px|right|thumb|The unit's dashboard leads to the Training Range, too]]</div> | ||
| + | }}The Training Range is used for both experience and skill training of HOC units. Units in training are not available for use in missions. | ||
| + | |||
| + | Upgrading this facility will increase the amount of units able to be trained in parallel. It will also affect the amount of {{Icon|advancedcombatreport}} Special Combat Reports consumed in Experience Training. Special Combat Reports are produced in the [[Dormitory#Data Room|Data Room]]; in the Office Desk's menu, press the right box to select. Their production follows the exact same rules as normal Battle Reports. | ||
| + | |||
| + | For each slot in the facility one HOC unit is selected. For each HOC unit the type of training has to be selected (Experience or Skill Training). | ||
| + | |||
| + | Once a training has been ordered, it cannot be cancelled. To complete either immediately, a single {{Icon|Quick Training Contract}} Quick Training Contract will be used. | ||
| + | |||
| + | For Experience Training, both {{Icon|battery}} batteries and {{Icon|advancedreport}} Special Combat Reports are needed. The amount consumed depends on the upgrade level of the facility and the hours of training set with the slider. You will always need at least 5 {{Icon|battery}} per hour, regardless of the level of the Training Facility; therefore, it is recommended to wait until Level 10 for the best results (15 {{Icon|advancedreport}} for the same 5 {{Icon|battery}}). | ||
| + | |||
| + | |||
| + | For Skill Training, both {{Icon|battery}} batteries and the three different tiers of {{Icon|basicdata}}{{Icon|intdata}}{{Icon|advdata}} data are needed. The time needed for training depends on the skill level. The first skill of each HOC, however, is special: it requires double the amount of data and slightly different amount of time (generally double as well). | ||
| + | :{| class="gf-table mw-collapsible mw-collapsed" | ||
| + | !Level | ||
| + | !Training Data (Skill 1) | ||
| + | !Training Data (Skill 2 and 3) | ||
| + | !Time (Skill 1) | ||
| + | !Time (Skill 2 and 3) | ||
| + | !Total Costs | ||
| + | |- | ||
| + | |Lv. 1 → Lv. 2 | ||
| + | |200x {{Icon|basicdata}} + 50x {{Icon|batteries}} | ||
| + | |100x {{Icon|basicdata}} + 50x {{Icon|batteries}} | ||
| + | |style="text-align: center;" | 2:00:00 | ||
| + | |style="text-align: center;" | 1:00:00 | ||
| + | |400x {{Icon|basicdata}} + 150x {{Icon|batteries}} | ||
| + | |- | ||
| + | |Lv. 2 → Lv. 3 | ||
| + | |400x {{Icon|basicdata}} + 50x {{Icon|batteries}} | ||
| + | |200x {{Icon|basicdata}} + 50x {{Icon|batteries}} | ||
| + | |style="text-align: center;" | 4:00:00 | ||
| + | |style="text-align: center;" | 2:00:00 | ||
| + | |800x {{Icon|basicdata}} + 150x {{Icon|batteries}} | ||
| + | |- | ||
| + | |Lv. 3 → Lv. 4 | ||
| + | |600x {{Icon|basicdata}} + 50x {{Icon|batteries}} | ||
| + | |300x {{Icon|basicdata}} + 50x {{Icon|batteries}} | ||
| + | |style="text-align: center;" | 6:00:00 | ||
| + | |style="text-align: center;" | 3:00:00 | ||
| + | |1200x {{Icon|basicdata}} + 150x {{Icon|batteries}} | ||
| + | |- | ||
| + | |Lv. 4 → Lv. 5 | ||
| + | |200x {{Icon|intdata}} + 80x {{Icon|batteries}} | ||
| + | |100x {{Icon|intdata}} + 80x {{Icon|batteries}} | ||
| + | |style="text-align: center;" | 12:00:00 | ||
| + | |style="text-align: center;" | 6:00:00 | ||
| + | |400x {{Icon|intdata}} + 240x {{Icon|batteries}} | ||
| + | |- | ||
| + | |Lv. 5 → Lv. 6 | ||
| + | |400x {{Icon|intdata}} + 80x {{Icon|batteries}} | ||
| + | |200x {{Icon|intdata}} + 80x {{Icon|batteries}} | ||
| + | |style="text-align: center;" | 18:00:00 | ||
| + | |style="text-align: center;" | 9:00:00 | ||
| + | |800x {{Icon|intdata}} + 240x {{Icon|batteries}} | ||
| + | |- | ||
| + | |Lv. 6 → Lv. 7 | ||
| + | |600x {{Icon|intdata}} + 80x {{Icon|batteries}} | ||
| + | |300x {{Icon|intdata}} + 80x {{Icon|batteries}} | ||
| + | |style="text-align: center;" | 24:00:00 | ||
| + | |style="text-align: center;" | 12:00:00 | ||
| + | |1200x {{Icon|intdata}} + 240x {{Icon|batteries}} | ||
| + | |- | ||
| + | |Lv. 7 → Lv. 8 | ||
| + | |200x {{Icon|advdata}} + 100x {{Icon|batteries}} | ||
| + | |100x {{Icon|advdata}} + 100x {{Icon|batteries}} | ||
| + | |style="text-align: center;" | 30:00:00 | ||
| + | |style="text-align: center;" | 15:00:00 | ||
| + | |400x {{Icon|advdata}} + 300x {{Icon|batteries}} | ||
| + | |- | ||
| + | |Lv. 8 → Lv. 9 | ||
| + | |400x {{Icon|advdata}} + 100x {{Icon|batteries}} | ||
| + | |200x {{Icon|advdata}} + 100x {{Icon|batteries}} | ||
| + | |style="text-align: center;" | 36:00:00 | ||
| + | |style="text-align: center;" | 18:00:00 | ||
| + | |800x {{Icon|advdata}} + 300x {{Icon|batteries}} | ||
| + | |- | ||
| + | |Lv. 9 → Lv. 10 | ||
| + | |600x {{Icon|advdata}} + 100x {{Icon|batteries}} | ||
| + | |300x {{Icon|advdata}} + 100x {{Icon|batteries}} | ||
| + | |style="text-align: center;" | 48:00:00 | ||
| + | |style="text-align: center;" | 24:00:00 | ||
| + | |1200x {{Icon|advdata}} + 300x {{Icon|batteries}} | ||
| + | |} | ||
| + | {{clr}} | ||
| + | |||
| + | === Central Data Refactoring === | ||
| + | [[File:HOC_Tutorial_Code_Refactoring.jpg|250px|right|thumb|The UI for refactoring Central Data]] | ||
| + | Facility used for refactoring Central Data of HOC units to {{Icon|wavedatapatch}} WAVE Data Patches. WAVE Data Patches are used to further boost a HOC's rarity and increase their stats beyond maximum. Central Data to be refactored needs to be dragged over to the right field. The choice will be confirmed with "OK". | ||
| + | |||
| + | In early stages it is not recommended to use this facility at all. In the newer versions of the game refactoring Central Data in early stages is forbidden to prevent accidentally scrapping important Central Data. | ||
| + | {{clr}} | ||
| + | === Elevator === | ||
| + | |||
| + | [[File:HOC_Tutorial_Camp_B1.jpg|250px|right|thumb|Only BGM-71 unlocked in this case]] | ||
| + | |||
| + | Clicking on the Elevator in the Garage will lead to separate rooms in the basement. Each rooms ID will be noted on the top left of the screen. This place is another overview of the HOC units. | ||
| + | *B1 Exhibition: The following units will be displayed on four podiums from left to right: [[BGM-71]], [[AGS-30]], [[2B14]], [[M2]] | ||
| + | *B2 Exhibition: The following units will be displayed on four podiums from left to right: [[AT4]], [[QLZ-04]], [[Mk 153]], (Fourth not known) | ||
| + | {{clr}} | ||
| + | |||
| + | === Support Unit === | ||
| + | [[File:HOC_Tutorial_Unit_Overview.jpg|250px|right|thumb|The list of Support Units is accessable through the bottom right button at the Garage]] | ||
| + | The Support Unit overview lists all available HOC units. Unlocked units provide further interactions. | ||
| + | {{clr}} | ||
| + | ==== Stat enhancement ==== | ||
| + | [[File:HOC_Tutorial_Stat_Enhancement.jpg|250px|right|thumb|Description of stat enhancement as seen in the in-game tutorial]] | ||
| + | Similar to stat enhancement of T-Dolls, HOC units can raise their stats by consuming {{Icon|pill}} Enhancement Pills. HOC units increase their stat capacities through level increases (up to Lvl. 100) | ||
| + | |||
| + | In contrast to T-Dolls, HOC units' stats need to be upgraded each for its own. | ||
| + | |||
| + | Not all stats increase with a 1:1 rate: | ||
| + | * [[File:Icon_HOC_Shelling_Damage.png|25px]] Lethality increases 1 per pill | ||
| + | * [[File:Icon_HOC_Defense_Piercing.png|25px]] Armor piercing increases 3 per pill | ||
| + | * [[File:Icon_HOC_Shelling_Accuracy.png|25px]] Accuracy increases 3 per pill | ||
| + | * [[File:Icon_HOC_Reload_Speed.png|25px]] Loading increases 2 per pill | ||
| + | {{clr}} | ||
| + | |||
| + | ==== Promotion ==== | ||
| + | [[File:HOC_Tutorial_Rank_Up.jpg|250px|right|thumb|]] | ||
| + | A HOC unit's iteration (star rank) can be upgraded up to five yellow stars with Central Data by promoting it. Further upgrades are possible once the unit reaches rarity 5, level 100. Upgrades beyond five yellow stars require {{Icon|wavedatapatch}} WAVE Data Patches. The iteration description continues with "one empty star", "one filled star", "one filled and one empty star" and so on. The red stars will overlay the yellow ones. In order to iterate a unit, the unit must be at max level and rarity (level 100, 5-Star). | ||
| + | |||
| + | {| class="gf-table mw-collapsible mw-collapsed" | ||
| + | |- | ||
| + | ! Rank | ||
| + | ! Central Data Cost | ||
| + | ! Total | ||
| + | |- | ||
| + | | 1 | ||
| + | | 5 | ||
| + | | 5 | ||
| + | |- | ||
| + | | 2 | ||
| + | | 10 | ||
| + | | 15 | ||
| + | |- | ||
| + | | 3 | ||
| + | | 15 | ||
| + | | 30 | ||
| + | |- | ||
| + | | 4 | ||
| + | | 20 | ||
| + | | 50 | ||
| + | |- | ||
| + | | 5 | ||
| + | | 30 | ||
| + | | 80 | ||
| + | |- | ||
| + | |} | ||
| + | |||
| + | {| class="gf-table mw-collapsible mw-collapsed" | ||
| + | |- | ||
| + | ! Iteration | ||
| + | ! {{Icon|wavedatapatch}} Cost | ||
| + | ! Commulative Cost | ||
| + | |- | ||
| + | | <span style="color:orange">★</span> - <span style="color:orange">★★★★★</span> | ||
| + | | (Central Data) | ||
| + | | (Central Data) | ||
| + | |- | ||
| + | | <span style="color:red">☆</span><span style="color:orange">★★★★</span> | ||
| + | | 5 | ||
| + | | 5 | ||
| + | |- | ||
| + | | <span style="color:red">★</span><span style="color:orange">★★★★</span> | ||
| + | | 8 | ||
| + | | 13 | ||
| + | |- | ||
| + | | <span style="color:red">★☆</span><span style="color:orange">★★★</span> | ||
| + | | 10 | ||
| + | | 23 | ||
| + | |- | ||
| + | | <span style="color:red">★★</span><span style="color:orange">★★★</span> | ||
| + | | 15 | ||
| + | | 38 | ||
| + | |- | ||
| + | | <span style="color:red">★★☆</span><span style="color:orange">★★</span> | ||
| + | | 20 | ||
| + | | 58 | ||
| + | |- | ||
| + | | <span style="color:red">★★★</span><span style="color:orange">★★</span> | ||
| + | | 25 | ||
| + | | 83 | ||
| + | |- | ||
| + | | <span style="color:red">★★★☆</span><span style="color:orange">★</span> | ||
| + | | 30 | ||
| + | | 113 | ||
| + | |- | ||
| + | | <span style="color:red">★★★★</span><span style="color:orange">★</span> | ||
| + | | 30 | ||
| + | | 143 | ||
| + | |- | ||
| + | | <span style="color:red">★★★★☆</span> | ||
| + | | 30 | ||
| + | | 173 | ||
| + | |- | ||
| + | | <span style="color:red">★★★★★</span> | ||
| + | | 30 | ||
| + | | 203 | ||
| + | |- | ||
| + | |} | ||
| + | |||
| + | {{Cleanup|reason=* What happens with the HOC unit with each promotion? | ||
| + | }} | ||
| + | |||
| + | With each Ranking Promotion, HOC Units unlock more of their Matrix Boards, which opens up more tile slots leading to an increase in the stat boost potential from chips. The increase in rarity and each tier's effects on the matrix boards, as well as the max iteration stat increase, can all be viewed within the game's Index > HOC Units. | ||
| + | |||
| + | {{clr}} | ||
| + | ==== Chip set up ==== | ||
| + | |||
| + | {{ThumbSlider|mode=stopslider|width=250|align=right|list= | ||
| + | <div class="jcarousel-item">[[File:HOC_Tutorial_Chip_Arrangement.jpg|250px|right|thumb|How to install Chips as described in the in-game tutorial]]</div> | ||
| + | <div class="jcarousel-item">[[File:HOC_Tutorial_Using_Chips.jpg|250px|right|thumb|Installing chips as described in the in-game tutorial]]</div> | ||
| + | <div class="jcarousel-item">[[File:HOC_Tutorial_Chip_Stat_Limit.jpg|250px|right|thumb|Same colour bonus as described in the in-game tutorial]]</div> | ||
| + | }}The Chips attached to a HOC unit can be set up here. Chips can be placed by dragging them from the storage (left) to the Chip Matrix of the HOC unit (right). Tapping on a placed Chip rotates it. Each rotated Chip consumes {{Icon|calibrationticket}} Calibration Tickets when confirmed. The amount of tickets used will vary based on the rotated chips rarity; | ||
| + | *2* Chips when rotated will cost 20x tickets | ||
| + | *3* Chips when rotated will cost 30x tickets | ||
| + | *4* Chips when rotated will cost 40x tickets | ||
| + | *5* Chips when rotated will cost 50x tickets | ||
| + | |||
| + | The numbers displayed are "Chip stat sum" and "Max allowed stat". The coloured number next to them is the "Same colour bonus". | ||
| + | |||
| + | Placing Chips of the same colour provides a stat bonus. Tap the information icon to see the possible and achieved bonuses. | ||
| + | |||
| + | The Chip system is a classic Pentomino puzzle system<ref name="pentomino">Wikipedia entry on [[wikipedia:Pentomino|Pentomino]]</ref>. Place and rotate Chips to fill the matrix of your HOC unit. | ||
| + | |||
| + | For a detailed explanation, please see [[Heavy Ordnance Corps Chip Matrix]]. | ||
| + | |||
| + | {{clr}} | ||
| + | == Chips == | ||
| + | {{ThumbSlider|mode=stopslider|width=250|align=right|list= | ||
| + | <div class="jcarousel-item">[[File:HOC_Tutorial_Chips_Refactoring.jpg|250px|right|thumb|The list of available Chips is accessible through the Garage]]</div> | ||
| + | <div class="jcarousel-item">[[File:HOC_Tutorial_Chip_Enhancement.jpg|250px|right|thumb|Chips can be enhanced just like equipment]]</div> | ||
| + | <div class="jcarousel-item">[[File:HOC_Tutorial_Removing_Chips.jpg|250px|right|thumb|Unneeded Chips can be scrapped]]</div> | ||
| + | }} | ||
| + | So called Chips (Tetris like stones) are used as "equipment" for the HOC units. The number of Chips which can be collected are defined by the [[#Storage|Storage]]. | ||
| + | Despite the colour, there is no difference between ''blue'' and ''orange'' coloured Chips in either stats nor tile shape. The only difference is in the HOCs' assigned bonus color, which grants boosted stats for same color chips used. See: [[:Category:HOC units by chip colour]]. | ||
| + | |||
| + | === Enhancement === | ||
| + | Chips can be enhanced similar to how equipment enhancement works. To enhance a Chip, other Chips and resources will be consumed. After choosing the Chip for enhancement, the Chips for consumption need to be selected (2-Star Chips cannot be enhanced). | ||
| + | |||
| + | Using Chips of the same colour and/or higher rarity will give more "experience" for the Chip. Each upgrade will result in higher stats of the Chip. | ||
| + | |||
| + | === Calculation Specifics === | ||
| + | Chip Experience value comes from rarity and color only, tile count is unrelated. Additionally, only the Chip fodder matters in calculations. Other than having different Exp capacities & thresholds, the qualities of the receiving chips have no influence on the exp being exchanged.</br> | ||
| + | |||
| + | Values are as follows...</br> | ||
| + | :Rarity: 2 star = 50 xp, 3 star = 100 xp, 4 star = 200 xp, 5 star = 300 xp | ||
| + | |||
| + | Also, the Color Bonus = (Rarity x 20%) | ||
| + | thus, same color enhance values are...</br> | ||
| + | :Rarity & Color: 2 star = 60 xp, 3 star = 120 xp, 4 star = 240 xp, 5 star = 360 xp | ||
| + | |||
| + | Finally, Exp transfers between chips is considered its own factor, transferring only 80% of its value between chips. This factor is not influenced '''at all''' by rarity or color. | ||
| + | |||
| + | |||
| + | Full Formula: | ||
| + | :(Rarity + (Rarity × 20%(''if same color'')) + (Exp of chip x 80%) = Total Enhance Value | ||
| + | |||
| + | |||
| + | Due to how Chip Enhance calculation works, its not a huge detriment to transfer individual, high value xp chips across differently colored chips, as the value lost will likely be fairly negligible. When enhancing chips of the same color in bulk however, rather than the exp levels they hold, the QUANTITY of the chips will likely hold greater value in the exp being given. Such as when enhancing a Blue Chip with one hundred 2-Star Orange Chips, up to 1000xp could be lost in such an exchange. Oppositely, enhancing a Blue Chip with a single level 20 blue chip in order to maximize exp efficiency will only yield 60 extra xp, which is minuscule in the face of the xxx amount of exp being granted from the level 20 chip. | ||
| + | |||
| + | |||
| + | EXP Desire: | ||
| + | {| class="gf-table mw-collapsible mw-collapsed" | ||
| + | ! Level | ||
| + | ! 3 Star | ||
| + | ! 4 Star | ||
| + | ! 5 Star | ||
| + | ! Stats Increase | ||
| + | |- | ||
| + | | 1 | ||
| + | | 50 | ||
| + | | 100 | ||
| + | | 150 | ||
| + | | 1.08x | ||
| + | |- | ||
| + | | 2 | ||
| + | | 75 | ||
| + | | 150 | ||
| + | | 225 | ||
| + | | 1.16x | ||
| + | |- | ||
| + | | 3 | ||
| + | | 100 | ||
| + | | 200 | ||
| + | | 300 | ||
| + | | 1.24x | ||
| + | |- | ||
| + | | 4 | ||
| + | | 125 | ||
| + | | 250 | ||
| + | | 375 | ||
| + | | 1.32x | ||
| + | |- | ||
| + | | 5 | ||
| + | | 150 | ||
| + | | 300 | ||
| + | | 450 | ||
| + | | 1.40x | ||
| + | |- | ||
| + | | 6 | ||
| + | | 200 | ||
| + | | 400 | ||
| + | | 600 | ||
| + | | 1.48x | ||
| + | |- | ||
| + | | 7 | ||
| + | | 250 | ||
| + | | 500 | ||
| + | | 750 | ||
| + | | 1.56x | ||
| + | |- | ||
| + | | 8 | ||
| + | | 300 | ||
| + | | 600 | ||
| + | | 900 | ||
| + | | 1.64x | ||
| + | |- | ||
| + | | 9 | ||
| + | | 350 | ||
| + | | 700 | ||
| + | | 1050 | ||
| + | | 1.72x | ||
| + | |- | ||
| + | | 10 | ||
| + | | 400 | ||
| + | | 800 | ||
| + | | 1200 | ||
| + | | 1.80x | ||
| + | |- | ||
| + | | 11 | ||
| + | | 450 | ||
| + | | 900 | ||
| + | | 1350 | ||
| + | | 1.87x | ||
| + | |- | ||
| + | | 12 | ||
| + | | 500 | ||
| + | | 1000 | ||
| + | | 1500 | ||
| + | | 1.94x | ||
| + | |- | ||
| + | | 13 | ||
| + | | 550 | ||
| + | | 1100 | ||
| + | | 1650 | ||
| + | | 2.01x | ||
| + | |- | ||
| + | | 14 | ||
| + | | 600 | ||
| + | | 1200 | ||
| + | | 1800 | ||
| + | | 2.08x | ||
| + | |- | ||
| + | | 15 | ||
| + | | 650 | ||
| + | | 1300 | ||
| + | | 1950 | ||
| + | | 2.15x | ||
| + | |- | ||
| + | | 16 | ||
| + | | 700 | ||
| + | | 1400 | ||
| + | | 2100 | ||
| + | | 2.22x | ||
| + | |- | ||
| + | | 17 | ||
| + | | 800 | ||
| + | | 1600 | ||
| + | | 2400 | ||
| + | | 2.29x | ||
| + | |- | ||
| + | | 18 | ||
| + | | 850 | ||
| + | | 1700 | ||
| + | | 2550 | ||
| + | | 2.36x | ||
| + | |- | ||
| + | | 19 | ||
| + | | 900 | ||
| + | | 1800 | ||
| + | | 2700 | ||
| + | | 2.43x | ||
| + | |- | ||
| + | | 20 | ||
| + | | 1000 | ||
| + | | 2000 | ||
| + | | 3000 | ||
| + | | 2.50x | ||
| + | |- | ||
| + | | Total | ||
| + | | 9000 | ||
| + | | 18000 | ||
| + | | 27000 | ||
| + | | MAX | ||
| + | |- | ||
| + | |} | ||
| + | |||
| + | |||
| + | '''Over-Stacking''' | ||
| + | |||
| + | Chips have the ability to retain the xp "overhead" that is transferred from one chip to another, going beyond the max levels exp requirements. This has little to no practical usage as resource costs for transferring xp seems to correlatively scale with the amount of exp being transferred, resulting in exponentially expensive enhancement costs. As well as, the fact that even the most exp hungry five star chips only need a total of 27k experience and going beyond that provides no extra benefits. | ||
| + | Given how the System works there is no efficient reason to do this other than having chips at the ready on a fully stacked chip storage. (Losing exp from the minus 20% rule on exp transfers.) | ||
| + | |||
| + | One of the only useful ways to utilize this "feature" is to level a five star chip to level 19 and enhance it so that it, at least, hits an over-cap value of 6,750 exp (due to the 80% exp transfer rule). This means by holding chips that have values of 33,750 exp, Commanders may reduce Chip Storage being occupied while still having "Maxed Chips" at the ready for whenever they may need to level a new set. | ||
| + | |||
| + | It is noteworthy, to remember that the game will not allow adding extra chips beyond the necessary amount needed, so in order to hit the minimum 6.75k over-cap, one of the chips will need to be an enhanced one. Upper limit on how much experience a chip can hold is... ''Unknown'' | ||
| + | |||
| + | === Scrapping === | ||
| + | Unneeded Chips can be scrapped. Each scrapped Chip will grant a small amount of resources equivalent to its rarity (EX: 4-Star = MARP{{Icon|Manpower}}{{Icon|Ammo}}{{Icon|Rations}}{{Icon|Parts}} x 4). Scrapping Enhanced Chips gives the same amount of resources as non-leveled ones. | ||
| + | |||
| + | A common rule of thumb defines that Chips should only be scrapped if the storage is full and the existing (and installed) six- or five-star Chips are already enhanced to their maximum level. | ||
| + | {{clr}} | ||
| + | |||
| + | == In Practice == | ||
| + | {{Stub}} | ||
| + | |||
| + | |||
| + | Can first be used in chapters 9/10 and major events. | ||
| + | |||
| + | Opposite to regular echelons, HOC units provide support from a distance, never battling in any direct confrontations. | ||
| + | |||
| + | |||
| + | |||
| + | === Deployment System === | ||
| + | * HOC units can only be deployed on a specific helipad called the "Heavy Heliport". | ||
| + | ** You can deploy any echelon or HOC unit on it. | ||
| + | ** Unlike regular echelons, this is the only heliport where a HOC unit can safely retreat or repair themselves. Attempting to retreat off of a Heavy Heliport forfeits the HOC's Ammo and Rations. | ||
| + | |||
| + | * Deployment/Fielding of HOCs works based on a point system. | ||
| + | * There is a limit to how many times you can deploy them and how many HOC you can put in the battlefield. Correlated to the number of captured Heavy Heliports. | ||
| + | |||
| + | * Commanders may '''redeploy''' withdrawn HOCs at the cost of one Action Point at captured Heavy Helipads, though HOCs that are OOC will need to be repaired first before deployment. (See: [[#Maintenance Machinery|Repair Costs]]) | ||
| + | |||
| + | |||
| + | === Combat === | ||
| + | |||
| + | |||
| + | |||
| + | |||
| + | |||
| + | '''On Map''' | ||
| + | |||
| + | * HOC units may support friendly echelons from a distance of 2 to 3 nodes away. This depends on the HOC, as some have a range of only 2 while others have a range of 3. ''This is not a classification based trait and is an independent stat of each individual HOC unit.'' | ||
| + | ** Multiple HOC units can support an echelon simultaneously. | ||
| + | |||
| + | |||
| + | * Commanders may toggle off HOC support by tapping/clicking on the unit and flipping the orange switch off. | ||
| + | |||
| + | * An HOC unit '''CANNOT''' attack an enemy unit directly, Commanders who attempt to do so will get a warning prompt, the unit will both retreat and be heavily damaged (OOC) should Commanders choose to proceed regardless. | ||
| + | * If an HOC is attacked by an enemy, the HOC unit will flee in terror. | ||
| + | ** This results in a OOC or an "Out of Commission". | ||
| + | |||
| + | |||
| + | |||
| + | '''In Battle''' | ||
| + | |||
| + | *Unless an HOC is put out of commission (fleeing), said hoc's hp is irrelevant to combat performance. | ||
| + | |||
| + | *Normal attack - ATW - Launch a missile to deal 1.5x lethality and 1x pierce to the main target and deal 0.5x avoidable lethality and 1x unavoidable pierce to enemies within a radius of 1.5. | ||
| + | |||
| + | *Normal attack - AGL - Launch 3 grenades to deal 0.33x lethality and pierce per grenade to enemies within a radius of 1.5. | ||
| + | |||
| + | *Normal attack - MTR - Launch a mortar to deal 1x lethality and pierce to enemies within a radius of 2. | ||
| + | |||
| + | |||
| + | |||
| + | == Trivia == | ||
| + | |||
| + | * Yes, the Maintenance Machinery is a washing machine. | ||
| + | * The logo in the background of the Intelligence Center changes with the level of the facilities. | ||
| + | * The screenshots shown in the in-game tutorials contain rendering errors. | ||
| + | |||
| + | * HOCs cannot be {{Icon|Oath Certificate}} oathed, as they do not have an [[Affection]] stat. | ||
| + | * Additionally, HOCs' level is independent of their rarity, so it is possible to have a level 100 HOC at rarity 1, as well as a level 1, rarity 5 HOC unit. | ||
| + | *Obtaining 5-Star rarity on an HOC unlocks their Live-2D, so long as one is available for that respective unit.</br> | ||
| + | **<dpl> | ||
| + | category = HOC units | ||
| + | format=,  •  ,[[%TITLE%/Live2D]] | ||
| + | notnamespace = Category | ||
| + | </dpl> | ||
== Known units == | == Known units == | ||
| − | < | + | For a list of released HOC units, please see the corresponding [[Heavy_Ordnance_Corps_Index|Index]]. |
| − | + | ||
| − | + | ||
| − | + | ||
| − | + | ||
| − | + | === Central Data Fragments === | |
| − | + | <div style='text-align: center;> | |
| − | </ | + | {| class="gf-table mw-collapsible" |
| + | |- | ||
| + | ! Image | ||
| + | ! Name | ||
| + | ! Type | ||
| + | ! Description | ||
| + | |- | ||
| + | |[[File:Item HOC General Data.png|90px]] | ||
| + | |HOC General Data | ||
| + | |N/A | ||
| + | | | ||
| + | Parts scavenged from the battlefield that are compatible with all HOC units . Being frugal is one of Griffin's many virtues.</br> | ||
| + | General data that can replace specific data in unlocking and upgrading HOC units. | ||
| + | |- | ||
| + | |[[File:Item Central Data QLZ04.png|90px]] | ||
| + | |[[QLZ-04]] | ||
| + | |AGL | ||
| + | |Data fragments of the QLZ-04 HOC. "We've successfully reached our target destination and are beginning to replenish our ammunition... Hmm? Why can't we stuff it in?" "I told you not to go drinking with those alcoholics before we set out!" | ||
| + | |- | ||
| + | |[[File:Item Central Data AGS30.png|90px]] | ||
| + | |[[AGS-30]] | ||
| + | |AGL | ||
| + | |Data fragment of HOC AGS-30. "Actually...we all have glasses." "That's right, mine are just not as portable!" | ||
| + | |- | ||
| + | |[[File:Item Central Data 2B14.png|90px]] | ||
| + | |[[2B14]] | ||
| + | |MTR | ||
| + | |Data fragment of HOC 2B14. "You remember if this is a grenade or the firework we stuffed full last night at the wine party?" "Whichever it is, I'm sure someone will wanna watch, right?" | ||
| + | |- | ||
| + | |[[File:Item Central Data AT4.png|90px]] | ||
| + | |[[AT4]] | ||
| + | |ATW | ||
| + | |Data fragment of HOC AT4 | ||
| + | |- | ||
| + | |[[File:Item Central Data M2.png|90px]] | ||
| + | |[[M2]] | ||
| + | |MTR | ||
| + | |Data fragment of HOC M2. "Are you sure...about this angle?" "Even if it doesn't work out, it's not my fault. It's math's." | ||
| + | |- | ||
| + | |[[File:Item Central Data BGM71.png|90px]] | ||
| + | |[[BGM-71]] | ||
| + | |ATW | ||
| + | |Data fragment of HOC BGM-71. "Sir, friendly forces spotted in targeted zones!" "Oh dear... Well, wish them luck!" | ||
| + | |- | ||
| + | |[[File:Item Central Data MK153.png|90px]] | ||
| + | |[[Mk 153]] | ||
| + | |ATW | ||
| + | |Data fragment of the HOC unit Mk 153. "Can you see the target location?" "Nope, but we just have to trust the orders we're given." | ||
| + | |- | ||
| + | |[[File:Item Central Data PP93.png|90px]] | ||
| + | |[[PP-93]] | ||
| + | |MTR | ||
| + | |A data fragment for the PP-93 HOC. "I have a question! If we're called seaweed when we make landfall on the beach early on, then–" "Then the enemies at the beach objective area are called sealions, you've told that lame joke hundreds of times already!" | ||
| + | |- | ||
| + | |[[File:Item Central Data MK47.png|90px]] | ||
| + | |[[Mk 47]] | ||
| + | |AGL | ||
| + | |Data Fragments for the Mk 47 HOC - "Your supporting fire services are no longer required. We'll follow the usual arrangement—" "—Hang on, looks like there were more enemies than expected... That'll be extra, Boss." | ||
| + | |- | ||
| + | |[[File:Item Central Data RPG29.png|90px]] | ||
| + | |[[RPG-29]] | ||
| + | |ATW | ||
| + | |A data fragment for the HOC unit RPG-29. | ||
| + | |} | ||
| + | </div> | ||
| + | |||
| + | |||
| + | == References == | ||
| + | <references/> | ||
Latest revision as of 21:05, 21 February 2024
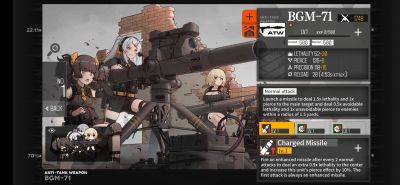
Heavy Ordnance Corps (HOC for short) is the name of the heavily equipped units in game. First released on CN before 2018 summer event Continuum Turbulence they made a big change in gameplay. EN/JP followed roughly the same release order (January 2020 before Continuum Turbulence).
Contents
General[edit]
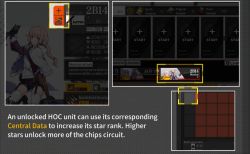
HOC units are handled different than normal T-Dolls. There can only be one instance of each HOC unit, so they are rather unlocked than gained. To unlock a HOC unit, five Central Data need to be prepared. Further Central Data will be needed to promote the HOC unit. An additional, method to obtain HOC Fragments of the newer released units is from Theater Mode, a recurring event that hosts the newest HOC unit as an event & ranking reward. Once unlocked there is no way to lose them as there is no mechanic to release or scrap them.
They do not have equipment, but can be strengthened with Chips.
HOC units appear as normal units on the battlefield. For a proper introduction on how to handle them, please see In battle. The HOC feature introduces two new buildings to the Headquarters: The Intelligence Center and the Garage.
Facilities[edit]
Access[edit]
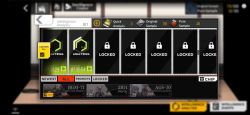
All interactions with the new HOC feature are within the new buildings/rooms. They will be unlocked with beating chapter 8 stage 5.
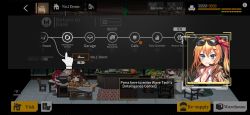
The newly available room can be accessed by either of the following ways:
- Tapping the Intelligence Center in the Headquarters (HQ) menu (the overview of all rooms of the HQ). It's in the outer ring.
- Tapping the Intelligence Center in the quick-base-menu on the main screen. It will be one of the available quick-switch-options
- On the main screen on the left quick-overview. The WAVE Tech. Logo will lead to the room. Also, it will show possible Samples to harvest.
Intelligence Center[edit]
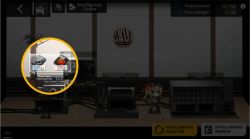
The Intelligence Center is the main place to gain Central Data and Chips for the HOC units.
Infrastructure Upgrade[edit]
Data receiver[edit]
Every 8 (eight) hours from 00:00 (+8GMT), ![]() Original Samples and
Original Samples and ![]() Pure Samples can be harvested here. The samples will remain at the Data Receiver until one collects it and will continue to gather over time until it reaches a certain cap. This cap can be raised by upgrading this facility.
Pure Samples can be harvested here. The samples will remain at the Data Receiver until one collects it and will continue to gather over time until it reaches a certain cap. This cap can be raised by upgrading this facility.
Intelligence quests[edit]
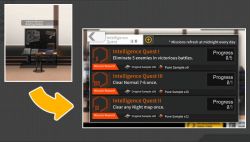
Provides quests rewarding Samples. The Intelligence Quests will offer new quests each day. Existing quest progress will be lost with the change of the day. Despite only specifying so once, None of the Quests may be completed through the Auto-Battle feature.
Quest rewards are ![]() Original Samples and
Original Samples and ![]() Pure Samples.
Pure Samples.
Depending on the upgrade level of the facility, up to 3 (three) quests are provided.
Following table displays Missions and Rewards from a max level Intelligence Center.
Data storage[edit]
Defines how many ![]() Original Samples and
Original Samples and ![]() Pure Samples can be storaged. Upgrading this facility will increase the amount of Samples storable.
Pure Samples can be storaged. Upgrading this facility will increase the amount of Samples storable.
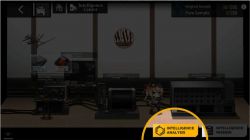
Computer[edit]
Processes ![]() Original Samples and
Original Samples and ![]() Pure Samples into Chips or Central Data.
Pure Samples into Chips or Central Data.
The general rules of processing are as follows:
- The level of the Computer determines the research tasks that can be started parallel and the time it will take (Starting at 8 hours and 1 Slot at level zero to being reduced to 2 hours and upgraded to 10 Slots at max level).
- A research task can be started either with 20
 Original Samples or 20
  Pure Samples.
- The result will be a Chip or a Central Data instance of a HOC unit.
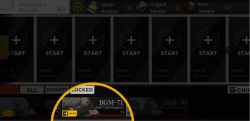
When enough Central Data for a HOC unit's promotion or unlocking is collected, it can be applied by tapping the corresponding icon on the bottom. Depending on the currently activated tab at the bottom a switch to "all" might be necessary.
Garage[edit]
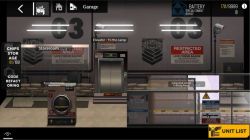
The Garage provides facilities necessary to manage HOC units and Chips.
Infrastructure Upgrade[edit]
Storage[edit]
The Storage holds onto all Chips collected. Upgrading the Storage increases the amount of Chips storable. It has no further function.
The facility's level determines the amount of Chips which can be stored.
Maintenance Machinery[edit]
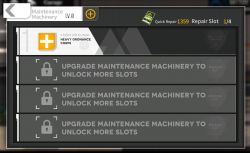
The repair station for damaged HOC units. HOC units can be repaired by opening the facility's menu and choosing the HOC unit which shall be repaired.
When there are damaged HOC units, the T-Doll repair menu will show an additional button to start the repair of the HOC unit, too.
Each facility level adds another slot up to a max. level of three (=four slots).
Repair Cost
The cost of an HOC Repair appears to be the same regardless of whether minimal damage was taken or the HOC was put Out of Commission (ooc). Repair Cost and Timers are only affected by an HOC's level and not by their rarity.
Similar to T-Dolls, repairing only comes at the cost of Manpower (MP), Parts (P) and Repair Time.
The cost to forego the repair timer is ALWAYS 10 quick repairs ![]() .
.
MP = Manpower, P = Parts, pl = per level
Formulas:
Please Be Aware of Time Conversions!
Example:
- Level 50 HOC
- 20880 seconds + (864 seconds*(Level 50)) = 64080 seconds
- 64080 seconds ÷ 3600 seconds = 17.8 hours
- 0.8 hours × 60 minutes = 48.0 minutes
- Repair Time = 17 hours, 48 minutes, and 0 seconds
Training Range[edit]
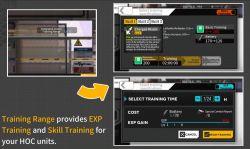
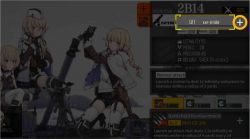
The Training Range is used for both experience and skill training of HOC units. Units in training are not available for use in missions.
Upgrading this facility will increase the amount of units able to be trained in parallel. It will also affect the amount of ![]() Special Combat Reports consumed in Experience Training. Special Combat Reports are produced in the Data Room; in the Office Desk's menu, press the right box to select. Their production follows the exact same rules as normal Battle Reports.
Special Combat Reports consumed in Experience Training. Special Combat Reports are produced in the Data Room; in the Office Desk's menu, press the right box to select. Their production follows the exact same rules as normal Battle Reports.
For each slot in the facility one HOC unit is selected. For each HOC unit the type of training has to be selected (Experience or Skill Training).
Once a training has been ordered, it cannot be cancelled. To complete either immediately, a single ![]() Quick Training Contract will be used.
Quick Training Contract will be used.
For Experience Training, both ![]() batteries and
batteries and ![]() Special Combat Reports are needed. The amount consumed depends on the upgrade level of the facility and the hours of training set with the slider. You will always need at least 5
Special Combat Reports are needed. The amount consumed depends on the upgrade level of the facility and the hours of training set with the slider. You will always need at least 5 ![]() per hour, regardless of the level of the Training Facility; therefore, it is recommended to wait until Level 10 for the best results (15
per hour, regardless of the level of the Training Facility; therefore, it is recommended to wait until Level 10 for the best results (15 ![]() for the same 5
for the same 5 ![]() ).
).
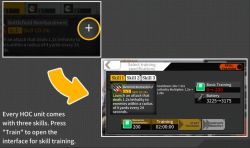
For Skill Training, both ![]() batteries and the three different tiers of
batteries and the three different tiers of ![]()
![]()
![]() data are needed. The time needed for training depends on the skill level. The first skill of each HOC, however, is special: it requires double the amount of data and slightly different amount of time (generally double as well).
data are needed. The time needed for training depends on the skill level. The first skill of each HOC, however, is special: it requires double the amount of data and slightly different amount of time (generally double as well).
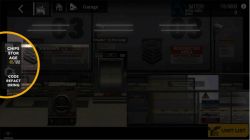
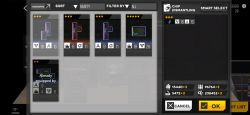
Central Data Refactoring[edit]
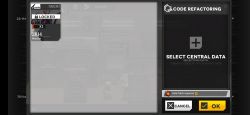
Facility used for refactoring Central Data of HOC units to ![]() WAVE Data Patches. WAVE Data Patches are used to further boost a HOC's rarity and increase their stats beyond maximum. Central Data to be refactored needs to be dragged over to the right field. The choice will be confirmed with "OK".
WAVE Data Patches. WAVE Data Patches are used to further boost a HOC's rarity and increase their stats beyond maximum. Central Data to be refactored needs to be dragged over to the right field. The choice will be confirmed with "OK".
In early stages it is not recommended to use this facility at all. In the newer versions of the game refactoring Central Data in early stages is forbidden to prevent accidentally scrapping important Central Data.
Elevator[edit]
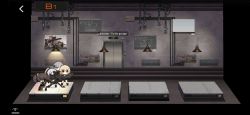
Clicking on the Elevator in the Garage will lead to separate rooms in the basement. Each rooms ID will be noted on the top left of the screen. This place is another overview of the HOC units.
- B1 Exhibition: The following units will be displayed on four podiums from left to right: BGM-71, AGS-30, 2B14, M2
- B2 Exhibition: The following units will be displayed on four podiums from left to right: AT4, QLZ-04, Mk 153, (Fourth not known)
Support Unit[edit]
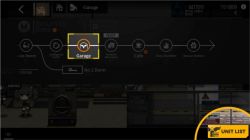
The Support Unit overview lists all available HOC units. Unlocked units provide further interactions.
Stat enhancement[edit]
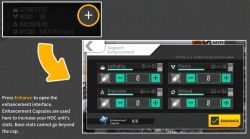
Similar to stat enhancement of T-Dolls, HOC units can raise their stats by consuming ![]() Enhancement Pills. HOC units increase their stat capacities through level increases (up to Lvl. 100)
Enhancement Pills. HOC units increase their stat capacities through level increases (up to Lvl. 100)
In contrast to T-Dolls, HOC units' stats need to be upgraded each for its own.
Not all stats increase with a 1:1 rate:
 Lethality increases 1 per pill
 Armor piercing increases 3 per pill
 Accuracy increases 3 per pill
 Loading increases 2 per pill
Promotion[edit]
A HOC unit's iteration (star rank) can be upgraded up to five yellow stars with Central Data by promoting it. Further upgrades are possible once the unit reaches rarity 5, level 100. Upgrades beyond five yellow stars require ![]() WAVE Data Patches. The iteration description continues with "one empty star", "one filled star", "one filled and one empty star" and so on. The red stars will overlay the yellow ones. In order to iterate a unit, the unit must be at max level and rarity (level 100, 5-Star).
WAVE Data Patches. The iteration description continues with "one empty star", "one filled star", "one filled and one empty star" and so on. The red stars will overlay the yellow ones. In order to iterate a unit, the unit must be at max level and rarity (level 100, 5-Star).
| Rank | Central Data Cost | Total |
|---|---|---|
| 1 | 5 | 5 |
| 2 | 10 | 15 |
| 3 | 15 | 30 |
| 4 | 20 | 50 |
| 5 | 30 | 80 |
| Iteration | Commulative Cost | |
|---|---|---|
| ★ - ★★★★★ | (Central Data) | (Central Data) |
| ☆★★★★ | 5 | 5 |
| ★★★★★ | 8 | 13 |
| ★☆★★★ | 10 | 23 |
| ★★★★★ | 15 | 38 |
| ★★☆★★ | 20 | 58 |
| ★★★★★ | 25 | 83 |
| ★★★☆★ | 30 | 113 |
| ★★★★★ | 30 | 143 |
| ★★★★☆ | 30 | 173 |
| ★★★★★ | 30 | 203 |
With each Ranking Promotion, HOC Units unlock more of their Matrix Boards, which opens up more tile slots leading to an increase in the stat boost potential from chips. The increase in rarity and each tier's effects on the matrix boards, as well as the max iteration stat increase, can all be viewed within the game's Index > HOC Units.
Chip set up[edit]
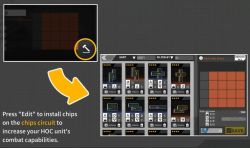
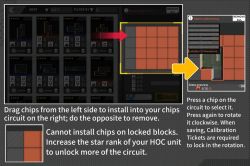
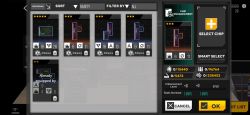
The Chips attached to a HOC unit can be set up here. Chips can be placed by dragging them from the storage (left) to the Chip Matrix of the HOC unit (right). Tapping on a placed Chip rotates it. Each rotated Chip consumes ![]() Calibration Tickets when confirmed. The amount of tickets used will vary based on the rotated chips rarity;
Calibration Tickets when confirmed. The amount of tickets used will vary based on the rotated chips rarity;
- 2* Chips when rotated will cost 20x tickets
- 3* Chips when rotated will cost 30x tickets
- 4* Chips when rotated will cost 40x tickets
- 5* Chips when rotated will cost 50x tickets
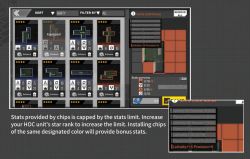
The numbers displayed are "Chip stat sum" and "Max allowed stat". The coloured number next to them is the "Same colour bonus".
Placing Chips of the same colour provides a stat bonus. Tap the information icon to see the possible and achieved bonuses.
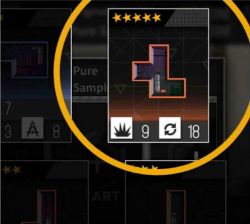
The Chip system is a classic Pentomino puzzle system[1]. Place and rotate Chips to fill the matrix of your HOC unit.
For a detailed explanation, please see Heavy Ordnance Corps Chip Matrix.
Chips[edit]
So called Chips (Tetris like stones) are used as "equipment" for the HOC units. The number of Chips which can be collected are defined by the Storage. Despite the colour, there is no difference between blue and orange coloured Chips in either stats nor tile shape. The only difference is in the HOCs' assigned bonus color, which grants boosted stats for same color chips used. See: Category:HOC units by chip colour.
Enhancement[edit]
Chips can be enhanced similar to how equipment enhancement works. To enhance a Chip, other Chips and resources will be consumed. After choosing the Chip for enhancement, the Chips for consumption need to be selected (2-Star Chips cannot be enhanced).
Using Chips of the same colour and/or higher rarity will give more "experience" for the Chip. Each upgrade will result in higher stats of the Chip.
Calculation Specifics[edit]
Chip Experience value comes from rarity and color only, tile count is unrelated. Additionally, only the Chip fodder matters in calculations. Other than having different Exp capacities & thresholds, the qualities of the receiving chips have no influence on the exp being exchanged.
Values are as follows...
- Rarity: 2 star = 50 xp, 3 star = 100 xp, 4 star = 200 xp, 5 star = 300 xp
Also, the Color Bonus = (Rarity x 20%)
thus, same color enhance values are...
- Rarity & Color: 2 star = 60 xp, 3 star = 120 xp, 4 star = 240 xp, 5 star = 360 xp
Finally, Exp transfers between chips is considered its own factor, transferring only 80% of its value between chips. This factor is not influenced at all by rarity or color.
Full Formula:
- (Rarity + (Rarity × 20%(if same color)) + (Exp of chip x 80%) = Total Enhance Value
Due to how Chip Enhance calculation works, its not a huge detriment to transfer individual, high value xp chips across differently colored chips, as the value lost will likely be fairly negligible. When enhancing chips of the same color in bulk however, rather than the exp levels they hold, the QUANTITY of the chips will likely hold greater value in the exp being given. Such as when enhancing a Blue Chip with one hundred 2-Star Orange Chips, up to 1000xp could be lost in such an exchange. Oppositely, enhancing a Blue Chip with a single level 20 blue chip in order to maximize exp efficiency will only yield 60 extra xp, which is minuscule in the face of the xxx amount of exp being granted from the level 20 chip.
EXP Desire:
| Level | 3 Star | 4 Star | 5 Star | Stats Increase |
|---|---|---|---|---|
| 1 | 50 | 100 | 150 | 1.08x |
| 2 | 75 | 150 | 225 | 1.16x |
| 3 | 100 | 200 | 300 | 1.24x |
| 4 | 125 | 250 | 375 | 1.32x |
| 5 | 150 | 300 | 450 | 1.40x |
| 6 | 200 | 400 | 600 | 1.48x |
| 7 | 250 | 500 | 750 | 1.56x |
| 8 | 300 | 600 | 900 | 1.64x |
| 9 | 350 | 700 | 1050 | 1.72x |
| 10 | 400 | 800 | 1200 | 1.80x |
| 11 | 450 | 900 | 1350 | 1.87x |
| 12 | 500 | 1000 | 1500 | 1.94x |
| 13 | 550 | 1100 | 1650 | 2.01x |
| 14 | 600 | 1200 | 1800 | 2.08x |
| 15 | 650 | 1300 | 1950 | 2.15x |
| 16 | 700 | 1400 | 2100 | 2.22x |
| 17 | 800 | 1600 | 2400 | 2.29x |
| 18 | 850 | 1700 | 2550 | 2.36x |
| 19 | 900 | 1800 | 2700 | 2.43x |
| 20 | 1000 | 2000 | 3000 | 2.50x |
| Total | 9000 | 18000 | 27000 | MAX |
Over-Stacking
Chips have the ability to retain the xp "overhead" that is transferred from one chip to another, going beyond the max levels exp requirements. This has little to no practical usage as resource costs for transferring xp seems to correlatively scale with the amount of exp being transferred, resulting in exponentially expensive enhancement costs. As well as, the fact that even the most exp hungry five star chips only need a total of 27k experience and going beyond that provides no extra benefits. Given how the System works there is no efficient reason to do this other than having chips at the ready on a fully stacked chip storage. (Losing exp from the minus 20% rule on exp transfers.)
One of the only useful ways to utilize this "feature" is to level a five star chip to level 19 and enhance it so that it, at least, hits an over-cap value of 6,750 exp (due to the 80% exp transfer rule). This means by holding chips that have values of 33,750 exp, Commanders may reduce Chip Storage being occupied while still having "Maxed Chips" at the ready for whenever they may need to level a new set.
It is noteworthy, to remember that the game will not allow adding extra chips beyond the necessary amount needed, so in order to hit the minimum 6.75k over-cap, one of the chips will need to be an enhanced one. Upper limit on how much experience a chip can hold is... Unknown
Scrapping[edit]
Unneeded Chips can be scrapped. Each scrapped Chip will grant a small amount of resources equivalent to its rarity (EX: 4-Star = MARP![]()
![]()
![]()
![]() x 4). Scrapping Enhanced Chips gives the same amount of resources as non-leveled ones.
x 4). Scrapping Enhanced Chips gives the same amount of resources as non-leveled ones.
A common rule of thumb defines that Chips should only be scrapped if the storage is full and the existing (and installed) six- or five-star Chips are already enhanced to their maximum level.
In Practice[edit]
Can first be used in chapters 9/10 and major events.
Opposite to regular echelons, HOC units provide support from a distance, never battling in any direct confrontations.
Deployment System[edit]
- HOC units can only be deployed on a specific helipad called the "Heavy Heliport".
- You can deploy any echelon or HOC unit on it.
- Unlike regular echelons, this is the only heliport where a HOC unit can safely retreat or repair themselves. Attempting to retreat off of a Heavy Heliport forfeits the HOC's Ammo and Rations.
- Deployment/Fielding of HOCs works based on a point system.
- There is a limit to how many times you can deploy them and how many HOC you can put in the battlefield. Correlated to the number of captured Heavy Heliports.
- Commanders may redeploy withdrawn HOCs at the cost of one Action Point at captured Heavy Helipads, though HOCs that are OOC will need to be repaired first before deployment. (See: Repair Costs)
Combat[edit]
On Map
- HOC units may support friendly echelons from a distance of 2 to 3 nodes away. This depends on the HOC, as some have a range of only 2 while others have a range of 3. This is not a classification based trait and is an independent stat of each individual HOC unit.
- Multiple HOC units can support an echelon simultaneously.
- Commanders may toggle off HOC support by tapping/clicking on the unit and flipping the orange switch off.
- An HOC unit CANNOT attack an enemy unit directly, Commanders who attempt to do so will get a warning prompt, the unit will both retreat and be heavily damaged (OOC) should Commanders choose to proceed regardless.
- If an HOC is attacked by an enemy, the HOC unit will flee in terror.
- This results in a OOC or an "Out of Commission".
In Battle
- Unless an HOC is put out of commission (fleeing), said hoc's hp is irrelevant to combat performance.
- Normal attack - ATW - Launch a missile to deal 1.5x lethality and 1x pierce to the main target and deal 0.5x avoidable lethality and 1x unavoidable pierce to enemies within a radius of 1.5.
- Normal attack - AGL - Launch 3 grenades to deal 0.33x lethality and pierce per grenade to enemies within a radius of 1.5.
- Normal attack - MTR - Launch a mortar to deal 1x lethality and pierce to enemies within a radius of 2.
Trivia[edit]
- Yes, the Maintenance Machinery is a washing machine.
- The logo in the background of the Intelligence Center changes with the level of the facilities.
- The screenshots shown in the in-game tutorials contain rendering errors.
- HOCs cannot be
 oathed, as they do not have an Affection stat.
 - Additionally, HOCs' level is independent of their rarity, so it is possible to have a level 100 HOC at rarity 1, as well as a level 1, rarity 5 HOC unit.
- Obtaining 5-Star rarity on an HOC unlocks their Live-2D, so long as one is available for that respective unit.
Known units[edit]
For a list of released HOC units, please see the corresponding Index.
Central Data Fragments[edit]
| Image | Name | Type | Description |
|---|---|---|---|

|
HOC General Data | N/A |
Parts scavenged from the battlefield that are compatible with all HOC units . Being frugal is one of Griffin's many virtues. |

|
QLZ-04 | AGL | Data fragments of the QLZ-04 HOC. "We've successfully reached our target destination and are beginning to replenish our ammunition... Hmm? Why can't we stuff it in?" "I told you not to go drinking with those alcoholics before we set out!" |

|
AGS-30 | AGL | Data fragment of HOC AGS-30. "Actually...we all have glasses." "That's right, mine are just not as portable!" |

|
2B14 | MTR | Data fragment of HOC 2B14. "You remember if this is a grenade or the firework we stuffed full last night at the wine party?" "Whichever it is, I'm sure someone will wanna watch, right?" |

|
AT4 | ATW | Data fragment of HOC AT4 |

|
M2 | MTR | Data fragment of HOC M2. "Are you sure...about this angle?" "Even if it doesn't work out, it's not my fault. It's math's." |

|
BGM-71 | ATW | Data fragment of HOC BGM-71. "Sir, friendly forces spotted in targeted zones!" "Oh dear... Well, wish them luck!" |

|
Mk 153 | ATW | Data fragment of the HOC unit Mk 153. "Can you see the target location?" "Nope, but we just have to trust the orders we're given." |

|
PP-93 | MTR | A data fragment for the PP-93 HOC. "I have a question! If we're called seaweed when we make landfall on the beach early on, then–" "Then the enemies at the beach objective area are called sealions, you've told that lame joke hundreds of times already!" |

|
Mk 47 | AGL | Data Fragments for the Mk 47 HOC - "Your supporting fire services are no longer required. We'll follow the usual arrangement—" "—Hang on, looks like there were more enemies than expected... That'll be extra, Boss." |

|
RPG-29 | ATW | A data fragment for the HOC unit RPG-29. |


