Difference between revisions of "Heavy Ordnance Corps"
(It's called iteration in EN) |
HellScythe42 (talk | contribs) m |
||
| (2 intermediate revisions by 2 users not shown) | |||
| Line 43: | Line 43: | ||
Depending on the upgrade level of the facility, up to 3 (three) quests are provided. | Depending on the upgrade level of the facility, up to 3 (three) quests are provided. | ||
| + | |||
| + | {{Cleanup|reason=If there is a fixed list of quests, please add a table with all quests here.}} | ||
{{clr}} | {{clr}} | ||
| Line 107: | Line 109: | ||
}}The Training Range is used for both experience and skill training of HOC units. Units in training are not available for use in missions. | }}The Training Range is used for both experience and skill training of HOC units. Units in training are not available for use in missions. | ||
| − | Upgrading this facility will increase the amount of units able to be trained in parallel. It will also affect the amount of {{Icon|advancedcombatreport}} Special Combat Reports consumed. | + | Upgrading this facility will increase the amount of units able to be trained in parallel. It will also affect the amount of {{Icon|advancedcombatreport}} Special Combat Reports consumed in Experience Training. Special Combat Reports are produced in the [[Dormitory#Data Room|Data Room]]; in the Office Desk's menu, press the right box to select. Their production follow the exact same rules as normal Battle Reports. |
For each slot in the facility one HOC unit is selected. For each HOC unit the type of training has to be selected (Experience or Skill Training). | For each slot in the facility one HOC unit is selected. For each HOC unit the type of training has to be selected (Experience or Skill Training). | ||
| − | + | Once a training has been ordered, it cannot be cancelled. To complete either immediately, a single {{Icon|Quick Training Contract}} Quick Training Contract will be used. | |
| − | For | + | For Experience Training, both {{Icon|battery}} batteries and {{Icon|advancedreport}} Special Combat Reports are needed. The amount consumed depends on the upgrade level of the facility and the hours of training set with the slider. You will always need at least 5 {{Icon|battery}} per hour, regardless of the level of the Training Facility; therefore, it is recommended to wait until Level 10 for the best results (15 {{Icon|advancedreport}} for the same 5 {{Icon|battery}}). |
| + | :{| class="gf-table mw-collapsible mw-collapsed" | ||
| + | ! Next Level | ||
| + | ! Time to level up | ||
| + | ! Batteries required | ||
| + | ! Addition | ||
| + | |- | ||
| + | | Lv. 1 | ||
| + | | 0:01 | ||
| + | | 5 | ||
| + | | +1 Research Slot | ||
| + | |- | ||
| + | | Lv. 2 | ||
| + | | 0:05 | ||
| + | | 50 | ||
| + | | +2 {{Icon|advancedcombatreport}} (3/hour) | ||
| + | |- | ||
| + | | Lv. 3 | ||
| + | | 0:30 | ||
| + | | 100 | ||
| + | | +2 {{Icon|advancedcombatreport}} (5/hour) | ||
| + | |- | ||
| + | | Lv. 4 | ||
| + | | 1:00 | ||
| + | | 150 | ||
| + | | +1 Research Slot | ||
| + | |- | ||
| + | | Lv. 5 | ||
| + | | 2:00 | ||
| + | | 200 | ||
| + | | +2 {{Icon|advancedcombatreport}} (7/hour) | ||
| + | |- | ||
| + | | Lv. 6 | ||
| + | | 4:00 | ||
| + | | 250 | ||
| + | | +2 {{Icon|advancedcombatreport}} (9/hour) | ||
| + | |- | ||
| + | | Lv. 7 | ||
| + | | 8:00 | ||
| + | | 350 | ||
| + | | +1 Research Slot | ||
| + | |- | ||
| + | | Lv. 8 | ||
| + | | 12:00 | ||
| + | | 450 | ||
| + | | +2 {{Icon|advancedcombatreport}} (11/hour) | ||
| + | |- | ||
| + | | Lv. 9 | ||
| + | | 18:00 | ||
| + | | 600 | ||
| + | | +2 {{Icon|advancedcombatreport}} (13/hour) | ||
| + | |- | ||
| + | | Lv. 10 | ||
| + | | 24:00 | ||
| + | | 800 | ||
| + | | +2 {{Icon|advancedcombatreport}} (15/hour) | ||
| + | |} | ||
| − | + | For Skill Training, both {{Icon|battery}} batteries and the three different tiers of {{Icon|basicdata}}{{Icon|intdata}}{{Icon|advdata}} data are needed. The time needed for training depends on the skill level. The first skill of each HOC, however, is special: it requires double the amount of data and slightly different amount of time (generally double as well). | |
| − | { | + | :{| class="gf-table mw-collapsible mw-collapsed" |
| − | + | !Level | |
| − | + | !Training Data (Skill 1) | |
| + | !Training Data (Skill 2 and 3) | ||
| + | !Time (Skill 1) | ||
| + | !Time (Skill 2 and 3) | ||
| + | !Total Costs | ||
| + | |- | ||
| + | |Lv. 1 → Lv. 2 | ||
| + | |200x {{Icon|basicdata}} + 50x {{Icon|batteries}} | ||
| + | |100x {{Icon|basicdata}} + 50x {{Icon|batteries}} | ||
| + | |style="text-align: center;" | 2:00:00 | ||
| + | |style="text-align: center;" | 1:00:00 | ||
| + | |400x {{Icon|basicdata}} + 150x {{Icon|batteries}} | ||
| + | |- | ||
| + | |Lv. 2 → Lv. 3 | ||
| + | |400x {{Icon|basicdata}} + 50x {{Icon|batteries}} | ||
| + | |200x {{Icon|basicdata}} + 50x {{Icon|batteries}} | ||
| + | |style="text-align: center;" | 4:00:00 | ||
| + | |style="text-align: center;" | 2:00:00 | ||
| + | |800x {{Icon|basicdata}} + 150x {{Icon|batteries}} | ||
| + | |- | ||
| + | |Lv. 3 → Lv. 4 | ||
| + | |600x {{Icon|basicdata}} + 50x {{Icon|batteries}} | ||
| + | |300x {{Icon|basicdata}} + 50x {{Icon|batteries}} | ||
| + | |style="text-align: center;" | 6:00:00 | ||
| + | |style="text-align: center;" | 3:00:00 | ||
| + | |1200x {{Icon|basicdata}} + 150x {{Icon|batteries}} | ||
| + | |- | ||
| + | |Lv. 4 → Lv. 5 | ||
| + | |200x {{Icon|intdata}} + 80x {{Icon|batteries}} | ||
| + | |100x {{Icon|intdata}} + 80x {{Icon|batteries}} | ||
| + | |style="text-align: center;" | 12:00:00 | ||
| + | |style="text-align: center;" | 6:00:00 | ||
| + | |400x {{Icon|intdata}} + 240x {{Icon|batteries}} | ||
| + | |- | ||
| + | |Lv. 5 → Lv. 6 | ||
| + | |400x {{Icon|intdata}} + 80x {{Icon|batteries}} | ||
| + | |200x {{Icon|intdata}} + 80x {{Icon|batteries}} | ||
| + | |style="text-align: center;" | 18:00:00 | ||
| + | |style="text-align: center;" | 9:00:00 | ||
| + | |800x {{Icon|intdata}} + 240x {{Icon|batteries}} | ||
| + | |- | ||
| + | |Lv. 6 → Lv. 7 | ||
| + | |600x {{Icon|intdata}} + 80x {{Icon|batteries}} | ||
| + | |300x {{Icon|intdata}} + 80x {{Icon|batteries}} | ||
| + | |style="text-align: center;" | 24:00:00 | ||
| + | |style="text-align: center;" | 12:00:00 | ||
| + | |1200x {{Icon|intdata}} + 240x {{Icon|batteries}} | ||
| + | |- | ||
| + | |Lv. 7 → Lv. 8 | ||
| + | |200x {{Icon|advdata}} + 100x {{Icon|batteries}} | ||
| + | |100x {{Icon|advdata}} + 100x {{Icon|batteries}} | ||
| + | |style="text-align: center;" | 30:00:00 | ||
| + | |style="text-align: center;" | 15:00:00 | ||
| + | |400x {{Icon|advdata}} + 300x {{Icon|batteries}} | ||
| + | |- | ||
| + | |Lv. 8 → Lv. 9 | ||
| + | |400x {{Icon|advdata}} + 100x {{Icon|batteries}} | ||
| + | |200x {{Icon|advdata}} + 100x {{Icon|batteries}} | ||
| + | |style="text-align: center;" | 36:00:00 | ||
| + | |style="text-align: center;" | 18:00:00 | ||
| + | |800x {{Icon|advdata}} + 300x {{Icon|batteries}} | ||
| + | |- | ||
| + | |Lv. 9 → Lv. 10 | ||
| + | |600x {{Icon|advdata}} + 100x {{Icon|batteries}} | ||
| + | |300x {{Icon|advdata}} + 100x {{Icon|batteries}} | ||
| + | |style="text-align: center;" | 48:00:00 | ||
| + | |style="text-align: center;" | 24:00:00 | ||
| + | |1200x {{Icon|advdata}} + 300x {{Icon|batteries}} | ||
| + | |} | ||
{{clr}} | {{clr}} | ||
| + | |||
=== Central Data Refactoring === | === Central Data Refactoring === | ||
[[File:HOC_Tutorial_Code_Refactoring.jpg|250px|right|thumb|The UI for refactoring Central Data]] | [[File:HOC_Tutorial_Code_Refactoring.jpg|250px|right|thumb|The UI for refactoring Central Data]] | ||
Revision as of 15:15, 22 January 2020
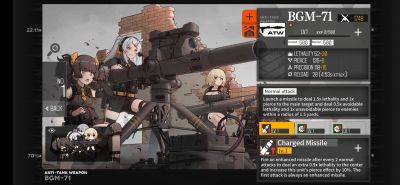
Heavy Ordnance Corps (HOC for short) is the name of the heavily equipped units in game. First released on CN before 2018 summer event Continuum Turbulence they made a big change in gameplay. EN/JP followed roughly the same release order (January 2020 before Continuum Turbulence).
Contents
General
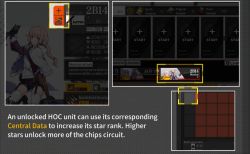
HOC units are handled different than normal T-Dolls. There can only be one instance of each HOC unit, so they are rather unlocked than gained. To unlock a HOC unit, five Central Data need to be prepared. Further Central Data will be needed to promote the HOC unit. Once unlocked there is no way to lose them as there is no mechanic to release or scrap them.
They do not have equipment, but can be strengthened with Chips.
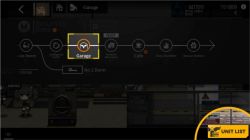
HOC units appear as normal units on the battlefield. For a proper introduction on how to handle them, please see In battle. The HOC feature introduces two new buildings to the Headquarters: The Intelligence Center and the Garage.
Access
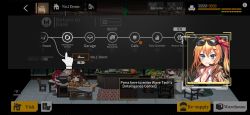
All interactions with the new HOC feature are within the new buildings/rooms. They will be unlocked with beating chapter 8 stage 5.
The newly available room can be accessed by either of the following ways:
- Tapping the Intelligence Center in the Headquarters (HQ) menu (the overview of all rooms of the HQ). It's in the outer ring.
- Tapping the Intelligence Center in the quick-base-menu on the main screen. It will be one of the available quick-switch-options
- On the main screen on the left quick-overview. The WAVE Tech. Logo will lead to the room. Also, it will show possible Samples to harvest.
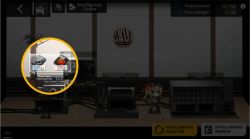
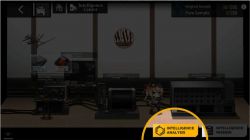
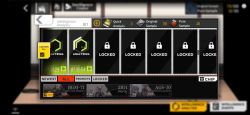
Intelligence Center
The Intelligence Center is the main place to gain Central Data and Chips for the HOC units.
Data receiver
Every 8 (eight) hours from 00:00 (+8GMT), ![]() Original Samples and
Original Samples and ![]() Pure Samples can be harvested here. The samples will remain at the Data Receiver until one collects it and will continue to gather over time until it reaches a certain cap. This cap can be raised by upgrading this facility.
Pure Samples can be harvested here. The samples will remain at the Data Receiver until one collects it and will continue to gather over time until it reaches a certain cap. This cap can be raised by upgrading this facility.
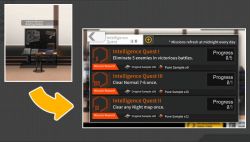
Intelligence quests
Provides quests rewarding Samples. The Intelligence Quests will offer new quests each day. Existing quest progress will be lost with the change of the day.
Quest rewards are ![]() Original Samples and
Original Samples and ![]() Pure Samples.
Pure Samples.
Depending on the upgrade level of the facility, up to 3 (three) quests are provided.
Data storage
Defines how many ![]() Original Samples and
Original Samples and ![]() Pure Samples can be storaged. Upgrading this facility will increase the amount of Samples storable.
Pure Samples can be storaged. Upgrading this facility will increase the amount of Samples storable.
Computer
Processes ![]() Original Samples and
Original Samples and ![]() Pure Samples into Chips or Central Data.
Pure Samples into Chips or Central Data.
The general rules of processing are as follows:
- The level of the Computer determines the research tasks that can be started parallel and the time it will take (down to 4 hours).
- A research task can be started either with 20
 Original Samples or 20
  Pure Samples.
- The result will be a Chip or a Central Data instance of a HOC unit.
When enough Central Data for a HOC unit's promotion or unlocking is collected, it can be applied by tapping the corresponding icon on the bottom. Depending on the currently activated tab at the bottom a switch to "all" might be necessary.
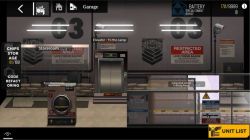
Garage
The Garage provides facilities necessary to manage HOC units and Chips.
Storage
The Storage holds onto all Chips collected. Upgrading the Storage increases the amount of Chips storable. It has no further function.
The facility's level determines the amount of Chips which can be stored.
Maintenance Machinery
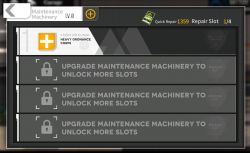
The repair station for damaged HOC units. HOC units can be repaired by opening the facility's menu and choosing the HOC unit which shall be repaired.
When there are damaged HOC units, the T-Doll repair menu will show an additional button to start the repair of the HOC unit, too.
Each facility level adds another slot up to a max. level of three (=four slots).
Training Range
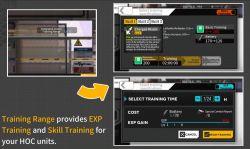
The Training Range is used for both experience and skill training of HOC units. Units in training are not available for use in missions.
Upgrading this facility will increase the amount of units able to be trained in parallel. It will also affect the amount of ![]() Special Combat Reports consumed in Experience Training. Special Combat Reports are produced in the Data Room; in the Office Desk's menu, press the right box to select. Their production follow the exact same rules as normal Battle Reports.
Special Combat Reports consumed in Experience Training. Special Combat Reports are produced in the Data Room; in the Office Desk's menu, press the right box to select. Their production follow the exact same rules as normal Battle Reports.
For each slot in the facility one HOC unit is selected. For each HOC unit the type of training has to be selected (Experience or Skill Training).
Once a training has been ordered, it cannot be cancelled. To complete either immediately, a single ![]() Quick Training Contract will be used.
Quick Training Contract will be used.
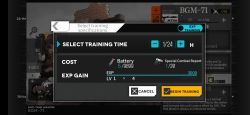
For Experience Training, both ![]() batteries and
batteries and ![]() Special Combat Reports are needed. The amount consumed depends on the upgrade level of the facility and the hours of training set with the slider. You will always need at least 5
Special Combat Reports are needed. The amount consumed depends on the upgrade level of the facility and the hours of training set with the slider. You will always need at least 5 ![]() per hour, regardless of the level of the Training Facility; therefore, it is recommended to wait until Level 10 for the best results (15
per hour, regardless of the level of the Training Facility; therefore, it is recommended to wait until Level 10 for the best results (15 ![]() for the same 5
for the same 5 ![]() ).
).
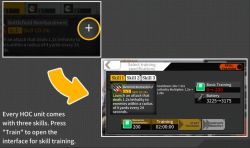
For Skill Training, both ![]() batteries and the three different tiers of
batteries and the three different tiers of ![]()
![]()
![]() data are needed. The time needed for training depends on the skill level. The first skill of each HOC, however, is special: it requires double the amount of data and slightly different amount of time (generally double as well).
data are needed. The time needed for training depends on the skill level. The first skill of each HOC, however, is special: it requires double the amount of data and slightly different amount of time (generally double as well).
Central Data Refactoring
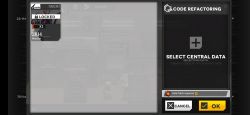
Facility used for refactoring Central Data of HOC units to ![]() WAVE Data Patches. WAVE Data Patches are used to further boost a HOC's rarity and increase their stats beyond maximum. Central Data to be refactored needs to be dragged over to the right field. The choice will be confirmed with "OK".
WAVE Data Patches. WAVE Data Patches are used to further boost a HOC's rarity and increase their stats beyond maximum. Central Data to be refactored needs to be dragged over to the right field. The choice will be confirmed with "OK".
In early stages it is not recommended to use this facility at all. In the newer versions of the game refactoring Central Data in early stages is forbidden to prevent accidentally scrapping important Central Data.
Elevator
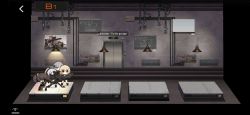
Clicking on the Elevator in the Garage will lead to separate rooms in the basement. Each rooms ID will be noted on the top left of the screen. This place is another overview of the HOC units.
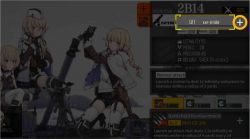
- B1 Exhibition: The following units will be displayed on four podiums from left to right: BGM-71, AGS-30, 2B14, M2
- B2 Exhibition: The following units will be displayed on four podiums from left to right: AT4, QLZ-04 (Third and fourth are not known)
Support Unit
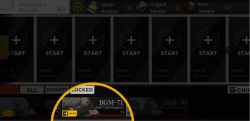
The Support Unit overview lists all available HOC units. Unlocked units provide further interactions.
Stat enhancement
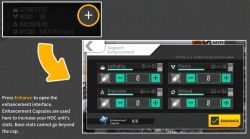
Similar to stat enhancement of T-Dolls, HOC units can raise their stats by consuming ![]() Enhancement Pills.
Enhancement Pills.
In contrast to T-Dolls, HOC units' stats need to be upgraded each for its own.
Not all stats do not increase with a 1:1 rate:
- Lethality increases 1 per pill
- Armor piercing increases 3 per pill
- Accuracy increases 3 per pill
- Loading increases 2 per pill
Promotion
A HOC unit's iteration (star rank) can be upgraded up to five yellow stars with Central Data by promoting it. Further upgrades are possible once the unit reaches level 100. Upgrades beyond five yellow stars require ![]() WAVE Data Patches. The iteration description continues with "one empty star", "one filled star", "one filled and one empty star" and so on. The red stars will overlay the yellow ones.
WAVE Data Patches. The iteration description continues with "one empty star", "one filled star", "one filled and one empty star" and so on. The red stars will overlay the yellow ones.
| Iteration | Commulative Cost | |
|---|---|---|
| ★ - ★★★★★ | (Central Data) | (Central Data) |
| ☆★★★★ | 5 | 5 |
| ★★★★★ | 8 | 13 |
| ★☆★★★ | 10 | 23 |
| ★★★★★ | 15 | 38 |
| ★★☆★★ | 20 | 58 |
| ★★★★★ | 25 | 83 |
| ★★★☆★ | 30 | 113 |
| ★★★★★ | 30 | 143 |
| ★★★★☆ | 30 | 173 |
| ★★★★★ | 30 | 203 |
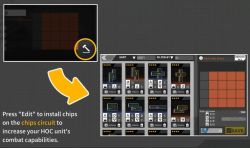
Chip set up
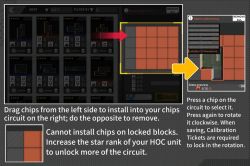
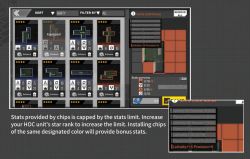
The Chips attached to a HOC unit can be set up here. Chips can be placed by dragging them from the storage (left) to the Chip Matrix of the HOC unit (right). Tapping on a placed Chip rotates it. Each rotated Chip consumes ![]() Calibration Tickets when confirmed. The amount of tickets used will vary based on the rotated chips rarity;
Calibration Tickets when confirmed. The amount of tickets used will vary based on the rotated chips rarity;
- 2* Chips when rotated will cost 20x tickets
- 3* Chips when rotated will cost 30x tickets
- 4* Chips when rotated will cost 40x tickets
- 5* Chips when rotated will cost 50x tickets
The numbers displayed are "Chip stat sum" and "Max allowed stat". The coloured number next to them is the "Same colour bonus".
Placing Chips of the same colour provides a stat bonus. Tap the information icon to see the possible and achieved bonuses.
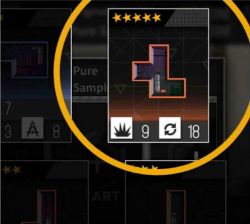
The Chip system is a classic Pentomino puzzle system[1]. Place and rotate Chips to fill the matrix of your HOC unit.
For a detailed explanation, please see Heavy Ordnance Corps Chip Matrix.
Chips
So called Chips (Tetris like stones) are used as "equipment" for the HOC units. The number of Chips which can be collected are defined by the Storage. Despite the colour, there is no difference between blue and orange coloured Chips.
Enhancement
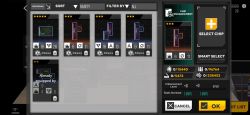
Chips can be enhanced similar to how equipment enhancement works. To enhance a Chip, other Chips and resources will be consumed. After choosing the Chip for enhancement, the Chips for consumption need to be selected.
Using Chips of the same colour and/or higher rarity will give more "experience" for the Chip. Each upgrade will result in higher stats of the Chip.
Scrapping
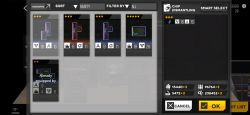
Unneeded Chips can be scrapped. Each scrapped Chip will grant a small amount of resources.
A common rule of thumb defines that Chips should only be scrapped if the storage is full and the existing (and installed) six- or five-star Chips are already enhanced to their maximum level.
In Battle
- HOC units can only be deployed on a specific helipad.
- You can deploy a normal echelon or a HOC unit on it
- Can first be found in chapter 9 and throughout 10 as well.
- This is the only field where a HOC unit can resupply themselves.
- A HOC unit CANNOT attack another SF unit directly, you'll get a prompt warning you if you try.
- HOC units support your echelons in a range of 2, though some Units may have higher or lesser range.
- Multiple HOC units can support an echelon parallel.
- One can choose to toggle off one of their HOC supports by tapping/clicking on that unit and flipping the switch off.
- Each support task will consume 1 ammo and ration tick.
- If attacked by an enemy the HOC unit will flee in terror.
- You will be able to redeploy them at their Airfield, though you will need to repair them first which can also be done at the airfield.
- There is a limit how many times you can deploy them and how many HOC you can put in the battlefield.
Trivia
- Yes, the Maintenance Machinery is a washing machine.
- The logo in the background of the Intelligence Center changes with the level of the facilities.
- The screenshots shown in the in-game tutorials contain rendering errors.
Known units
For a list of released HOC units, please see the corresponding Index

