Difference between revisions of "Combat Simulation"
m |
|||
| (28 intermediate revisions by 12 users not shown) | |||
| Line 1: | Line 1: | ||
{{Guide}} | {{Guide}} | ||
| + | __TOC__ | ||
| + | {{Cleanup|reason= | ||
| + | * Some more tips should be added here | ||
| + | * Should add maps of all difficulties of the different modes here}} | ||
| + | * Enemy formation preview images | ||
| + | |||
| + | == Overview == | ||
| + | Combat Simulation allows you to send your T-Dolls on various training missions. It requires Commander Level 12 to be unlocked. | ||
| + | |||
| + | Performing simulations does not use ammunition or rations, but spends energy. One point of energy is gained every two hours, up to a maximum of six. Should you run out, more may be bought from the [[Shop|store]]. {{Icon|Superconducting Energy}} Extra energies are used when your main energy runs out. | ||
| + | |||
| + | The first four simulation are divided into three difficulties; '''Basic''', '''Intermediate''', and '''Advanced'''. Missions of a higher level have a higher difficulty and a correspondingly higher reward. {{clr}} | ||
| + | |||
| + | == Reinforcement Exercises == | ||
| + | {{ThumbSlider|width=300|align=right|list= | ||
| + | {{p|[[File:Capsule Sim0.jpg|thumb|300px|Reinforcement Exercises.]]}} | ||
| + | {{p|[[File:Capsule Sim1.jpg|thumb|300px|Basic training.]]}} | ||
| + | {{p|[[File:Capsule Sim2.jpg|thumb|300px|Intermediate training.]]}} | ||
| + | {{p|[[File:Capsule Sim3.jpg|thumb|300px|Advanced training.]]}} | ||
| + | }} | ||
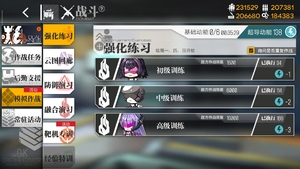
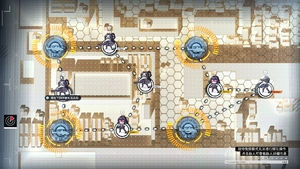
| + | Reinforcement Exercises open every '''Monday''', '''Thursday''', and '''Sunday'''. It provides {{Icon|Enhancement Capsule}}Enhancement Capsules, which the Commander can use to strengthen T-Dolls and HOC units. All training levels involve sending one echelon down a fixed path to fight an enemy echelon. Random nodes that can be found along the way may drop {{Icon|Enhancement Capsule}}Enhancement Capsules or random [[Guide:Tutorial#Resources|resources]]. The higher the difficulty is, the more rewards the Commander can get. | ||
| + | |||
| + | *'''Basic''' Training provides guaranteed {{Icon|Enhancement Capsule}}x1. | ||
| + | ** Random node has a chance for {{Icon|Enhancement Capsule}}+1, increasing potential reward to {{Icon|Enhancement Capsule}}x2 total. | ||
| + | *'''Intermediate''' Training provides guaranteed {{Icon|Enhancement Capsule}}x2. | ||
| + | ** Random node has a chance for {{Icon|Enhancement Capsule}}+1 or +2, increasing potential reward to {{Icon|Enhancement Capsule}}x6 total. | ||
| + | *'''Advanced''' Training provides guaranteed {{Icon|Enhancement Capsule}}x3. | ||
| + | ** Random node has a chance for {{Icon|Enhancement Capsule}}+2 or +3, increasing potential reward to {{Icon|Enhancement Capsule}}x12 total. | ||
| + | |||
| + | See also: [[Guide:Factory Menu#Tactical_Dolls|T-Doll Enhancement]], [[Heavy Ordnance Corps#Stat_enhancement|HOC Enhancement]] {{clr}} | ||
| + | |||
| + | == Data Sampling == | ||
| + | {{ThumbSlider|width=300|align=right|list= | ||
| + | {{p|[[File:Data Sim0.jpg|thumb|300px|Data Sampling.]]}} | ||
| + | {{p|[[File:Data Sim1.jpg|thumb|300px|Team selection screen.]]}} | ||
| + | }} | ||
| + | Data Sampling simulation battle provides {{Icon|Basic Training Data}}{{Icon|Intermediate Training Data}}{{Icon|Advanced Training Data}}Training Data, which is essential for [[Guide:Research Menu#Skill Training|skill training]] for both T-Dolls and Fairies. Commander can use any owned T-Doll for this sim, including those who are in the middle of repair, logistic mission, or expedition. | ||
| + | |||
| + | Commander is given a maximum 30 seconds to beat the [[Training Drone]]. Successfully beating the drone within the time limit will award the Commander with {{Icon|Basic Training Data}}{{Icon|Intermediate Training Data}}{{Icon|Advanced Training Data}}Training Data. Faster time corresponds to higher amount of reward. | ||
| + | |||
| + | * '''Basic''' Training: 10,000 HP. | ||
| + | **Maximum reward: {{Icon|Basic Training Data}}x218. | ||
| + | * '''Intermediate''' Training: 20,000 HP. | ||
| + | **Maximum reward: {{Icon|Intermediate Training Data}}x98. | ||
| + | * '''Advanced''' Training: 40,000 HP. | ||
| + | **Maximum reward: {{Icon|Advanced Training Data}}x53. | ||
| + | |||
| + | == Experience Training == | ||
| + | {{ThumbSlider|width=300|align=right|list= | ||
| + | {{p|[[File:Exp Sim0.jpg|thumb|300px|Experience Training.]]}} | ||
| + | {{p|[[File:Exp Sim1.jpg|thumb|300px|Basic training.]]}} | ||
| + | {{p|[[File:Exp Sim2.jpg|thumb|300px|Intermediate training.]]}} | ||
| + | {{p|[[File:Exp Sim3.jpg|thumb|300px|Advanced training.]]}} | ||
| + | }} | ||
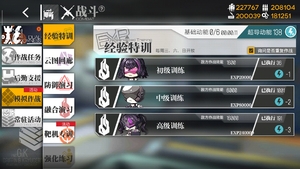
| + | Experience Mode is identical to actual combat, with several exceptions. T-Dolls which die in combat here will not lose [[Affection|affection]]. Additionally, there is no enemy phase and T-Dolls do not consume Ammo or Ration. | ||
| + | |||
| + | Experience Mode cannot be paused once it is started. | ||
| + | |||
| + | Once it is completed, you will receive fixed amount of EXP split evenly between all T-Dolls present in the simulation, meaning the less T-Dolls you bring the more individual EXP they will each gain. The amount of experience given is dependent on the difficulty of the mission and on the number of enemy echelons you successfully eliminated, with a 2x bonus awarded for fully clearing the mission. | ||
| + | |||
| + | Leaving low-level teams you want to level on drop zones and bringing just enough to clear the mobs is an effective strategy for maximizing efficiency, but be careful as the mission will be failed if all T-Dolls are killed. Even if only one T-Doll survives the simulation can be cleared and the valuable bonus EXP awarded. Furthermore, no additional EXP is awarded to a squad that defeats a mob. | ||
| + | |||
| + | *Basic EXP training rewards 20,000 EXP split between all participating T-Dolls. | ||
| + | *Intermediate EXP training rewards 80,000 EXP split between all participating T-Dolls. | ||
| + | *Advanced EXP training rewards 240,000 EXP split between all participating T-Dolls. {{clr}} | ||
| + | |||
| + | == Corridor of Cloud Atlas == | ||
| + | {{ThumbSlider|width=300|align=right|list= | ||
| + | {{p|[[File:Digimind Corridor0.jpg|thumb|300px|Corridor of Cloud Atlas.]]}} | ||
| + | {{p|[[File:Digimind Corridor1.jpg|thumb|300px|Basic training.]]}} | ||
| + | {{p|[[File:Digimind Corridor2.jpg|thumb|300px|Intermediate training.]]}} | ||
| + | {{p|[[File:Digimind Corridor3.jpg|thumb|300px|Advanced training.]]}} | ||
| + | }} | ||
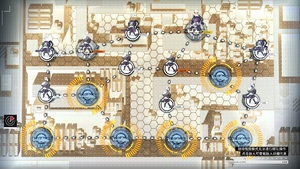
| + | Neural Cloud Corridor is available '''everyday''' This simulation battle provides the Commander with {{Icon|Memory Fragments}}Memory Fragments which can be used to perform [[Guide:Research Menu#Digi-mind_Upgrade|Digimind Upgrade]] for eligible T-Dolls. Similar to Capsule Mode, the Commander sends an echelon to clear one enemy echelon down a fixed path riddled with mystery nodes, which may award the Commander with either extra {{Icon|Memory Fragments}}Memory Fragments or random resources. | ||
| + | |||
| + | *'''Basic''' Training provides guaranteed {{Icon|Memory Fragments}}x8. | ||
| + | ** Random node has a chance for {{Icon|Memory Fragments}}+3, increasing potential reward to {{Icon|Memory Fragments}}x11 total. | ||
| + | *'''Intermediate''' Training provides guaranteed {{Icon|Memory Fragments}}x20. | ||
| + | ** Random node has a chance for {{Icon|Memory Fragments}}+5, increasing potential reward to {{Icon|Memory Fragments}}x30 total. | ||
| + | *'''Advanced''' Training provides guaranteed {{Icon|Memory Fragments}}x30. | ||
| + | ** Random node has a chance for {{Icon|Memory Fragments}}+10, increasing potential reward to {{Icon|Memory Fragments}}x60 total. | ||
| + | |||
| + | See also: [[:Category:T-Dolls with Digi-mind upgrade|T-Dolls with Digimind Upgrade]] {{clr}} | ||
| + | |||
| + | == Defense Drill == | ||
| + | {{ThumbSlider|width=300|align=right|list= | ||
| + | {{p|[[File:Defense Drill0.jpg|thumb|300px|Defense Drill.]]}} | ||
| + | {{p|[[File:Defense Drill1.jpg|thumb|300px|Echelon selection interface.]]}} | ||
| + | }} | ||
| + | Defense Drill is a survival mode, it has a fixed cost of 5 energy and you can assign up to 4 echelons. The objective is to survive for up to 109 waves, each wave will give you a certain amount of {{Icon|calibrationvoucher}}Calibration Tickets, and every 10 waves there will be a boss which rewards you a package with resources, gems, and {{Icon|calibrationvoucher}}. The rewards increase with each passing wave. | ||
| + | |||
| + | Keep in mind that progress is saved and you cannot back out of the Defense Drill (or you lose), this means that packages are a one time reward. If you lose, the next time you will start at the wave after the last boss you have beaten. Losing with one echelon means all echelons go home, be careful. | ||
| + | |||
| + | The enemy composition changes between 5 and 10 waves and gets increasingly stronger each wave. At the later stages of the Drill, you will most likely need specialized compositions to get through. There will be night battles. | ||
| + | Once you've completed all waves, you will start at wave 101, this means that you will only be able to farm {{Icon|calibrationvoucher}} after fully completing the Drill. | ||
| + | |||
| + | See also: [[Guide:Research Menu#Equipment_Calibration|Equipment/Fairy Calibration]] {{clr}} | ||
| + | |||
| + | == Sangvis Cultivation == | ||
| + | [[File:Battle Simulation Sangvis Cultivation.jpg|thumb|300px|right|Sangvis Cultivation.]] | ||
| + | |||
| + | With the arrival of [[Protocol Assimilation]], Sangvis Cultivation simulation battle is added to provide Coalition units with items needed for their growth and upgrade. | ||
| + | |||
| + | What makes it different with other simulation is the Commander cannot use their own T-Dolls for this simulation. Instead, Commander will be provided with random selection of T-Dolls for each simulation mode that will be refreshed on a weekly basis. These T-Dolls are level 100, fully-linked, well-equipped (fully enhanced and calibrated), and came with max skill level. Enemy lineup is also refreshed on a weekly basis. Each mode will get a different enemy lineup, which consists of one of the three [[Enemy Index|opposing forces]]; Sangvis Ferri, KCCO, and Paradeus. | ||
| + | |||
| + | This sim battle consists of three modes. It uses different type of sim energy, which recharge at the same rate as the standard sim energy. Each mode has their own ''bonus day''. During bonus day, reward received will get multiplied by three. Sunday will grant bonus for all mode. Commander can also gain extra reward by clearing the sim under par time, 10-20%, which will yield 10-20% extra reward. | ||
| + | |||
| + | === EXP Simulation === | ||
| + | * This mode will get bonus on Monday and Thursday. | ||
| + | * Provides '''SF Combat Report''' which can be used to level up Coalition units @3000 exp each. | ||
| + | * Completing this mode will grant 10-12 pieces on normal day, and 30-36 pieces during bonus day. | ||
| + | |||
| + | === Development Simulation === | ||
| + | * This mode will get bonuses on Tuesday and Friday. | ||
| + | * Provides '''Development Petri Dish''' which is used to raise Coalition units' development level (rarity). | ||
| + | * Completing this mode will grant 6-8 pieces on normal day, and 18-22 pieces on bonus day. | ||
| + | |||
| + | === Data Simulation === | ||
| + | * Data Simulation will get bonuses on Wednesday and Saturday. | ||
| + | * Provides '''SF Skill Chips''' which is used to raise Coalition units' skill level. | ||
| + | * Completing this mode will grant 70-84 pieces on normal day, and 210-252 pieces on bonus day. {{clr}} | ||
| + | |||
| + | == Target Practice == | ||
| + | [[File:Target Practice0.jpg|thumb|300px|right|Target Practice.]] | ||
| + | |||
| + | After showcased in July 2020 Summer Livestream, Training Drone Exercise mode was finally live with v2.0600. This simulation battle is a sandbox-like feature, where Commanders can commence tests for T-Doll composition and battle performance without going to actual battle in mission. | ||
| + | |||
| + | *Open Everyday | ||
| + | *DOESN'T CONSUME RESOURCES (Manpower / Fairy Commands / Repairs / Energy / Etc.) | ||
| + | *Form Echelons of up to 5 T-Dolls, 1 Fairy, and 4 HOCs | ||
| + | *ALL units come from a Commander's Personal Armory | ||
| + | *Limited Time "Special" Challenges | ||
| + | **Ranking is based on clear time; Faster Time equals better Score/Rank | ||
| + | |||
| + | === Customized Training Drone (Tentative) === | ||
| + | Target: [[Training Drone]] | ||
| + | |||
| + | Customizations: | ||
| + | |||
| + | Environment: | ||
| + | *Day | ||
| + | *Night | ||
| + | Stats (None / Low / Medium / High / Very High): | ||
| + | *[[File:Icon_eva.png|20px]] Evasion | ||
| + | *[[File:Icon_armor.png|20px]] Armor | ||
| + | *Shield | ||
| + | *[[File:Icon_Skill_Invincible.png|20px]] Force | ||
| + | - Secondary Bar Selects Percentage: 30 50 70 100 % | ||
| + | |||
| + | Target Strength Slider: | ||
| + | |||
| + | *Strength Level 1-5 <br> | ||
| + | *Recommended Commander Level 20, 40, 60, 80, 100 respectively | ||
| + | |||
| + | Strength Level / HP (Per Dummy) | ||
| + | |||
| + | {| class="gf-table sortable" | ||
| + | |- | ||
| + | ! Target Strength | ||
| + | ! HP (Per Dummy) | ||
| + | |- | ||
| + | |1 | ||
| + | |5,000 | ||
| + | |- | ||
| + | |2 | ||
| + | |10,000 | ||
| + | |- | ||
| + | |3 | ||
| + | |20,000 | ||
| + | |- | ||
| + | |4 | ||
| + | |40,000 | ||
| + | |- | ||
| + | |5 | ||
| + | |100,000 | ||
| + | |} | ||
| + | |||
| + | Target HP: | ||
| + | *Normal | ||
| + | *Invincible (HP Unaffected by Damage) | ||
| + | Target Formation: | ||
| + | *Max (5 Dummy-Link) | ||
| + | *Single (1 Dummy-Link) | ||
| + | |||
| − | + | == == | |
| + | === Exercises Target (Tentative) === | ||
| + | Target: Enemy Echelon Formations ([[Enemy Index]]) | ||
| − | + | Customizations: | |
| − | + | Environment: | |
| + | *Day | ||
| + | *Night | ||
| − | + | Target HP: | |
| + | *Normal | ||
| + | *Invincible (HP Unaffected by Damage) | ||
| − | + | Target Damage: | |
| + | *Open | ||
| + | *Close (Enemy Attacks Deal No Damage) | ||
| − | |||
| − | + | '''Enemy Formations / Target Strength:''' | |
| + | <div class="mw-collapsible mw-collapsed"> | ||
| + | |||
| + | Formation #1: | ||
| + | |||
| + | (Target Strength 1-3)<br> | ||
| + | '''Wandering Stragglers''' - Easily manageable with an echelon trained to a reasonable level. | ||
| + | |||
| + | (Target Strength 4-5)<br> | ||
| + | '''Wandering Stragglers''' - Hoodwinking morons and weaklings takes both flexible strategies and nimble T-Dolls. | ||
| + | |||
| + | {| class="gf-table mw-collapsible mw-collapsed" | ||
| + | |- | ||
| + | ! Enemy Formation | ||
| + | ! Target Strength | ||
| + | ! Enemies | ||
| + | |- | ||
| + | |Wandering Stragglers | ||
| + | |1 | ||
| + | |Dragoon x 4 / Scout x 2 / Ripper x 8 / Vespid x 6 | ||
| + | |- | ||
| + | |W/S | ||
| + | |2 | ||
| + | |Dragoon x 6 / Scout x 3 / Ripper x 12 / Vespid x 9 | ||
| + | |- | ||
| + | |W/S | ||
| + | |3 | ||
| + | |Scout x 3 / Ripper x 12 / Vespid x 9 / Striker x 6 | ||
| + | |- | ||
| + | |W/S | ||
| + | |4 | ||
| + | |Beast x 4 / Archer x 4 | ||
| + | |- | ||
| + | |W/S | ||
| + | |5 | ||
| + | |Beast x9 / Archer x 4 | ||
| + | |} | ||
| + | |||
| + | |||
| + | Formation #2: | ||
| + | |||
| + | (Target Strength 1-5)<br> | ||
| + | '''Concentrated Wraiths''' - Wraiths are composites of all horrors and ought to be wiped out in one go. (Echelons with good AoE damage recommended.) | ||
| + | |||
| + | {| class="gf-table mw-collapsible mw-collapsed" | ||
| + | |- | ||
| + | ! Enemy Formation | ||
| + | ! Target Strength | ||
| + | ! Enemies | ||
| + | |- | ||
| + | |Concentrated Wraiths | ||
| + | |1 | ||
| + | |Infected x 16 / Infected Soldier x 14 | ||
| + | |- | ||
| + | |C/W | ||
| + | |2 | ||
| + | |Infected x 24 / Infected Soldier x 27 | ||
| + | |- | ||
| + | |C/W | ||
| + | |3 | ||
| + | |Infected x 36 / Infected Soldier x 27 | ||
| + | |- | ||
| + | |C/W | ||
| + | |4 | ||
| + | |Unknown x 72 | ||
| + | |- | ||
| + | |C/W | ||
| + | |5 | ||
| + | |Unknown x 155 | ||
| + | |} | ||
| + | |||
| + | |||
| + | Formation #3: | ||
| + | |||
| + | (Target Strength 1-3)<br> | ||
| + | '''Guns and Shields''' - Shields are rather bothersome, but without the pikes behind them, the become pointless. (Echelons that target the back row recommended.) | ||
| + | |||
| + | (Target Strength 4)<br> | ||
| + | '''Armored Infantry''' - If you can't penetrate their armor, it's futile no matter how many people you throw at them. (Echelons who target the unit with the highest HP and have armor-piercing capability recommended. It will also be easier if your front row units are tanky.) | ||
| + | |||
| + | (Target Strength 5)<br> | ||
| + | '''Aegis and Deer''' - (Same as Above) | ||
| + | |||
| + | {| class="gf-table mw-collapsible mw-collapsed" | ||
| + | |- | ||
| + | ! Enemy Formation | ||
| + | ! Target Strength | ||
| + | ! Enemies | ||
| + | |- | ||
| + | |Guns and Shields | ||
| + | |1 | ||
| + | |Guard x 4 / Jaegar x 4 | ||
| + | |- | ||
| + | |G/S | ||
| + | |2 | ||
| + | |Guard x 12 / Jaegar x 12 | ||
| + | |- | ||
| + | |G/S | ||
| + | |3 | ||
| + | |Guard x 12 / Jaegar x 18 | ||
| + | |- | ||
| + | |Armored Infantry | ||
| + | |4 | ||
| + | |Aegis x 12 / Nemeum x 24 | ||
| + | |- | ||
| + | |Aegis and Deer | ||
| + | |5 | ||
| + | |Aegis (KCCO) x 20 / Cerynitis x 35 | ||
| + | |} | ||
| + | |||
| + | |||
| + | Formation #4: | ||
| + | |||
| + | (Target Strength 1-5)<br> | ||
| + | '''Twisted Faith''' - If you can't defeat enemies with strong faith, then destroy their faith first - starting with the force field. (Echelons capable of tearing down a single high-health target and effective against enemies with force fields recommended.) | ||
| + | |||
| + | {| class="gf-table mw-collapsible mw-collapsed" | ||
| + | |- | ||
| + | ! Enemy Formation | ||
| + | ! Target Strength | ||
| + | ! Enemies | ||
| + | |- | ||
| + | |Twisted Faith | ||
| + | |1 | ||
| + | |Rodelero x 1 / Stretlet x 12 | ||
| + | |- | ||
| + | |T/F | ||
| + | |2 | ||
| + | |Stretlet x 27 / Rodelero x 1 | ||
| + | |- | ||
| + | |T/F | ||
| + | |3 | ||
| + | |Stretlet x 27 / Rodelero x 2 | ||
| + | |- | ||
| + | |T/F | ||
| + | |4 | ||
| + | |Stretlet x 24 / Doppelsoldner x 1 | ||
| + | |- | ||
| + | |T/F | ||
| + | |5 | ||
| + | |Stretlet x 30 / Doppelsoldner x 2 | ||
| + | |} | ||
| − | |||
| − | + | Formation #5: | |
| − | |||
| − | |||
| − | + | (Target Strength 1-5)<br> | |
| + | '''Mobile Explosives''' - The best way to stop nightmares is to wake up at once ... or just strangle it before it happens. (Echelons with high burst damage right off the bat recommended.) | ||
| − | + | {| class="gf-table mw-collapsible mw-collapsed" | |
| − | {| | + | |- |
| − | | | + | ! Enemy Formation |
| + | ! Target Strength | ||
| + | ! Enemies | ||
| + | |- | ||
| + | |Mobile Explosives | ||
| + | |1 | ||
| + | |Goliath x 2 | ||
| + | |- | ||
| + | |M/E | ||
| + | |2 | ||
| + | |Goliath x 2 | ||
| + | |- | ||
| + | |M/E | ||
| + | |3 | ||
| + | |Goliath x 2 | ||
| + | |- | ||
| + | |M/E | ||
| + | |4 | ||
| + | |Dactyl x 2 / Cerynitis x 16 | ||
| + | |- | ||
| + | |M/E | ||
| + | |5 | ||
| + | |Dactyl x 5 / Cerynitis x 20 | ||
|} | |} | ||
| − | + | Formation #6: | |
| − | |||
| − | |||
| − | + | (Target Strength 1-5)<br> | |
| + | '''Sturdy Iron Wall''' - If going strait at them proves difficult, try punching through that annoying armor! (Echelons capable of tearing down high-health targets and effective against enemies with force fields recommended. It might also be easier if your front row units are tanky.) | ||
| − | {| | + | {| class="gf-table mw-collapsible mw-collapsed" |
| − | | | + | |- |
| + | ! Enemy Formation | ||
| + | ! Target Strength | ||
| + | ! Enemies | ||
| + | |- | ||
| + | |Sturdy Iron Wall | ||
| + | |1 | ||
| + | |Roarer x 1 / Strelet+ x 6 | ||
| + | |- | ||
| + | |S/I/W | ||
| + | |2 | ||
| + | |Roarer x 1 / Strelet+ x 15 | ||
| + | |- | ||
| + | |S/I/W | ||
| + | |3 | ||
| + | |Strelet+ x 15 / Roarer x 2 | ||
| + | |- | ||
| + | |S/I/W | ||
| + | |4 | ||
| + | |Tesla Trooper x 1 / Cyclops x 24 | ||
| + | |- | ||
| + | |S/I/W | ||
| + | |5 | ||
| + | |Cyclops x 50 / Tesla Trooper x 2 | ||
|} | |} | ||
| − | |||
| − | |||
| − | |||
| − | + | Formation #7: | |
| − | + | (Target Strength 1-3)<br> | |
| + | '''Storm of Destruction''' - It is unwise to engage multiple Manticores - unless you're very experienced or know their weaknesses. | ||
| − | {| | + | (Target Strength 4-5)<br> |
| − | | | + | '''Storm of Destruction''' - It is unwise to engage multiple Hydras - unless you're very experienced or know their weaknesses. |
| + | |||
| + | {| class="gf-table mw-collapsible mw-collapsed" | ||
| + | |- | ||
| + | ! Enemy Formation | ||
| + | ! Target Strength | ||
| + | ! Enemies | ||
| + | |- | ||
| + | |Storm of Destruction | ||
| + | |1 | ||
| + | |Manticore x 2 | ||
| + | |- | ||
| + | |S/D | ||
| + | |2 | ||
| + | |Manticore x 6 | ||
| + | |- | ||
| + | |S/D | ||
| + | |3 | ||
| + | |Manticore x 12 | ||
| + | |- | ||
| + | |S/D | ||
| + | |4 | ||
| + | |Hydra x 8 | ||
| + | |- | ||
| + | |S/D | ||
| + | |5 | ||
| + | |Hydra x 20 | ||
|} | |} | ||
| − | == | + | Formation #8: |
| + | |||
| + | (Target Strength 1-5)<br> | ||
| + | '''Keen-Eyed Hunter''' - The abandoned Patrolers want to prove their worth by killing you. If you're still a rookie, avoid them. | ||
| + | |||
| + | {| class="gf-table mw-collapsible mw-collapsed" | ||
| + | |- | ||
| + | ! Enemy Formation | ||
| + | ! Target Strength | ||
| + | ! Enemies | ||
| + | |- | ||
| + | |Keen-Eyed Hunter | ||
| + | |1 | ||
| + | |Thunder (Enemy) x 1 | ||
| + | |- | ||
| + | |K-E/H | ||
| + | |2 | ||
| + | |Thunder (Enemy) x 1 | ||
| + | |- | ||
| + | |K-E/H | ||
| + | |3 | ||
| + | |Thunder (Enemy) x 1 | ||
| + | |- | ||
| + | |K-E/H | ||
| + | |4 | ||
| + | |Thunder (Enemy) x 1 | ||
| + | |- | ||
| + | |K-E/H | ||
| + | |5 | ||
| + | |Thunder (Enemy) x 2 | ||
| + | |}</div> | ||
| + | |||
| + | |||
| + | == == | ||
| + | === Challenge Exercises (Tentative) === | ||
| + | Target: Boss/Elite Formations (Special) | ||
| + | |||
| + | Customization: | ||
| + | *None | ||
| + | |||
| + | '''Formations''' | ||
| + | |||
| + | Cerberus: | ||
| + | *Day Battle | ||
| + | *Target CE - 126250 | ||
| + | *{{enemy name|Garm|boss}} x 1 / Dinergate x 40 / Tarantula x 40 | ||
| + | |||
| + | Yegor: | ||
| + | *Day Battle | ||
| + | *Target CE - 143733 | ||
| + | *Beast x 10 / Archeron x 1 / Pathfinder x 20 / Ares x 1 / Cyclops (SG) x 15 | ||
| + | |||
| + | Failed Isomer: | ||
| + | *Day Battle | ||
| + | *Target CE - 154709 | ||
| + | *{{enemy name|Isomer White|boss}} x 1 / Isomer (Enemy) x 26 | ||
| − | + | M16A1!: | |
| − | + | *Day Battle | |
| − | + | *Target CE - 169976 | |
| − | + | *{{enemy name|M16A1 (Boss)|boss}} x 1 / Ripper x 10 / Guard (SWAP) x 10 / Jaegar (SWAP) x 10 | |
| + | |||
| + | Intercepting Squadron: | ||
| + | *Day Battle | ||
| + | *Target CE - 175920 | ||
| + | *Typhon x 3 / Hydra x 15 / Aegis (KCCO) x 30 / Cerynitis x 30 / cyclops? x 15 / cyclops? x 15 | ||
Revision as of 01:58, 26 December 2020
Contents
- Enemy formation preview images
Overview
Combat Simulation allows you to send your T-Dolls on various training missions. It requires Commander Level 12 to be unlocked.
Performing simulations does not use ammunition or rations, but spends energy. One point of energy is gained every two hours, up to a maximum of six. Should you run out, more may be bought from the store. ![]() Extra energies are used when your main energy runs out.
Extra energies are used when your main energy runs out.
The first four simulation are divided into three difficulties; Basic, Intermediate, and Advanced. Missions of a higher level have a higher difficulty and a correspondingly higher reward.
Reinforcement Exercises
Reinforcement Exercises open every Monday, Thursday, and Sunday. It provides ![]() Enhancement Capsules, which the Commander can use to strengthen T-Dolls and HOC units. All training levels involve sending one echelon down a fixed path to fight an enemy echelon. Random nodes that can be found along the way may drop
Enhancement Capsules, which the Commander can use to strengthen T-Dolls and HOC units. All training levels involve sending one echelon down a fixed path to fight an enemy echelon. Random nodes that can be found along the way may drop ![]() Enhancement Capsules or random resources. The higher the difficulty is, the more rewards the Commander can get.
Enhancement Capsules or random resources. The higher the difficulty is, the more rewards the Commander can get.
- Basic Training provides guaranteed
 x1.
x1.
- Intermediate Training provides guaranteed
 x2.
x2.
- Advanced Training provides guaranteed
 x3.
x3.
See also: T-Doll Enhancement, HOC Enhancement
Data Sampling
Data Sampling simulation battle provides ![]()
![]()
![]() Training Data, which is essential for skill training for both T-Dolls and Fairies. Commander can use any owned T-Doll for this sim, including those who are in the middle of repair, logistic mission, or expedition.
Training Data, which is essential for skill training for both T-Dolls and Fairies. Commander can use any owned T-Doll for this sim, including those who are in the middle of repair, logistic mission, or expedition.
Commander is given a maximum 30 seconds to beat the Training Drone. Successfully beating the drone within the time limit will award the Commander with ![]()
![]()
![]() Training Data. Faster time corresponds to higher amount of reward.
Training Data. Faster time corresponds to higher amount of reward.
- Basic Training: 10,000 HP.
- Intermediate Training: 20,000 HP.
- Advanced Training: 40,000 HP.
Experience Training
Experience Mode is identical to actual combat, with several exceptions. T-Dolls which die in combat here will not lose affection. Additionally, there is no enemy phase and T-Dolls do not consume Ammo or Ration.
Experience Mode cannot be paused once it is started.
Once it is completed, you will receive fixed amount of EXP split evenly between all T-Dolls present in the simulation, meaning the less T-Dolls you bring the more individual EXP they will each gain. The amount of experience given is dependent on the difficulty of the mission and on the number of enemy echelons you successfully eliminated, with a 2x bonus awarded for fully clearing the mission.
Leaving low-level teams you want to level on drop zones and bringing just enough to clear the mobs is an effective strategy for maximizing efficiency, but be careful as the mission will be failed if all T-Dolls are killed. Even if only one T-Doll survives the simulation can be cleared and the valuable bonus EXP awarded. Furthermore, no additional EXP is awarded to a squad that defeats a mob.
- Basic EXP training rewards 20,000 EXP split between all participating T-Dolls.
- Intermediate EXP training rewards 80,000 EXP split between all participating T-Dolls.
- Advanced EXP training rewards 240,000 EXP split between all participating T-Dolls.
Corridor of Cloud Atlas
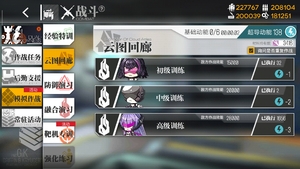
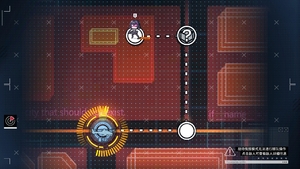
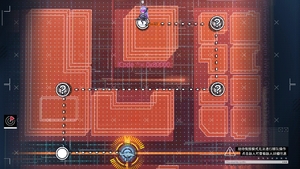
Neural Cloud Corridor is available everyday This simulation battle provides the Commander with ![]() Memory Fragments which can be used to perform Digimind Upgrade for eligible T-Dolls. Similar to Capsule Mode, the Commander sends an echelon to clear one enemy echelon down a fixed path riddled with mystery nodes, which may award the Commander with either extra
Memory Fragments which can be used to perform Digimind Upgrade for eligible T-Dolls. Similar to Capsule Mode, the Commander sends an echelon to clear one enemy echelon down a fixed path riddled with mystery nodes, which may award the Commander with either extra ![]() Memory Fragments or random resources.
Memory Fragments or random resources.
- Basic Training provides guaranteed
 x8.
x8.
- Intermediate Training provides guaranteed
 x20.
x20.
- Advanced Training provides guaranteed
 x30.
x30.
See also: T-Dolls with Digimind Upgrade
Defense Drill
Defense Drill is a survival mode, it has a fixed cost of 5 energy and you can assign up to 4 echelons. The objective is to survive for up to 109 waves, each wave will give you a certain amount of ![]() Calibration Tickets, and every 10 waves there will be a boss which rewards you a package with resources, gems, and
Calibration Tickets, and every 10 waves there will be a boss which rewards you a package with resources, gems, and ![]() . The rewards increase with each passing wave.
. The rewards increase with each passing wave.
Keep in mind that progress is saved and you cannot back out of the Defense Drill (or you lose), this means that packages are a one time reward. If you lose, the next time you will start at the wave after the last boss you have beaten. Losing with one echelon means all echelons go home, be careful.
The enemy composition changes between 5 and 10 waves and gets increasingly stronger each wave. At the later stages of the Drill, you will most likely need specialized compositions to get through. There will be night battles.
Once you've completed all waves, you will start at wave 101, this means that you will only be able to farm ![]() after fully completing the Drill.
after fully completing the Drill.
See also: Equipment/Fairy Calibration
Sangvis Cultivation
With the arrival of Protocol Assimilation, Sangvis Cultivation simulation battle is added to provide Coalition units with items needed for their growth and upgrade.
What makes it different with other simulation is the Commander cannot use their own T-Dolls for this simulation. Instead, Commander will be provided with random selection of T-Dolls for each simulation mode that will be refreshed on a weekly basis. These T-Dolls are level 100, fully-linked, well-equipped (fully enhanced and calibrated), and came with max skill level. Enemy lineup is also refreshed on a weekly basis. Each mode will get a different enemy lineup, which consists of one of the three opposing forces; Sangvis Ferri, KCCO, and Paradeus.
This sim battle consists of three modes. It uses different type of sim energy, which recharge at the same rate as the standard sim energy. Each mode has their own bonus day. During bonus day, reward received will get multiplied by three. Sunday will grant bonus for all mode. Commander can also gain extra reward by clearing the sim under par time, 10-20%, which will yield 10-20% extra reward.
EXP Simulation
- This mode will get bonus on Monday and Thursday.
- Provides SF Combat Report which can be used to level up Coalition units @3000 exp each.
- Completing this mode will grant 10-12 pieces on normal day, and 30-36 pieces during bonus day.
Development Simulation
- This mode will get bonuses on Tuesday and Friday.
- Provides Development Petri Dish which is used to raise Coalition units' development level (rarity).
- Completing this mode will grant 6-8 pieces on normal day, and 18-22 pieces on bonus day.
Data Simulation
- Data Simulation will get bonuses on Wednesday and Saturday.
- Provides SF Skill Chips which is used to raise Coalition units' skill level.
- Completing this mode will grant 70-84 pieces on normal day, and 210-252 pieces on bonus day.
Target Practice
After showcased in July 2020 Summer Livestream, Training Drone Exercise mode was finally live with v2.0600. This simulation battle is a sandbox-like feature, where Commanders can commence tests for T-Doll composition and battle performance without going to actual battle in mission.
- Open Everyday
- DOESN'T CONSUME RESOURCES (Manpower / Fairy Commands / Repairs / Energy / Etc.)
- Form Echelons of up to 5 T-Dolls, 1 Fairy, and 4 HOCs
- ALL units come from a Commander's Personal Armory
- Limited Time "Special" Challenges
- Ranking is based on clear time; Faster Time equals better Score/Rank
Customized Training Drone (Tentative)
Target: Training Drone
Customizations:
Environment:
- Day
- Night
Stats (None / Low / Medium / High / Very High):
- Secondary Bar Selects Percentage: 30 50 70 100 %
Target Strength Slider:
- Strength Level 1-5
- Recommended Commander Level 20, 40, 60, 80, 100 respectively
Strength Level / HP (Per Dummy)
| Target Strength | HP (Per Dummy) |
|---|---|
| 1 | 5,000 |
| 2 | 10,000 |
| 3 | 20,000 |
| 4 | 40,000 |
| 5 | 100,000 |
Target HP:
- Normal
- Invincible (HP Unaffected by Damage)
Target Formation:
- Max (5 Dummy-Link)
- Single (1 Dummy-Link)
Exercises Target (Tentative)
Target: Enemy Echelon Formations (Enemy Index)
Customizations:
Environment:
- Day
- Night
Target HP:
- Normal
- Invincible (HP Unaffected by Damage)
Target Damage:
- Open
- Close (Enemy Attacks Deal No Damage)
Enemy Formations / Target Strength:
Formation #1:
(Target Strength 1-3)
Wandering Stragglers - Easily manageable with an echelon trained to a reasonable level.
(Target Strength 4-5)
Wandering Stragglers - Hoodwinking morons and weaklings takes both flexible strategies and nimble T-Dolls.
| Enemy Formation | Target Strength | Enemies |
|---|---|---|
| Wandering Stragglers | 1 | Dragoon x 4 / Scout x 2 / Ripper x 8 / Vespid x 6 |
| W/S | 2 | Dragoon x 6 / Scout x 3 / Ripper x 12 / Vespid x 9 |
| W/S | 3 | Scout x 3 / Ripper x 12 / Vespid x 9 / Striker x 6 |
| W/S | 4 | Beast x 4 / Archer x 4 |
| W/S | 5 | Beast x9 / Archer x 4 |
Formation #2:
(Target Strength 1-5)
Concentrated Wraiths - Wraiths are composites of all horrors and ought to be wiped out in one go. (Echelons with good AoE damage recommended.)
| Enemy Formation | Target Strength | Enemies |
|---|---|---|
| Concentrated Wraiths | 1 | Infected x 16 / Infected Soldier x 14 |
| C/W | 2 | Infected x 24 / Infected Soldier x 27 |
| C/W | 3 | Infected x 36 / Infected Soldier x 27 |
| C/W | 4 | Unknown x 72 |
| C/W | 5 | Unknown x 155 |
Formation #3:
(Target Strength 1-3)
Guns and Shields - Shields are rather bothersome, but without the pikes behind them, the become pointless. (Echelons that target the back row recommended.)
(Target Strength 4)
Armored Infantry - If you can't penetrate their armor, it's futile no matter how many people you throw at them. (Echelons who target the unit with the highest HP and have armor-piercing capability recommended. It will also be easier if your front row units are tanky.)
(Target Strength 5)
Aegis and Deer - (Same as Above)
| Enemy Formation | Target Strength | Enemies |
|---|---|---|
| Guns and Shields | 1 | Guard x 4 / Jaegar x 4 |
| G/S | 2 | Guard x 12 / Jaegar x 12 |
| G/S | 3 | Guard x 12 / Jaegar x 18 |
| Armored Infantry | 4 | Aegis x 12 / Nemeum x 24 |
| Aegis and Deer | 5 | Aegis (KCCO) x 20 / Cerynitis x 35 |
Formation #4:
(Target Strength 1-5)
Twisted Faith - If you can't defeat enemies with strong faith, then destroy their faith first - starting with the force field. (Echelons capable of tearing down a single high-health target and effective against enemies with force fields recommended.)
| Enemy Formation | Target Strength | Enemies |
|---|---|---|
| Twisted Faith | 1 | Rodelero x 1 / Stretlet x 12 |
| T/F | 2 | Stretlet x 27 / Rodelero x 1 |
| T/F | 3 | Stretlet x 27 / Rodelero x 2 |
| T/F | 4 | Stretlet x 24 / Doppelsoldner x 1 |
| T/F | 5 | Stretlet x 30 / Doppelsoldner x 2 |
Formation #5:
(Target Strength 1-5)
Mobile Explosives - The best way to stop nightmares is to wake up at once ... or just strangle it before it happens. (Echelons with high burst damage right off the bat recommended.)
| Enemy Formation | Target Strength | Enemies |
|---|---|---|
| Mobile Explosives | 1 | Goliath x 2 |
| M/E | 2 | Goliath x 2 |
| M/E | 3 | Goliath x 2 |
| M/E | 4 | Dactyl x 2 / Cerynitis x 16 |
| M/E | 5 | Dactyl x 5 / Cerynitis x 20 |
Formation #6:
(Target Strength 1-5)
Sturdy Iron Wall - If going strait at them proves difficult, try punching through that annoying armor! (Echelons capable of tearing down high-health targets and effective against enemies with force fields recommended. It might also be easier if your front row units are tanky.)
| Enemy Formation | Target Strength | Enemies |
|---|---|---|
| Sturdy Iron Wall | 1 | Roarer x 1 / Strelet+ x 6 |
| S/I/W | 2 | Roarer x 1 / Strelet+ x 15 |
| S/I/W | 3 | Strelet+ x 15 / Roarer x 2 |
| S/I/W | 4 | Tesla Trooper x 1 / Cyclops x 24 |
| S/I/W | 5 | Cyclops x 50 / Tesla Trooper x 2 |
Formation #7:
(Target Strength 1-3)
Storm of Destruction - It is unwise to engage multiple Manticores - unless you're very experienced or know their weaknesses.
(Target Strength 4-5)
Storm of Destruction - It is unwise to engage multiple Hydras - unless you're very experienced or know their weaknesses.
| Enemy Formation | Target Strength | Enemies |
|---|---|---|
| Storm of Destruction | 1 | Manticore x 2 |
| S/D | 2 | Manticore x 6 |
| S/D | 3 | Manticore x 12 |
| S/D | 4 | Hydra x 8 |
| S/D | 5 | Hydra x 20 |
Formation #8:
(Target Strength 1-5)
Keen-Eyed Hunter - The abandoned Patrolers want to prove their worth by killing you. If you're still a rookie, avoid them.
| Enemy Formation | Target Strength | Enemies |
|---|---|---|
| Keen-Eyed Hunter | 1 | Thunder (Enemy) x 1 |
| K-E/H | 2 | Thunder (Enemy) x 1 |
| K-E/H | 3 | Thunder (Enemy) x 1 |
| K-E/H | 4 | Thunder (Enemy) x 1 |
| K-E/H | 5 | Thunder (Enemy) x 2 |
Challenge Exercises (Tentative)
Target: Boss/Elite Formations (Special)
Customization:
- None
Formations
Cerberus:
- Day Battle
- Target CE - 126250
- Garm x 1 / Dinergate x 40 / Tarantula x 40
Yegor:
- Day Battle
- Target CE - 143733
- Beast x 10 / Archeron x 1 / Pathfinder x 20 / Ares x 1 / Cyclops (SG) x 15
Failed Isomer:
- Day Battle
- Target CE - 154709
- Isomer White x 1 / Isomer (Enemy) x 26
M16A1!:
- Day Battle
- Target CE - 169976
- M16A1 (Boss) x 1 / Ripper x 10 / Guard (SWAP) x 10 / Jaegar (SWAP) x 10
Intercepting Squadron:
- Day Battle
- Target CE - 175920
- Typhon x 3 / Hydra x 15 / Aegis (KCCO) x 30 / Cerynitis x 30 / cyclops? x 15 / cyclops? x 15


